Sweet Potato Brownies – sugar, dairy and gluten free


Brownies are a staple treat for me, my husband and our friends and it’s usually the dessert of choice whenever we go to our friend’s house for dinner. My usual brownie recipe (see all the various recipes here) is a firm favourite and is also dairy and gluten free but I needed a sugar-free version for this weekend. My very special friend Colette from The Pure Form Fitness Kitchen is in training for an upcoming competition and I just couldn’t bring dessert that she couldn’t eat!

So thinking cap on…. I knew I could use sweet potato to add some natural sweetness but I searched and searched online and couldn’t find a recipe that didn’t have any added sugar of any type (aside from fruit/veg sugar). Every recipe had maple syrup, agave, coconut syrup or rice malt syrup in it. So I decided to have a go at creating one myself, based on all the recipes I found (and there are a lot of sweet potato brownie recipes out there!).

IMG_6622

I have to be honest – this was a complete experiment, but I’m pretty happy with the results. It’s tasty, it’s got a natural sweetness and it’s actually really good (even better the day after they’re made).  I’ve gone for the smallest amount of dates, apple and sweet potato possible to limit the amount of fruit sugars whilst still keeping the flavour.

You will need:

2 Sweet potatoes (approx 500 g in total – unpeeled weight)

50g Apple Purée (make your own – recipe here)

60g Buckwheat flour

80g ground Almonds

75g Cocoa powder

6 Medjool Dates

IMG_6621

Preheat the oven to 180 C

Peel and dice the sweet potato and then pop in a covered bowl in the microwave. Microwave until soft (a couple of blasts of 2 – 3 minutes). Using a fork mash up the sweet potato and then pop into a blender or processor. Chop the dates and add them to the sweet potato (it’s easier if you do this while the potato is still warm). Blitz it until the dates are well combined with the sweet potato. I actually like a bit of substance to the dates so I’m not fussed if it’s not smooth but it’s up to you.

Mix together the flour, almonds and cocoa and then stir the sweet potato mixture in (it will be quite stiff). Add the apple and mix well. You want a sticky, quite thick mixture – thicker than a normal brownie batter. If the flour won’t all combine (as it will depend a little on the moisture content of the dates and apple) then add a drizzle of warm water, but not too much.

Pour into a lined tin and place in the oven for 30 -35 minutes. The top will be crusty and if you stick a skewer in it will come out clean. Remove from the oven and allow to cool in the tin (if you can wait :)). Then slice and serve!

IMG_6625


A host of Easter Treats


With Easter upon us I thought I’d share a few of my favourite, slightly healthier but equally yummy Easter recipes.

So if chocolate is your thing then why not try some quick, raw chocolates like these chocolate coconut treats, or the raw chocolate filled eggs and fruit eggs, or if you fancy something with a little more kick – why not try the chilli chocs.

2014-04-18 19.27.21        2014-04-13 16.29.29

Or how about whipping up some quick, cute, marzipan bunnies!

2014-04-05 17.33.53

What about creating a quick batch of Easter spiced biscuits, or some fresh, light lemon and chia cookies to dunk in your afternoon tea on Easter Sunday.

If you’re feeling adventurous you could try my coffee and amaretto cupcakes (using any instant coffee you have to hand).

2014-04-05 17.37.59

And finally..it wouldn’t be Easter without some hot cross buns right? Try my better bun recipe for some hot cross fun! 🙂

Happy Easter! 🙂


Chocolate Orange and Almond Brownies – dairy and gluten free


I think I’m in heaven. I’ve managed to combine three of my most favourite things – Willie’s Cacao Luscious Orange chocolate, roasted Almonds and my dairy and gluten free brownie! And wow – this is good! I’ve even managed to win over my orange chocolate hating friend! Win! 🙂

IMG_0026.JPG

You will need:

1/4 cup Rice flour

1/2 cup Ground almonds

1 cup unrefined Raw sugar (golden caster sugar, coconut sugar etc)

1/2 cup almond oil (or coconut oil)

1/4 cup raw Cacoa powder

2 tbsp chia seeds soaked in 6 tbsp water

1/2 tsp Himalayan rock salt

1/4 tsp Bicarbonate of soda

1 tsp Orange extract

Handful of Almonds

1 – 2 bars Willie’s Luscious Orange chocolate (chopped)

For Icing

1 – 2 bars Willie’s Luscious Orange chocolate

50 – 100g Unrefined icing sugar (adjust quantity to depending how runny you want it)

Silver balls to decorate

IMG_0476.JPG

Preheat the oven to 170C and grease a 20 x 20cm square baking pan with parchment paper.

Toast the almonds in a dry frying pan until they just start to turn brown. To make them even crunchier I let them cool to room temperature then chopped them and toast again briefly. Pop to one side until later.

Mix the ground almonds, flour, cacao powder, sugar, salt and bicarbonate of soda together in a large mixing bowl. In a separate bowl soak the chia seeds in the water. Once the chia seeds have absorbed all the water add them to the mix along with the orange extract, and oil. Whisk together using a hand mixer until well mixed. It should be thick and glossy when mixed.

Stir in the chocolate and almonds. Pour in to the baking tin and place in the oven for 25 – 30 mins until a skewer inserted in the middle comes out clean.

Cool on a wire rack

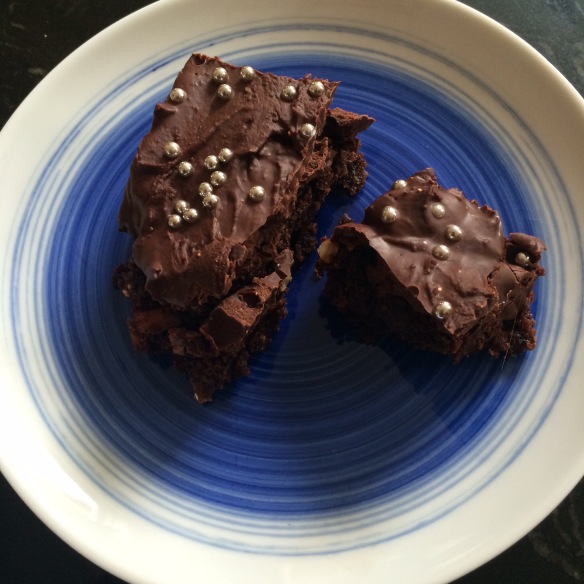
Then prepare the icing. Melt the chocolate and then stir in the icing sugar a little at a time until you get the consistency you want. Spread quickly on to the brownies and sprinkle the silver balls and any other decorations you want to use on to the top!

Enjoy!

IMG_0478-0.JPG

Peanut butter fruit and nut brownies – dairy and gluten free


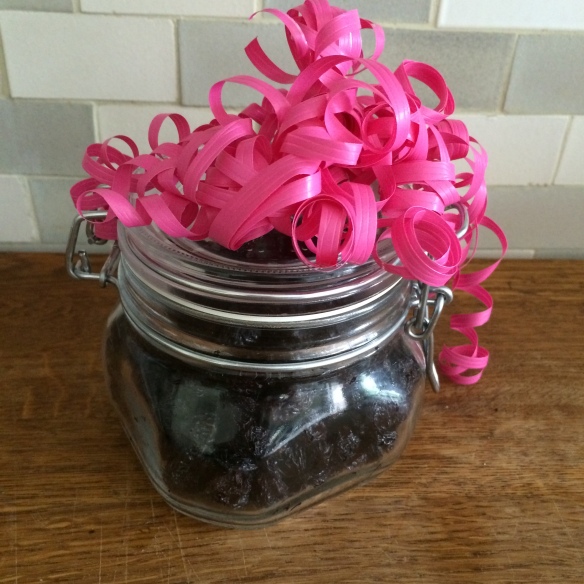
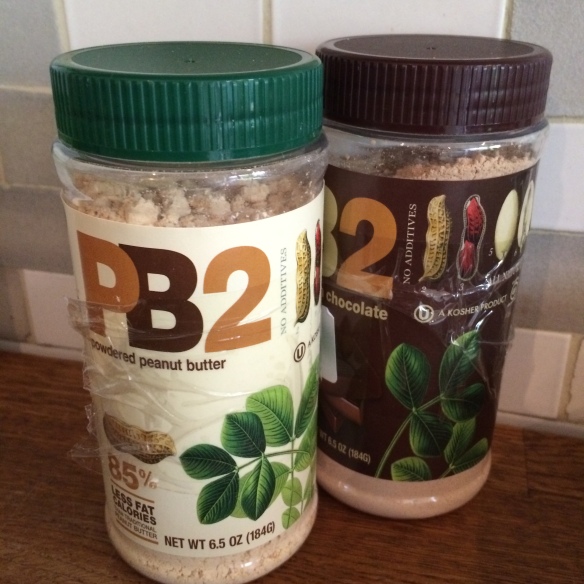
Two very exciting things happened recently…Firstly I was given this beautiful pot full of scrummy raisins from my friend Dee 🙂 and secondly I finally found some PB2 powdered peanut butter!

photo (1)

The raisins… well that’s a long (somewhat amusing) story which I won’t go in to here, but needless to say they were very gratefully received :). Now PB2….What on earth is that and why would I be so excited to find it? Well for a start it’s a powdered peanut butter which means it’s a great way to get peanut butter in to your baking (if you want to.. which I do!). As an added bonus it has 85% less calories from fat compared to traditional peanut butter, but it isn’t full of rubbish. It’s all natural, slow roasted peanuts which are then pressed to remove the fat and oil. It comes as natural and chocolate (yum!) and you can either just add water to make it in to a butter to use as you would normal peanut butter…. or you can use it as a powder in bakes and shakes!

2014-09-06 18.04.13

So these two wonderful things were just crying out to be combined into something yummy…. and here it is! Peanut butter fruit and nut brownies! A great way to have a healthy treat with a little bit of a protein boost too!

2014-09-07 12.47.56

You can change the fruit and add different nuts if you like but I wanted to really give that peanut punch so I stuck with peanuts! You can also use peanut butter if you don’t have PB2 but it will change the consistency so I suggest you go a little lighter on the oil.

You will need:

1/4 cup Rice flour

1/2 cup Ground almonds

1 cup unrefined Raw sugar (golden caster sugar, coconut sugar etc)

1/2 cup almond oil (or coconut oil)

1/4 cup raw Cacoa powder

4 heaped tbsp PB2 (if you don’t have this you can use normal peanut butter – 2 – 3 tbsp)

2 tbsp chia seeds soaked in 6 tbsp water

1/2 tsp Himalayan rock salt

1/4 tsp Bicarbonate of soda

1 tsp Vanilla extract

100g dried Raisins

50g dried Cherries

Handful of natural roasted Peanuts (halved or chopped)

For topping

2 – 3 tbsp PB2 original

1 – 2 tbsp PB2 chocolate

a little Water

Preheat the oven to 170C and grease a 20 x 20cm square baking pan with parchment paper.

Mix the ground almonds, flour, cacao powder,PB2, sugar, salt and bicarbonate of soda together in a large mixing bowl. In a separate bowl soak the chia seeds in the water. Once the chia seeds have absorbed all the water add them to the mix along with the vanilla extract, and oil. Whisk together using a hand mixer until well mixed. It should be thick and glossy when mixed. Have a taste – if you want a bit more peanutty flavour you can add a little more PB2 now but mix it in really well.

Stir in the peanuts, raisins and cherries (cut them in half if they are large). Pour in to the baking tin and place in the oven for 25 – 30 mins until a skewer inserted in the middle comes out clean.

Cool on a wire rack

Then prepare the topping. In separate bowls mix the original PB2 and chocolate PB2 with water. Add a little water at a time – you want a runny consistency but not too runny.  Drizzle the original one over the brownie, then the chocolate one. Pop in the fridge to set  – or just eat straight away!

2014-09-07 12.46.56

2014-09-07 12.45.17

Homemade healthy coconut “bounty” bars! Dairy and Gluten-free


I made these a while ago but totally forgot to put the recipe up! Bad Nancy!

These are delish – a great alternative to a traditional “Bounty” bar and FAR healthier! They’re made with raw chocolate so they’re full of antioxidants and the coconut centre is pure coconut, nothing else!

2014-04-15 17.33.27

You will need some sort of mould for this – it can be any shape and any size you like! I’ve gone for a rectangular one as I happened to have one in my cupboard but anything will do.

For the chocolate you will need:

1 cup Cacao butter (melted)

1 cup Raw Cocoa powder

1/3 Cup Maple syrup (or other liquid sweetener)

For the filling you will need:

A few tbsp desiccated Coconut (adjust quantity to taste)

Coconut butter – the amount will depend on the size of your chocs so start with a small amount and it’s easy to make more as needed. You need to make sure you use a whole coconut flesh butter, rather than coconut oil. I used the Artisana brand.

2014-04-12 17.07.29

Start with the chocolate. Mix the cacao butter, cocoa and maple syrup together and ensure there are no lumps. Pour a small amount in to the mould – remember you are filling this so don’t fill the mould – probably aim for a third of the mould. Save enough to cover the filling later. You will probably find that it settles at the bottom leaving the sides with only a very thing layer. This is ok – just pop it in the fridge for now. After about 5 mins check it and as it’s beginning to solidify just swirl the mould around so the chocolate coats the sides too. Place back in the fridge until set hard (15 mins should do it).

Now prepare the filling. Just melt the coconut butter gently in a warm pan, stirring all the time. Add as much desicated coconut as you want to get the desired texture and then pour in to the chilled moulds. Place back in the fridge immediately until this has set (at least 15 mins)

2014-04-12 17.01.50

Cover the top with more of your raw chocolate mix (you may need to re-warm it if it’s started to set). Pop straight back in the fridge until properly set – 30 mins or more.

These are best kept in the fridge until you want to eat them and then remove them and allow them to warm very slightly at room temperature for a few mins before serving. I made my chocolate layers just a little bit thick… but I quite like that! 🙂

Enjoy!

2014-04-13 12.44.28

Chocolate Cherry Brownies – gluten and dairy free


My hubby and I had a rare evening out last night with some very good friends to go and watch “Dirty Dancing” at the open air cinema. Tasked with providing dessert I decided I’d go for some good old chocolately goodness and whip up a new version of my brownies for us to munch on whilst watching the film… They’re almost as tasty as Patrick Swayze 😉

The sweet-sour of the cherries works so well to balance out the rich chocolate in these and they’re brilliant served with berries and some cashew cream (recipe here) for a decadent (but not too bad for you) dessert.

photo 4

You will need:

1/4 cup Rice flour

1/2 cup Ground almonds

1 cup unrefined Raw sugar (golden caster sugar, coconut sugar etc)

1/2 cup almond oil (or coconut oil)

1/4 cup raw Cacoa powder

2 tbsp chia seeds soaked in 6 tbsp water

1/2 tsp Himalayan rock salt

1/4 tsp Bicarbonate of soda

1 tsp Vanilla extract

100g dried Cherries

Dairy free chocolate (I use Willie’s cacao drops) – about a handful (approx 100g)

For Icing

100g Dairy free chocolate (again I use Willie’s cacao drops)

100 – 200g Unrefined icing sugar (adjust quantity to depending how runny you want your icing)

Freeze dried Cherries to decorate

Preheat the oven to 170C and grease a 20 x 20cm square baking pan with parchment paper.

Mix the ground almonds, flour, cacao powder, sugar, salt and bicarbonate of soda together in a large mixing bowl. In a separate bowl soak the chia seeds in the water. Once the chia seeds have absorbed all the water add them to the mix along with the vanilla extract, and oil. Whisk together using a hand mixer until well mixed. It should be thick and glossy when mixed.

Stir in the chocolate and cherries (cut them in half if they are large). Pour in to the baking tin and place in the oven for 25 – 30 mins until a skewer inserted in the middle comes out clean.

Cool on a wire rack

Then prepare the icing. Melt the chocolate and then stir in the icing sugar a little at a time until you get the consistency you want. Spread quickly on to the brownies and sprinkle the freeze dried cherries and any other decorations you want to use on to the top!

photo 1

Then enjoy (preferably with a side helping of Patrick Swayze 😉 )

photo 3

Guilt-free Chocolate cake (with beetroot!)


You can’t beat a good chocolate cake and this is definitely a good chocolate cake! It’s totally vegan and totally yummy! This was inspired by a delicious cake my friend Vicky made so I thought I’d have a go at veganising and gluten-freeing it! 🙂

2014-06-07 21.18.06-1

You will need:

250g cooked Beetroot

250g unrefined Raw sugar (coconut palm sugar etc)

190g self-raising gluten free Flour

60g raw Cacao powder

1 tsp Bicarbonate of soda

3 tbsp Chia seeds soaked in 9 tbsp water

180 ml Almond oil (or other non flavoured oil)

1 tsp Vanilla extract

1 tsp Chocolate extract (or extra Vanilla if you don’t have this)

2014-06-07 21.18.34

Preheat the oven to 170 C. Lightly grease a 23 cm diameter cake tine.

In a large mixing bowl, sift together the flour, cacoa and bicarbonate of soda. Then stir in the sugar.  Pop the cooked beetroot in to a food processor and blend until smooth. Place this in to a sieve over another bowl and push out any juices with the back of a spoon. You don’t need the juice for this recipe but don’t bin it – you can throw it in to a smoothie 🙂

Put the beetroot pulp back in to the processor and then turn on the motor and add the soaked chia seeds, vanilla and chocolate extract (if using) and then slowly pour in the oil.

Mix until well blended. Make a well in the centre of the flour mix and add the beetroot mixture. Gently fold together with a large spoon. Pour the mixture in to the cake tin and place in the oven for 35 -40 mins (or until a skewer comes out clean). Remove from oven and allow to cool for 5 – 10 mins in the tin, then remove and place on a wire rack to cool.

Then enjoy with a cup of tea (and maybe a cat)! 🙂

2014-06-07 21.22.39

Fruity Raw Chocs


As you’ll know from my recent raw choc recipes (see here and here) I’ve been having loads of fun playing around with my raw choc and raw white choc recipes, and my collection of freeze-dried fruit powders. The results were awesome!

The fruit powders work brilliantly with both the dark and white raw choc and they add an amazing tartness and freshness to the chocs. They also make the white chocs look very pretty 🙂 (I get my fruit powders online from here)

2014-05-11 09.26.12

You can make solid chocs of one flavour or you can use the flavoured white chocolate to add colour and patterns to dark chocs. They come out looking amazing! If you are very clever (and more patient than I am 😉 ) you can add different colours to different parts of your mould to highlight certain details 🙂 The world is your chocolate box! Warning though – if you’re anything like me your entire kitchen will be covered in raw choc when you’re done! Is it wrong that I considered licking it up to clean it….. (don’t judge me 😉 )

2014-05-11 09.29.44

2014-05-11 09.35.362014-05-10 20.01.45

Now I couldn’t decide which of my freeze-dried fruit powders to use so I used them all (separately!). I think my favourite were raspberry, passion fruit and cranberry – I love the tartness of them 🙂

2014-06-11 16.25.33

So all you need for the dark chocs is:

1 cup Cacao butter (melted)

1 cup Raw Cocoa powder

1/3 Cup Maple syrup (or other liquid sweetener)

Freeze-dried fruit powder of your choice – approx 1 tsp – adjust to taste

2014-05-11 09.31.54

For the white choc you need:

1/4 cup melted Cacao butter

1 tbsp Cashew butter

1 tsp dry dairy-free milk powder – rice, coconut or soya milk powder (This is optional but it makes the chocolate creamier so is worth it if you can find it)

1 tbsp unrefined raw Icing sugar (adjust to taste)

1/4 tsp Vanilla extract

Freeze-dried fruit powder of your choice – approx 1 tsp – adjust to taste

The method is the same for both – melt the cacao butter and then stir in all the other ingredients. Mix well.

2014-05-10 20.01.34

Now for the fun! and mess…. You can do whatever you like! I made a load of small quantities of chocolate of various flavours. Then I filled some moulds full of that flavour which worked well.   Then I had some fun….. either carefully dribbling one flavour in to the mould or liberally splashing it around to create a beautiful marble effect. Splash one flavour at a time, then pop in the fridge to set before doing the next.

2014-05-10 20.01.51

Place in the fridge between each one until you’re finished. Allow to set properly in the fridge and store in there until you want to eat them!

2014-05-11 09.29.50

2014-05-11 09.31.23


Dairy Free Raw White Chocolate!


I’ve been meaning to post this recipe for a while now. White chocolate is one thing that’s pretty hard to come by if you’re trying to avoid dairy so I wanted to come up with an easy to make alternative and I think I’ve found it!

2014-05-05 17.05.21

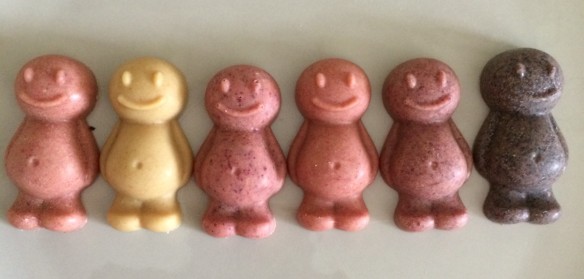
I made some plain white choc ones, some mixed with dark raw choc and for some I added some freeze-dried raspberry powder to give a yummy raspberry choc!

If you have some interesting chocolate or ice moulds you can have some fun with a mix of white and dark raw chocolate (see recipe for raw chocolate here)

2014-05-05 17.02.56

You will need:

1/4 cup melted Cacao butter

1 tbsp Cashew butter

1 tsp dry dairy-free milk powder – rice, coconut or soya milk powder (This is optional but it makes the chocolate creamier so is worth it if you can find it)

1 tbsp unrefined raw Icing sugar (adjust to taste)

1/4 tsp Vanilla extract

Optional – (Freeze-dried raspberry powder – approx 1 tsp – adjust to taste)

Melt the Cacao butter and then stir in all the other ingredients. Mix well and then pour in to moulds. Pop in the fridge until set. Enjoy!

2014-05-05 16.59.52


2014-05-05 17.06.20


Chocolate Coconut Treats


This is a super simple Easter recipe for some yummy little melt in the mouth coconut chocolate bites. In fact it’s not really a recipe at all it’s so simple! 🙂

2014-04-18 19.27.21

All you need is some of this wonderful stuff – Artisana Cacao Bliss. It’s just chocolate coconut butter, made from coconut flesh (not the coconut oil).

2014-04-12 17.07.38

If you can’t find this then you can use the normal Artisana Coconut Butter and just add raw cocoa powder to it (to taste).

2014-04-12 17.07.29


All you need to do is melt the coconut butter in a pan on a very low heat. I like this just the way it is but if it isn’t sweet enough for you then you can add some maple syrup to taste. Once it’s melted all you need to do is pour in to moulds – egg shaped or otherwise! Pop in the fridge for 20 mins to set. If you’re doing eggs remove from the fridge and mould. Warm the back of the eggs using a hair dryer or a warmed spoon just to melt it slightly, then press 2 halves together. Place back in the fridge for a few mins.

Enjoy!