Chunky Chilli Chocolate Cherry mini fingers and loaves


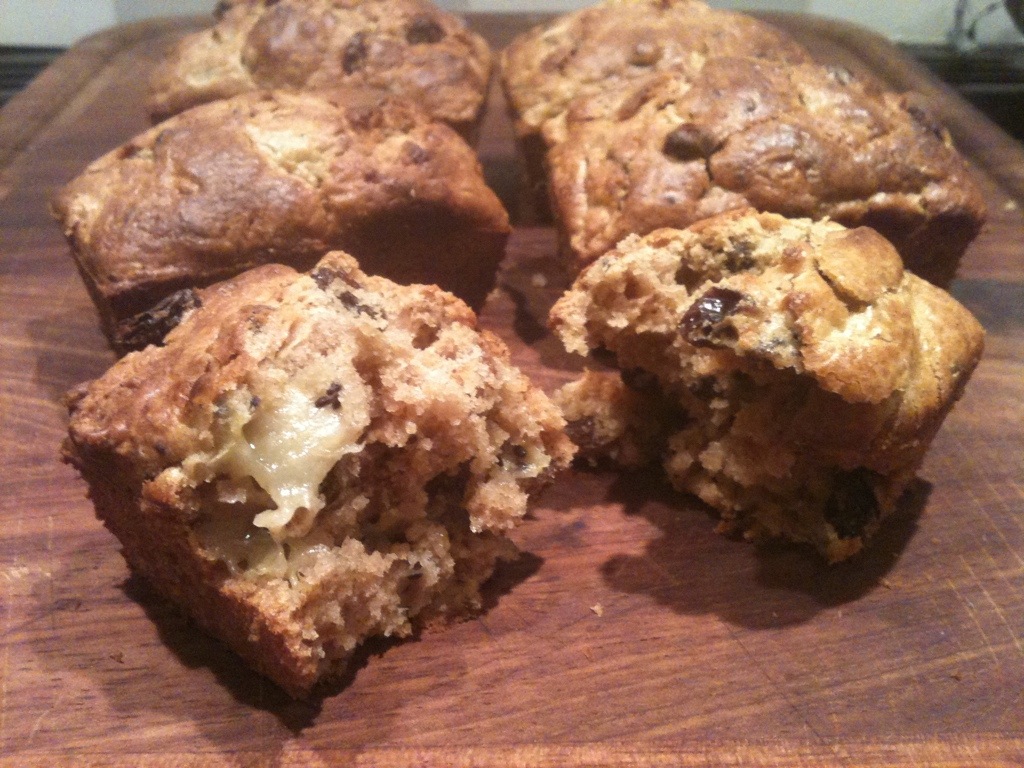
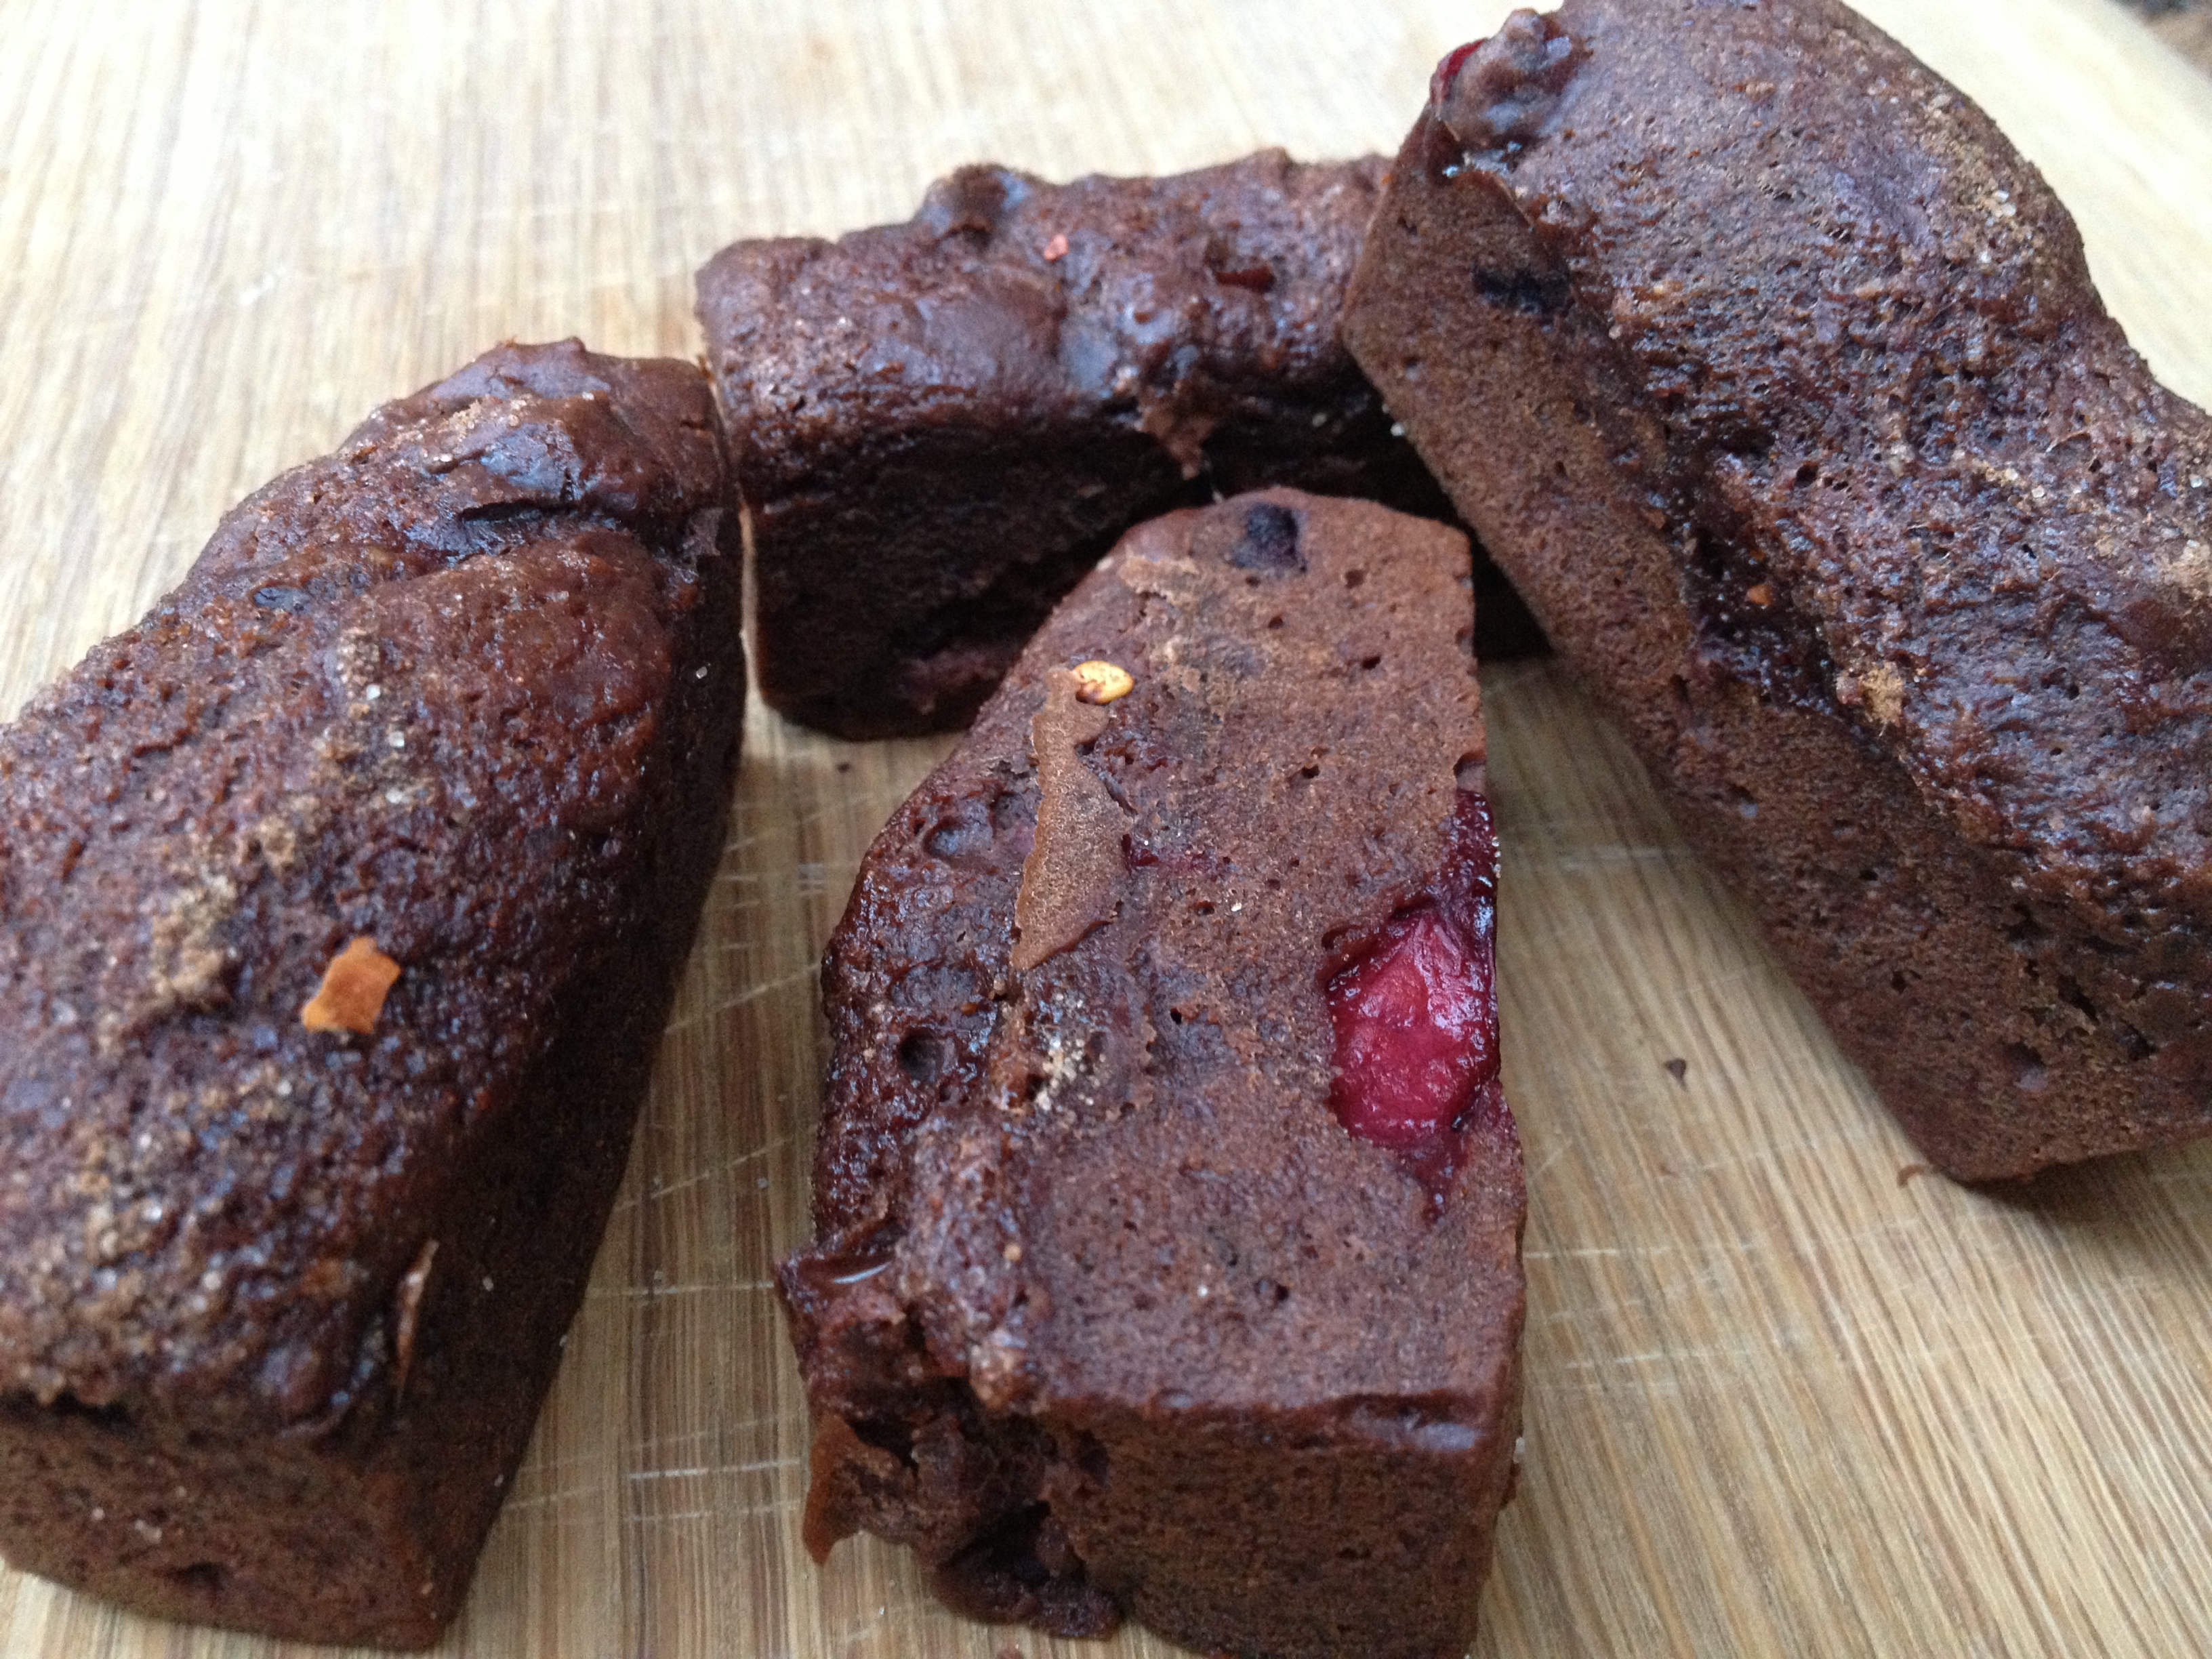
I thought I’d mix things up a bit with a modified version of my yummy chunky cherry loaves. These have a delicious hit of chilli and a sneaky bit of cinnamon too. I happened to get a new mini mini loaf tin so made some chunky chilli chocolate cherry fingers as well as loaves!

1582

I used some chilli and chocolate infused sugar for this recipe. You can buy this ready mixed or you could easily make it yourself  – it’s simply a mix of sugar, cocoa powder, chilli powder and cinnamon. Mix 100g sugar with 10g of cocoa powder, 2 tsp cinnamon and 1 tsp chilli powder (or more if you want it hotter!). Adjust the amounts depending how much you need but keep them in those ratios 🙂

For the loaves/fingers you will need:

1/2 cup Apple puree

1/4 cup Almond butter

1/3 cup Cocoa powder

1/3 cup Almond milk/soya milk/any non-dairy milk

1/3 cup + 2 tbsp boiling water

3/4 cup Chilli and chocolate infused sugar (plus extra to sprinkle on the top)

1 tsp Vanilla extract

1 tsp Chocolate extract (if you don’t have this then use another tsp vanilla extract)

1/8 tsp Almond extract

1 1/2 cups Gluten-free flour mix (or spelt flour if you’re not worried about gluten-free)

3/4 tsp Bicarbonate soda

3/4 tsp Himalayan rock salt

1 tsp chilli flakes (adjust to taste)

4 oz Chocolate chopped into chunks (I used Willie’s chocolate for this)

1 cup chopped Sweet cherries

1570

Preheat oven to 175 C and boil the kettle (no, not for tea – though that wouldn’t hurt!).

Put the apple, almond butter, milk and cocoa powder in a mixing bowl. Add 1/3 cup boiling water and mix quickly with a fork to make a thick chocolate sauce. Add the sugar and extracts and mix well. Sieve half the flour, bicarbonate soda and salt into the mix and mix gently. Add 1 tbsp boiling water and mix again. Add the rest of the flour mixture and another tbsp boiling water and stir until smooth. Go gently – don’t over mix. Add the chilli flakes and adjust to taste – if you want it with a bit more of a hit add more! Finally add the chocolate chunks and cherries and fold in to the mixture.

Pour into the tins  (this recipe will give approx 8 – 9 tins) or if you have a mini mini loaf/finger tin then use that. Put in the oven for 10 – 25 mins (if making fingers you will need to start checking them after 10 mins as they’re so much smaller).

Check they’re done by sticking a skewer in the centre, if it comes out clean they’re done (bear in mind you may hit a cherry or chocolate when you do this so you’re looking for a lack of cake dough on the skewer – chocolate or cherry juice is fine!). Allow to cool in the tins for 10 mins then take out of the tins and cool on a wire rack. They really need to be eaten warm so the chocolate is all melty! :) Yum Yum Yum! :) 1567

Bananarama! Banana bread recipes :)


A glut of over-ripe bananas led to a bit of banana bread making so I thought I would re-post these two recipes. I’ve had a bit of fun with banana bread recently and a very good friend and I have done a blind banana bread tasting – 4 banana breads (hers and mine) so I’ll be posting the results of that soon! In the meantime though here are my two recipes 🙂

The first recipe is a dairy free, low gluten (spelt) banana bread and the second one is a modification of my  friend Colette’s mum’s recipe (modified to replace butter with oil and a few other little additions of my own) which does contain eggs (but these could be substituted out for apple puree).  Either of these recipes could have nuts added to them – walnuts would work particularly well, and if you’re feeling naughty you could throw in some dark chocolate chunks too!

Dairy free Banana Bread:

2 cups wholemeal spelt flour
1 cup coconut palm (or any unrefined) sugar
1/4 cup and 2 tbsps almond oil or olive oil
3 ripe bananas, mashed
1/4 cup soya milk mixed with 1 tsp apple cider vinegar
1/2 tsp baking soda
1 tsp vanilla extract
1 tsp cinnamon
1/4 tsp allspice
1/2 tsp himalayan rock salt

Preheat oven to 350 F / 175 C. Line and grease a small loaf tin (approximately 8 inches x 4 inches).

Mix the flour, baking soda, cinnamon, allspice and salt together in a large bowl. In a separate bowl mix the oil and sugar together until well combined. Add the mashed bananas and the soya milk (to which vinegar has been added) and the vanilla extract. Add this mix to the flour mixture and stir well. Pour into the loaf tin and place in the oven for an hour, or until a skewer inserted in the middle comes out clean. Once cooked remove from the oven and allow to cool in the tin for 5 mins then transfer to a wire rack to cool.

Colette’s mum’s modified banana bread:

2 cups white spelt flour
1 cup coconut palm (or any unrefined) sugar
1/4 cup and 2 tbsps almond oil or olive oil
4 ripe bananas, mashed
2 large eggs
1 tsp baking soda                                                                                                                      1 tsp bicarbonate of soda
1/2 tsp vanilla extract
1/2 tsp cinnamon
1/4 tsp allspice
1 tsp himalayan rock salt

Preheat oven to 350 F / 175 C. Line and grease a small loaf tin (approximately 8 inches x 4 inches).

In a large bowl mix the oil and sugar together until well combined, then add the mashed bananas and vanila extract. In a separate bowl mix the flour, baking soda, cinnamon, allspice and salt together.  Add half of this mix to the wet ingredients and mix well. Then add one egg and mix until combined. Add the rest of the flour mixture, stir well and add the final egg. Mix until well combined. Mix the bicarbonate of soda in 1/4 cup of hot water and stir in to the mixture. Pour into the loaf tin, sprinkle some unrefined coconut sugar over the top and place in the oven for an hour, or until a skewer inserted in the middle comes out clean. Once cooked remove from the oven and allow to cool in the tin for 5 mins then transfer to a wire rack to cool.


Brownie Love Bites


I was asked recently if I had a recipe for vegan brownies… well I do… and so I thought I’d re-post it to make it a little easier to find! 🙂 These were originally made for Valentine’s day, hence the heart shapes, but I kinda like them like this anyway! 🙂

Enjoy!

Brownie love bites


165g Silken tofu

100g white spelt flour

65g Whole-wheat spelt flour

70g Cocoa powder

6 tbsp Water

8 tbsp Agave syrup  AND 2 tbsp Date syrup

200g unrefined raw sugar/ coconut palm sugar

A handful of chopped pecans and dried cherries

2 tsp Vanilla extract

1/2 tbsp Ground brown linseed

1.5 tbsp Hot water

1/4 tsp Baking powder

1/4 tsp Salt

Mix the ground linseeds with the 1 1/2 tablespoons of hot water and set aside to thicken.  Preheat the oven to 180 C  and then line an 8-inch x 8-inch x 2-inch baking tin with greaseproof paper and lightly oil.

Blend the tofu, water, agave syrup, date syrup, cocoa powder, linseed mixture, and vanilla extract until completely smooth. Place the remaining ingredients, except the pecans and cherries, in a mixing bowl and stir until they are well combined. Then pour the wet mixture into the dry ingredients, and stir well. Finally, gently fold in the pecans and cherries.  Pour the mix into the tin and place in the oven for 30 mins, or until a skewer inserted in the centre comes out clean. Leave to cool in the tin for 5 mins, then cool on a wire rack. Whilst still warm use a small heart cutter (2 – 3 cm) to cut out heart shaped brownie bites. You should get 12 – 15 out of one tray of brownie (and you get to eat all the little off cuts!) :)

Cranberry and Apple Meringue pie! oh my!


Hands up if you love Lemon Meringue Pie! I do! And yes I know, meringue contains eggs, so I’m very sorry to my vegan friends (although you can use a commercial egg replacer for meringue so all is not lost!), but this festive meringue pie is gluten and dairy free 🙂 It’s a nice change to the usual festive fair!

_MG_6748

Pastry

100g Ground almonds
100g Flaked almonds
75g Spelt or Rice flour(or other gluten free flour)
25g Golden raw Caster sugar
50ml Almond oil
3 -4 tbsp cold almond or other non dairy milk
Pinch of Himalayan rock salt

Filling

4-5 Bramley apples, peeled, cored and thickly sliced
250g frozen or fresh Cranberries
juice of 1 clementine
75g Dried cranberries
1 tablespoon Corn flour
Raw unrefined sugar (if required)

Meringue

3 Large egg whites (or egg replacer)
150g Golden raw Caster sugar

Preheat the oven to 180 C. Put the ground and almonds into a bowl with the flour and salt and stir to combine. Keep stirring and add in the olive oil gradually. Add 2 tablespoons of almond milk and keep stirring. The mixture should hold together when pressed, if it doesn’t then add some more almond milk, stirring all the time, until it does. At this point have a taste. If you want a sweeter pastry then add some more sugar until you get the desired flavour. Press it into a 20 cm pie or fluted flan dish. Bake in the oven for 15 minutes or until set and barely golden.
Remove from the oven and brush the almond pastry with a little almond oil and return to the oven for a few minutes to set then set aside to cool.

Now for the filling! First you need to cook the cranberries. Place the frozen or fresh cranberries in a pan with the juice of 1 clementine (or half an orange if that’s easier!). Cook for 5 mins until the cranberries start to soften and burst. Taste – if too tart for you then add a little raw sugar. Put the apples, cooked cranberries and dried cranberries in a saucepan with 75ml water and bring to the boil. Simmer, partially covered, for 10 minutes.

Mix the corn flour with a tbsp of cold water till smooth then stir into fruit mixture. Boil for 1 minute then pour into the pastry case.

If using them then whisk the egg whites until stiff, then beat in the sugar, a third at a time, to form a thick meringue. Spoon over the fruit and bake 20-25 minutes until golden.
Leave to cool for a few minutes then transfer to a plate to cool.

_MG_6755

Mini Christmas cake – gluten free, dairy free cake, marzipan and fondant icing!


A little while ago I posted a recipe for a gluten and dairy free christmas cake. I said I’d have a go at creating some marzipan and icing to go with it and I’ve managed it! Now, I know my icing skills are pretty poor so just over look that! I’m certain you guys can do a better job at laying the icing but this is my first attempt and I was going more for taste than looks….! 🙂

_MG_7471

I’ve used a rollable fondant icing and a royal icing for the decoration. Read the instructions for the fondant icing before you start as once the sugar is boiling you can’t really leave it to check the instructions! 🙂

The recipe for the cake is here.

For the marzipan (this will cover 4 small cakes – approx 3 inches cubed) – :

200g Ground Almonds
100g Raw icing Sugar
1 tbsp  Lemon Juice
2 tbsp Maple Syrup
1 tbsp Cold Water
1 tsp Almond extract

Put the ground almonds and icing sugar in a bowl and mix well. Make a well in the centre and add the liquid ingredients. Mix thoroughly. You should end up with a pastry-like dough. If it is too dry add a drop of lemon juice but be careful you don’t make it too moist. Wrap in clingfilm and put in the fridge for at least an hour.

For the fondant icing.

5 tbps water
1 tsp agar-agar powder or “gelatine” substitute (kosher gelatine is often non-animal based so can be used)
225g Raw icing sugar
1 tbsp glucose syrup
1 tsp glycerine (optional)

Put the agar-agar powder or gelatine substitute in a small bowl and add 1 tbsp of water and leave to soak. In a heavy-based saucepan, put the icing sugar, 4 tbsp water and the glucose syrup. Heat over a medium heat until sugar has dissolved, stirring gently all the time.

When the sugar mixture comes to the boil, boil for 2 to 3 minutes, or until the syrup has reached soft-ball stage. Now if you’re like me you don’t know what that means! It’s actually quite straight forward – it’s the point at which if you take a spoonful of the mixture and drop it in a bowl of very cold water that you can form a ball with the syrup using your fingers (once it’s in the water!). At this stage it will easily form a ball in the water and will flatten when you remove it. For me it was almost eactly 3 minutes of boiling so you could just go by that. If you happen to have a sugar thermometer it’s when it reaches 112 degrees C.

While the sugar is boiling warm the bowl that the the soaked agar-agar or “gelatine” is in (over a saucepan of simmering water is easiest) until it dissolves.

When the sugar has finished cooking, remove from heat and dip the saucepan’s base in cold water to stop it from cooking. Leave to cool for a few seconds and then add the agar-agar/”gelatine” and glycerine and mix well.

IF you have a marble slab or suitable work surface then grease it and pour the mixture out onto the marble slab, and begin turning and mixing with a palette knife until it becomes a paste and clay-like. If, like me, you don’t then you can leave the mixture in the saucepan and just keep turning and stirring it in the pan using a wooden spoon (you need to mix vigorously!).

At first, the fondant will be very fluid, but it will gradually harden. After 5 – 10 minutes of  mixing, the fondant will become very stiff, crumbly and hard to manipulate. At this point, lightly grease your hands, and knead the fondant into a ball. The fondant will begin to come together and become softer and smoother. Stop kneading when it is smooth.

Wrap in clingfilm and place in the fridge for at least an hour.

For the royal icing:

125g icing sugar
2 tsp soya milk (or other non-dairy milk)
1 tsp glucose syrup mixed with 1/2 tsp boiling water

Mix the icing sugar with the milk and stir until smooth. Add the glucose syrup and mix well. If it’s too runny add more icing sugar, if too dry add a little more milk.

Now to put it all together!

Roll out the marzipan on a greased board. Lay it over your cake. Roll out the fondant icing and lay that over the marzipan making sure you press it down firmly. Finally decorate using the royal icing. You can use a fork to create a “snow-like” appearance. Add silver balls, edible glitter or whatever you like to finish it off. Then place in the fridge to set! Enjoy! 🙂

_MG_7450


Baking-tastic! :)


This is how I will be spending most of tonight…


IMG_9869

To create these! 🙂

IMG_9864 IMG_9874 IMG_9876

IT’s CHRISTTTTTMAAAAASSSS! :) A rich tasting christmas cake that’s gluten and fat free!


Well I had a special request to see if I could come up with a gluten free christmas cake. The big challenge was not only making it gluten free but also dairy free without turning to processed soya margarine… so I had little play around this week and I think I’ve got a winner here.  At first I wasn’t too sure about it, I was worried it was more of a bread pudding or tea loaf than a christmas cake. It’s now been tested by a good friend and christmas cake connoisseur and she gave it the thumbs up so I think it’s ready to be posted here!

IMG_9854

Gluten free flour blend:
65g Gram flour and 105g Rice flour
3/4 tsp Xantham gum
1 tsp Baking powder

or 170g White spelt flour for a low gluten option

For the rest of the cake:

85g Raw coconut sugar (or dark muscovado)
85g Currants
85g Sultanas
70g Raisins
25g Dried cherries– chopped
25g Dried cranberries
140ml Soya milk (or oat milk, rice milk, or coconut milk)
85g Ground linseed (just pop whole linseeds in a coffee grinder and whizz until powdery)
enough water to cover well.
Grated rind of 1/2 – 1 lemon
1/2 tsp Bicarbonate soda
1/2 tsp Cinnamon
1/8 tsp Nutmeg
1/8 tsp Ground cloves
1/2 tsp Mixed spice
pinch Himalayan rock salt
45ml Brandy (optional)

Sieve the gluten free flour blend (gram and rice flour, xantham gum and baking powder) (or spelt flour) together with the salt, cinnamon, nutmeg, cloves and mixed spice in to a large mixing bowl. Put the ground linseed into a small bowl and cover with water. Allow the linseed to soak up the water, then add a bit more, you want a gelatinous consistency. Stir it in to the flour mix. It will be quite hard to mix, add a little water if necessary, but not too much.

Stir in the sugar and dried fruit. Add the lemon rind and give it a good but gentle stir. Then add all but 2 tbsp of the soya milk and mix gently again. Gently warm the 2 tbsp of soya milk in a microwave or on the hob – don’t let it boil, just warm it (you should be able to put your finger in it without it burning!). Add the bicarbonate of soda to the warm milk and then add to the cake mixture amd stir gently until combined.

Pour the mixture into a lined 7 inch cake tin.  Smooth the top and make a small hollow in the centre. Bake at 180 C for one hour, then turn the oven down to 160 C and bake for a further 30 – 45 mins (or until a skewer insered in the middle comes out clean). Keep an eye on it while it’s baking.

Before you bake it you can add blanched almonds to the top. If you do this then make sure you check the cake regularly and when they start to brown cover the cake with foil for the rest of the baking time.

Once the cake is cooked remove from the oven and allow to cool for 5 minutes before removing from the cake tin. Allow to cool.

IMG_9843

If you are going to use the brandy then once the cake is cool prick it with a cocktail stick or a small skewer  and feed with a third of the brandy. Then wrap the cake in greaseproof paper and store in an airtight container. You can pour the rest of the brandy over the cake at weekly intervals. With the Brandy in it it will keep for up to a year (apparently!), without it will last 4 weeks if stored properly.

Obviously you can then add marzipan and royal icing to this. I am going to have a go at creating some dairy and gluten free marzipan and royal icing so watch this space!

IMG_9852

Chocolate banana bread! Omg!


So I have had some very ripe bananas hanging about in my kitchen for the past few days and decided I just had to do something with them… and it just had to be banana bread! But… I was in need of a chocolate fix….. and boy, is this a good chocolate fix!

I used my original non-dairy banana bread recipe with just a couple of additions:

2 cups wholemeal spelt flour
1/4 cup raw cacao powder
couple of handfuls of chopped non-dairy dark chocolate of your choice
1 cup coconut palm (or any unrefined) sugar
1/4 cup and 2 tbsps almond oil or olive oil
3 ripe bananas, mashed
1/4 cup soya milk mixed with 1 tsp apple cider vinegar
1/2 tsp baking soda
1 tsp vanilla extract
1 tsp cinnamon
1/4 tsp allspice
1/2 tsp himalayan rock salt

Preheat oven to 350 F / 175 C. Line and grease a small loaf tin (approximately 8 inches x 4 inches) or 6 mini loaf tins.

Mix the flour, baking soda, raw cacao, cinnamon, allspice and salt together in a large bowl. In a separate bowl mix the oil and sugar together until well combined. Add the mashed bananas and the soya milk (to which vinegar has been added) and the vanilla extract. Add this mix to the flour mixture and stir well. Finally stir in the chopped chocolate. Pour into the loaf tin and place in the oven for an hour, or until a skewer inserted in the middle comes out clean. Once cooked remove from the oven and allow to cool in the tin for 5 mins then transfer to a wire rack to cool. And then eat…. quickly.. while it’s still warm and the chocolate is still melted! yum!!


Mini kiwi loaves!


I had a few kiwi’s left in the fruit bowl, half an hour to spare and a very dear friend who needed to try these so I thought I’d make some more kiwi loaf

20121115-203521.jpg

The best things come in small packages so I decided to make mini versions this time 🙂 yum yum!

20121115-203621.jpg

Kiwi loaf – dairy and gluten free and helps you sleep!


It’s been a busy couple of months since I got back from my trip to Indonesia and in that time as well as having loads on at work, we’ve had our kitchen re-done and a load of building work at home. As a result, not only have I not been able to do any baking, but I’ve found living in a building site has been impacting on my sleep! So I did some research and discovered that there’s pretty good evidence that kiwi’s (the fruit!) can help improve the quality and quantity of sleep you get (you can read my article about it here). That got me thinking about creative things to do with kiwi’s other than fruit salads! Lots of the research also suggests that a carb-based snack will also aid restful sleep so I thought I’d try combining the two. I stumbled across a recipe for kiwi bread some time ago so now that the kitchen is finally finished I decided to adapt it and give it a go. I wasn’t sure exactly how it would turn out but it’s actually really good and rather like banana bread. It’s not too sweet but you get lovely flavours from the spices which really complement the slightly tangy kiwi flavour – delish, especially warm!

1/4 cup Agave nectar or sweet freedom (or you could use honey or any liquid sweetner)

1/3 cup Almond oil (or other neutral oil)

1 tbsp Ground flaxseed (linseed) in 3 tbsp warm water (or you could use 1 egg)

1 and 1/2 cups gluten-free flour

1 cup kiwi pulp (approx 4 kiwi’s)

1/2 cup chopped nuts (I used hazelnuts and almonds as it’s what I had in the cupboard!)

1 cup Raisins

1 tsp Cinnamon

1/4 tbsp Ground cloves

1/4 tsp Himlayan Rock Salt

1 tsp Baking powder

Preheat the oven to 180 degrees CPut the ground flaxseed in the warm water and allow to thicken, then beat with the agave and oil until well mixed. Sieve in the flour, baking powder, salt and spices and combine. Then add the kiwi, raisins and nuts stirring gently. Transfer to a greased loaf tin and place in the oven for 40 – 45 minutes. Remove from the oven and allow to cool a bit before slicing (or it will crumble – as I discovered as I just couldn’t wait! 🙂 ). Enjoy slightly warm in the evening (or at any time of day to be honest!). Sweet dreams! 🙂