Autumn Fruits Cinnamon Cake


I just can’t resist all the yummy autumn fruits so decided to combine them all in this Autumn fruits cinnamon cake. It’s lovely and moist (and because of all the fruit it’s rather crumbly) and another great cake for a Sunday afternoon, with a cuppa!

It serves about 8-10 with approx 234 – 290 cals per slice.

You will need:

450g of autumn fruits (I used plums, apples and pears) plus some to decorate

85g Sugar (I used half spoon)

170g dairy free spread

255g self raising flour

2 large eggs (Or egg replacer if you prefer)

2 tbsp milk (any will do – I used soya)

1 teaspoon cinnamon

Pre-heat the oven to 170C and grease and line a 25cm round loose-bottomed cake tin.

Put the sugar and spread in a bowl and cream until light and fluffy.

Add one egg and whisk it into the batter, then add half the flour and whisk again. Repeat with the other egg and the remainder of the flour.

Then add the cinnamon and milk to slacken the batter a little.

Core and dice the fruit (I didn’t bother peeling the pears and apples but you can if you want to). Add to the mix and fold them in.

Spoon in to the cake tin, spread evenly and then line the top of the cake with finely sliced segments of all the fruit. Sprinkle with a little sugar and cinnamon.

Bake in the oven for 45-60 mins or until a skewer comes out clean.  Once it’s ready, remove from the oven and let it cool in the tin for 10 mins then on a wire rack.

Slice and enjoy with a cuppa!

🙂

Xx

Plum and Pear Cake


I had a last handful of my Nannie’s homegrown plums left and some more my friend’s pears so thought I’d try one last bake!

This is a really nice, moist sponge type of cake – perfect with a cup of tea on a Sunday afternoon! It’s delicious whilst still warm, but actually gets better the next day so is something you can easily make in advance. It’s a large cake and can comfortably serve 10-12 slices. I used half spoon sugar and a light spread to reduce the calories a bit so each slice was around 300 cals.

(If you want to make it egg free then egg replacer works well with this recipe 🙂 )

You will need:

300g plain flour

2 tsp baking powder

pinch of salt

225g Sugar (I used half spoon)

225g margarine or butter (I used a light non dairy spread)

4 large eggs

4-5 plums

1-2 small pears

Juice of half a lemon

cinnamon and sugar to sprinkle on top


Preheat the oven to 180 C.

Mix the flour, baking powder and salt together bowl.

In another bowl cream the margarine and sugar until fluffy and light in color.

Add the eggs, one at a time and scraping down the bowl to ensure it’s mixed well.

Add the dry ingredients and mix until combined.

Spoon batter into a greased or lined 25cm spring form pan.

Cut the plums in halves and the pears in quarters (unless large then cut smaller). Arrange the plums and pears, skin side up as much as possible , all over the batter. Push them down in to the batter until partially covered.

Sprinkle the top with lemon juice, then cinnamon and finally a sprinkling of sugar.

Pop in the centre of the ovens for approximately 45-50 minutes or until cake is golden and a skewer comes out clean. Cool in the tin for ten mins then remove and cool on a rack.

Lightly dust with icing sugar before serving and then enjoy with a nice cup of tea!

Enjoy! 🙂

Xxx

Pear and Plum Jammy Slice


This is a really sticky, yummy afternoon treat and a perfect way to use up any late plums and seasonal pears.

I recently lost my beloved Nannie. She loved baking and was a legend in the kitchen! We harvested the last plums from her plum tree last week and I made a final batch of jam. I had a few plums left over, and some pears from a lovely friend, so decided to put all three together and create something Nannie would have approved of! This slice isn’t elegant, and it isn’t pretty, but it’s damn tasty!

I used half spoon sugar and a light spread to save some calories but you can use normal sugar and any spread / butter you like. It serves around 12 and is only around 204 cals per slice!

You will need:

160g Plain flour

64g Ground almonds

50g sugar (I used half spoon)

170g Dairy free spread

1 large egg

2 tbsp water

1.5 tsp Baking powder

Approx 200g Plum jam

1 – 2 pears (I used a conference pears)

2-3 plums

Preheat the oven to 180 C and grease and line a small baking tin (mine was approx 7 x 10 inches).

Add the flour, almonds, sugar and baking powder to a large bowl.

Mix well and add the spread. You can either use a processor or a fork to mix it in until it resembles bread crumbs. I used a fork so it’s quite lumpy breadcrumbs but that doesn’t matter!

Add the egg and water and mix well. It will form a sticky dough.

Spread it in the baking tin.

Spread the jam over the top – be generous with the jam!

Slice the pears and plums and lay them on the jam.

Pop in the oven and cook for at least 25 mins or until a skewer comes out clean.

Allow to cool a bit before you slice.

Enjoy! 🙂 Xx

Plum and Cinnamon Loaf


I got given a massive haul of Victoria Plums from a kind friend, some of which I used to make some jam, and with the rest I thought I’d do a little baking!

As we head in to late summer and thoughts turn to autumn I thought I’d go for some autumnal flavours – plum and cinnamon! This makes one loaf which serves 8-10, at around 205 cals a slice!

You will need:

140g self-raising flour (any type you like)

140g dairy-free spread (I used a light version to save some calories)

140 sugar (or 70g half spoon sugar for less cals)

2 large eggs and one egg yolk, beaten

200g plums

1 heaped tsp cinnamon

Preheat the oven to 170 C.

Put the spread and sugar and beat lightly until fluffy. Add in the beaten egg a little at a time and beat well in between each bit.

Mix the flour and cinnamon and then add in to the wet mixture, fold it in.

Chop all bout approx 2-3 plums in to small pieces. Slice the 2-3 plums in to wedges (to decorate the top). Add the chopped plums and mix well.

Pour in to a loaf tin. Arrange the plum wedges on the top and sprinkle with a little cinnamon and sugar.

Put in the oven and bake for 50-60 mins. It’s done when a skewer comes out clean.

Allow to cool in the tin for about 10 mins, then remove. Slice and serve!

Enjoy! 🙂

Xx

Valentine’s Vanilla, Berry and Chocolate Porridge


As it’s the season of love I thought I’d celebrate with something I love… porridge! This makes a great brekkie or lunch option. The protein powder is optional but adds the vanilla flavour and also the added protein helps to keep you fuller for longer. My current favourite protein powder is Missfits Vegan Vanilla powder – super yummy and available from amazon and Ocado (and other places!)

I make my porridge with water because I prefer it that way but obviously use milk if you prefer. I have used some yummy little protein chocolate hearts from Cocoa+ but you can use any chocolate you like! It would work well with some squares of dark chocolate

This comes in at approx 415 cals of warming yumminess!

You will need:

50g jumbo oats

Large handful of mixed berries (blueberries, raspberries, strawberries)

1 scoop vanilla protein powder (optional – replace with a 1/4 tsp Vanilla essence if not using)

3 Chocolate hearts or squares

Place the oats in to a saucepan with the protein powder. Add enough water to cover (I like my porridge quite dry so adjust the amount of water to suit you) – heat gently and stir well. If I’m rushed I just pour boiling water on to the oats and protein powder, stir and add a little extra water then blast in the microwave for a min.

Once it starts to cook add in the blueberries and raspberries and stir in.

Slice the strawberries. Once cooked pour the porridge in to a bowl and add the strawberries and chocs on the top.

Enjoy!

🙂

Xx

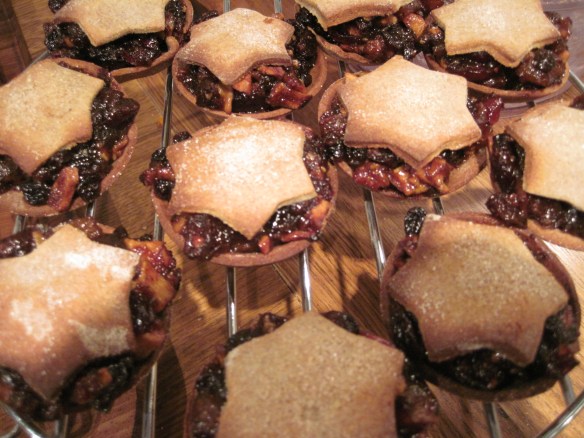
Nancy’s Mince Pies!


Many of you have tried my little mini mince pies at my festive classes and a few have asked for the recipe so I thought I’d re-blog it for you 🤗.

I make mini pies for my classes using a canapé or mini muffin tin – they come in at approx 47 cals per pie so are a perfect little mouthful, but you can obvious make any size you like! The recipe below makes 12 normal pies or approx 24-30 mini ones.

These happen to be both gluten and dairy-free so everyone can enjoy them.

For the Pastry:

4 oz Buckwheat flour
2 oz ground Almonds
5 tbsp Agave nectar
Up to 6 tbsp Water

For the Mincemeat:

3 oz Bramley apples, cored and finely chopped
6 oz Mixed dried fruit (I prefer equal quantities of raisins, currants, cranberries and apricots)
1 oz Vegetable suet
2 oz brown sugar (coconut palm or dark raw muscovado give the best flavour)
Juice and grated zest of half an Orange
1 level tsp of ground allspice
1 pinch ground Cinnamon
1 pinch ground Cloves
1 pinch grated / ground Nutmeg
1 small handful chopped Almonds
1 tbsp Date syrup

Put all the ingredients for the mincemeat into a saucepan. Cook on a low heat, stirring frequently. Cook until the apple is soft and the mixture is thick – it may take some time. Remove from the heat and allow to cool.

For the Pastry: Put the buckwheat flour and ground almonds in a processor and add the agave. Pulse and gradually add the water until it forms a dough. You may find you need more or less water. If it is too wet add a little more flour. You can also do this by hand in a bowl – it’s just a bit messier. Once it’s forming a firm dough remove, wrap in cling-film and place the mixture in the fridge.

Preheat the oven to 180 C/ gas mark 6.

Lightly oil a 12 hole cake tin. Remove pastry from the fridge and roll out on a lightly floured surface. Roll it as thin as you can – a few mm. The pastry can be a bit difficult to handle so I find working with smaller bits at a time is easier. Use a round biscuit cutter to cut out 12 bases. Place them in the tin. Lightly brush with oil and use a fork to prick the base.

Place in an oven to blind bake for 5–10 mins (or 3-7 mins for mini ones). Keep an eye on them – this pastry browns quite fast. Once the edges are brown and the middle is firm remove them. While the cases are in the oven take a smaller circular biscuit cutter to cut out the “lids” or you could use star shapes/ holly leaf shapes/lattice pattern – whatever takes your fancy 🙂

Place a generous helping of mincemeat in each of the cases and place your chosen “lid” on top. Lightly oil and sprinkle with a little cinnamon and sugar. Place the pies back in the oven and bake until golden (10–20 mins for large ones, 5 – 10 for mini ones). Keep a careful eye on them. You want the tops to brown but be careful the bases don’t burn. Remove from the oven and leave to cool for 5 mins, then remove and place on a wire cooling rack.

Enjoy! 🙂

Xx

Peanut butter and blueberry n’ice cream


Nothing beats a nice cold, creamy ice cream on a warm afternoon and this combo works so well together. If you’ve got bananas already frozen this only takes a few minutes to make! 🙂

Freeze your bananas ready diced – it makes blending them easier. Freeze for a few hours, ideally overnight if you can. They will stick together so give them a bash before you blend. If your blender can’t handle them then try blitzing in short pulses or add a very small amount of non-dairy milk,  but the juice from the blueberries will help anyway 🙂

You will need:

4 or so frozen bananas

1 cup blueberries or berries of your choice

1 – 2 tbsp peanut butter

Take half the bananas and pop in to a high speed blender / vitamix with the blueberries and blitz until smooth. It will melt fast so pop in freezer once done while you make the peanut butter one.

Take the other half of the bananas and 1 tbsp peanut butter and blitz. This will be thicker so you may need a small dash of milk. Once blended have a taste and add more peanut butter if you want. Blitz.

Serve together 🙂

If you want to keep it for later pop in the freezer – ideally in ice cube trays then pop out and re-blend briefly to eat (this breaks up the ice crystals that may have formed).

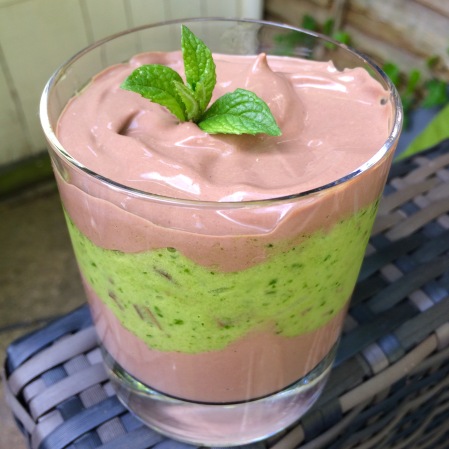
Mint Chocolate Mousse and N’ice cream layered dessert – dairy and gluten free


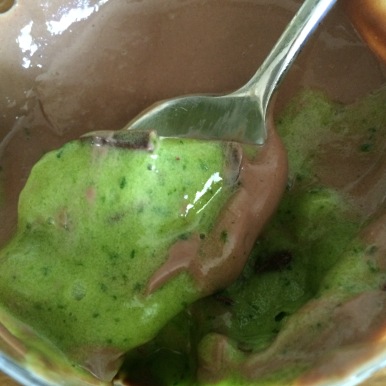
Does anyone else remember those mint chocolate swirled mousse/ice cream dessert things we used to have as children? They came in a little pot, they were mostly sugar and air but they tasted amazing! I’m such a massive mint choc fan and was feeling a little nostalgic so thought I’d see if I could recreate something similar but a little more classy.
FullSizeRender

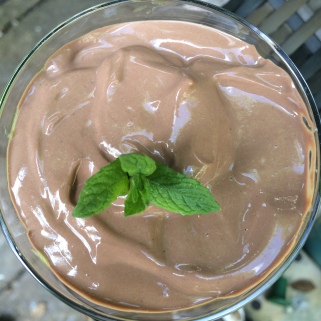
This would make a great dinner party pud – it looks fab and tastes amazing. You can prepare the mousse and the n’ice cream in advance and then put it together in a few mins. It’s also a great healthy, high protein treat for you or the kids on summer evenings.
IMG_6551

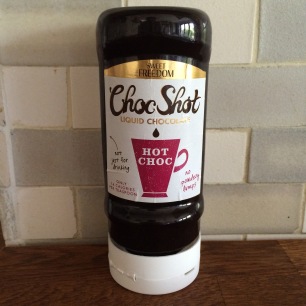
This also gave me a chance to use the yummy choc shot I was sent my the lovely people over at sweet freedom for something other than pouring liberally over my porridge and soya yoghurt 🙂  The mousse recipe is based on Colette’s recipe from The Pure Form Fitness Kitchen and the n’ice cream is my recipe from the other day (here) which I’ll re-post below for ease.
IMG_6550

This will make approx 2 large layered desserts.

For the mousse you will need:

1 packet of Silken tofu

2 tbsp Cocoa powder

2 tbsp sweet freedom Choc Shot (you may want to add a little extra if you want it sweeter)

Natural peppermint extract (to taste)

Pop all the ingredients except the peppermint extract in to your blender/processor and mix well until combined. Have a little taste and add a little more choc shot if you feel you need it. Then add the peppermint extract to taste and mix. Store the mousse in the fridge until you’re ready to prepare the dessert (it will last up to a week – it may separate a little but just stir it before you use it).

For the n’ice cream you will need:

Frozen bananas – I used 4 medium bananas

Handful of spinach (adjust according to how green you want it!)

Couple of tbsp Cacao nibs (or you can use any dark chocolate – sugar free or not – your choice)

Natural peppermint extract (to taste) (or fresh mint leaves if you happen to have some)

Pop the bananas in to a high speed blender – I use my trusty vitamix but any blender that can handle ice will do, and blitz it to start to break up the bananas. Once they start to smoosh up (technical term 😉 ) add the spinach a little at a time. Then add a few drops of peppermint extract – the amount will depend on how minty you like it! You don’t want it tasting like mouthwash though so go easy to start with! Keep blitzing it and stirring it in until the spinach is combined and the colour you want. Remove from the blender and stir the cacao nibs/chopped chocolate through it.

It melts fast so if you’re making it just before you serve it then that’s fab, but if not then you can refreeze it – ideally refreeze in ice cube trays (or small portions) and then when are ready to put the dessert together pop the cubes in to the blender and give it a very quick blitz!

Assemble the pud

Add a layer of mousse, then a layer of n’ice cream and top with another layer of mousse in a glass, sundae dish or bowl. Top with a sprig of fresh mint and enjoy!
IMG_6544

A host of Easter Treats


With Easter upon us I thought I’d share a few of my favourite, slightly healthier but equally yummy Easter recipes.

So if chocolate is your thing then why not try some quick, raw chocolates like these chocolate coconut treats, or the raw chocolate filled eggs and fruit eggs, or if you fancy something with a little more kick – why not try the chilli chocs.

2014-04-18 19.27.21        2014-04-13 16.29.29

Or how about whipping up some quick, cute, marzipan bunnies!

2014-04-05 17.33.53

What about creating a quick batch of Easter spiced biscuits, or some fresh, light lemon and chia cookies to dunk in your afternoon tea on Easter Sunday.

If you’re feeling adventurous you could try my coffee and amaretto cupcakes (using any instant coffee you have to hand).

2014-04-05 17.37.59

And finally..it wouldn’t be Easter without some hot cross buns right? Try my better bun recipe for some hot cross fun! 🙂

Happy Easter! 🙂


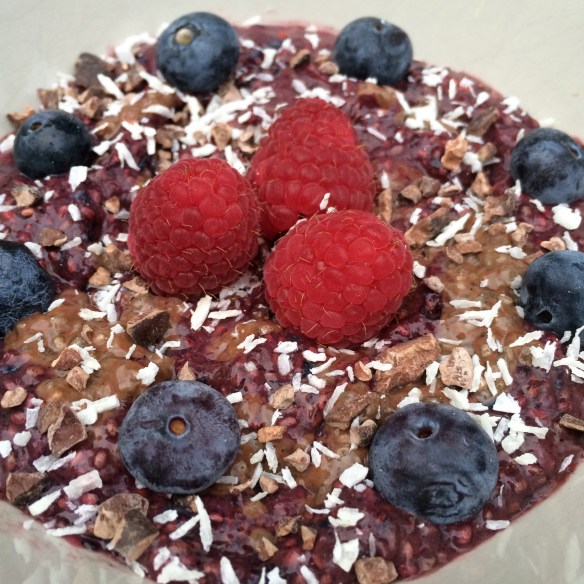
A wonderful bowl of love! Chia pudding :)


I thought I’d treat myself with this gorgeous bowl of love!

IMG_1031
Mixed berry chia pudding swirled with chocolate coconut pudding, topped with cacao nibs, desiccated coconut and berries.

IMG_1038

For the berry pudding you will need:

2 tbsp Chia seeds
1 cup mixed Berries
1/2 cup Almond or soya milk
Liquid sweetener to taste (I used coconut syrup)

For the chocolate coconut pudding you will need:

2 tbsp Chia seeds
1 tbsp Cocoa powder
1/2 cup Coconut milk
1 tbsp desiccated Coconut
1 tsp Lucuma (or vanilla powder if you don’t have this, or 1/2 tsp vanilla extract)
Sweetener to taste ( I used a drizzle of coconut syrup)

For the topping:
Cacao nibs
Desiccated coconut
Berries

For both puddings mix the dry ingredients together well then add the wet ingredients. Mix really well and then allow to sit in the fridge for at least an hour before checking. Adjust the amount of liquid to suit – add more if it’s too thick or if too think you can add some more chia seeds. Let it sit for at least another hour.

Spoon the berry pudding into a bowl, add a couple of spoonfuls of chocolate pudding and then swirl through the berry pudding. Sprinkle with cacao nibs and desiccated coconut and add berries. Serve! 🙂

IMG_1042