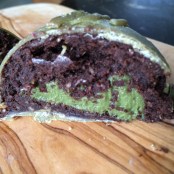
Chocolate and Nut butter molten pud – dairy and gluten free


Sometimes you just need a bit of chocolate pud and this little beauty is quick and easy to whip up, tastes amazing and has a respectable 14g of protein to boot!

You can use any nut butter you like in this (or you can leave it out completely) – I used normal peanut butter for two, and then cos my hubby isn’t a fan of peanut butter I put some ‘hognuts’ choc mint flavoured almond butter in the others – which I have to say, was AMAZING! These are best served immediately but aren’t too shabby when left to cool either 🙂 


You will need:

120g Ground almonds

2 Eggs

4 tbsp Cocoa powder 

6 tbsp Soya/almond/oat milk

2 tsp Vanilla extract

1 tsp Baking powder

4 tbsp Coconut or Maple syrup

4 small tbsp Nut butter of choice

Preheat oven to 160 degrees. Put the almonds, cocoa powder and baking powder in a bowl and mix well. Add the two eggs, coconut syrup and vanilla extract and mix really well so there are no lumps.  


Grease four small ramekins with a little almond or olive oil and divide the mixture between them. Add a tbsp of your nut butter of choice in the middle and place in the oven for approx 15 – 20 mins. Start checking at 15 mins and remove when a skewer comes out clean. 


Eat whilst still warm! 

Homemade n’ice cream ‘Nobbly Bobbly’ – easy, healthy but super tasty!


I confess, I have a problem. I am addicted to Nobbly Bobblys. So to save myself from myself I’ve created my own version. These are divine! For me they hit that Nobbly Bobbly spot but with way less guilt! They’re dairy, gluten and sugar free (if you want them to be – with the exception of those little sugar balls on the outside which if you didn’t want to use you could substitute with desiccated coconut or chopped nuts or something instead :)). I didn’t use any sweetener in the chocolate coating as I find the sugar balls and natural sweetness of the n’ice cream is enough for me but its personal preference so if you want it a little sweeter then I’ve added the details below.


These are easy but take a little time. You are going to need quite a few frozen bananas and some lolly sticks. I got mine from Amazon but places like Lakeland or other baking stores will have them, and you may also find them in craft stores. If you have a lolly mould you can use this for the first layer too (I tried using a mould and moulding them without – both worked).

This amount made me 4 pretty large Nobbly Bobblys and I had some n’ice cream and chocolate to spare for a quick pud afterwards but it will depend how big you make them.


You will need:

For the chocolate layer 

4 frozen bananas

4 tbsp Cocoa powder

For the Strawberry layer 

4 frozen Bananas

4 large ripe Strawberries

6 – 10 Raspberries (you can use more strawberries instead, I just like the colour and flavour the raspberries give)

For the chocolate coating

1/2 cup Coconut oil (melted)

1/3 cup Cocoa powder

Optional – 1/4 cup Coconut syrup/ maple syrup/ rice malt syrup / any liquid sweetener

Sugar balls or dessicated coconut or nuts etc (if using sugar balls you’ll need at least a full pot, probably two if you’re as messy as me 😉 )

First clear some space in your freezer and find a suitable tray to lay the ice creams on. Cover it in baking paper and have your ice cream sticks handy.

Start with the chocolate layer. Pop the bananas and cocoa into a high speed blender (I use my vitamix) and blitz until you get a smooth consistency – you will need to do it in bursts and keep stirring in between. Remove from the blender and then as quickly as you can mould your first layer around the lolly sticks (Or in the mould if you’re using one). Place on the tray and in to the freezer. Leave for at least an hour. If they’re s bit messy don’t worry you can tidy them up with a knife before the next layer goes on.

IMG_7044 
 
Next make the strawberry layer. Pop the bananas, strawberries and raspberries into the blender. Blitz until smooth. You will need to work quickly now. Remove the frozen chocolate layer from the freezer (tidy them up if you want to) and using a spatula add a layer of the strawberry n’ice cream all over and then pop back on the tray and get them back in the freezer for another 40 mins or more.


Once they’re frozen you can coat them. Mix the coconut oil and cocoa powder together with a fork or whisk (add the sweetener if you want to). If the coconut oil is very hot allow it to cool a little – it will stay liquid for ages so there’s no rush. Place on one side and pour your sugar balls (or whatever you are using) into a tray or plate and have it handy.  It’s best to work with one lolly at a time as they melt so fast. Warning this may get messy 🙂


Take your lolly and spoon the chocolate over one side and immediately press in it the sugar balls (or pour them over the top). Repeat over the whole lolly then get it straight back in the freezer on the tray asap. Do this for all your lollies.


Allow to freeze initially for at least 20 – 30 mins on the tray and then you can transfer them to a Tupperware box to keep them in the freezer until you want to eat them! Then enjoy! 

Super quick chocolate n’ice cream 


The weather is finally warm! Woohoo!

That makes me want ice cream so I thought I’d whip up a quick batch of chocolate ice cream. It took minutes to make and has all the taste of lovely creamy ice cream with none of the bad stuff!

Only two ingredients: Frozen bananas and raw cocoa powder!

I used about two bananas which I chopped and froze yesterday but they don’t take long to freeze so whack some in now and you can make it in a couple of hours! I popped these into my Vitamix (any high speed blender will work) and added 2 tbsp of cocoa powder – whizzed it all together and voila! You can add a little more or less cocoa according to taste if you want.

IMG_7044

You could eat straight away or pop in to ice lolly moulds for later 🙂

Sweet Potato Brownies – sugar, dairy and gluten free


Brownies are a staple treat for me, my husband and our friends and it’s usually the dessert of choice whenever we go to our friend’s house for dinner. My usual brownie recipe (see all the various recipes here) is a firm favourite and is also dairy and gluten free but I needed a sugar-free version for this weekend. My very special friend Colette from The Pure Form Fitness Kitchen is in training for an upcoming competition and I just couldn’t bring dessert that she couldn’t eat!

So thinking cap on…. I knew I could use sweet potato to add some natural sweetness but I searched and searched online and couldn’t find a recipe that didn’t have any added sugar of any type (aside from fruit/veg sugar). Every recipe had maple syrup, agave, coconut syrup or rice malt syrup in it. So I decided to have a go at creating one myself, based on all the recipes I found (and there are a lot of sweet potato brownie recipes out there!).

IMG_6622

I have to be honest – this was a complete experiment, but I’m pretty happy with the results. It’s tasty, it’s got a natural sweetness and it’s actually really good (even better the day after they’re made).  I’ve gone for the smallest amount of dates, apple and sweet potato possible to limit the amount of fruit sugars whilst still keeping the flavour.

You will need:

2 Sweet potatoes (approx 500 g in total – unpeeled weight)

50g Apple Purée (make your own – recipe here)

60g Buckwheat flour

80g ground Almonds

75g Cocoa powder

6 Medjool Dates

IMG_6621

Preheat the oven to 180 C

Peel and dice the sweet potato and then pop in a covered bowl in the microwave. Microwave until soft (a couple of blasts of 2 – 3 minutes). Using a fork mash up the sweet potato and then pop into a blender or processor. Chop the dates and add them to the sweet potato (it’s easier if you do this while the potato is still warm). Blitz it until the dates are well combined with the sweet potato. I actually like a bit of substance to the dates so I’m not fussed if it’s not smooth but it’s up to you.

Mix together the flour, almonds and cocoa and then stir the sweet potato mixture in (it will be quite stiff). Add the apple and mix well. You want a sticky, quite thick mixture – thicker than a normal brownie batter. If the flour won’t all combine (as it will depend a little on the moisture content of the dates and apple) then add a drizzle of warm water, but not too much.

Pour into a lined tin and place in the oven for 30 -35 minutes. The top will be crusty and if you stick a skewer in it will come out clean. Remove from the oven and allow to cool in the tin (if you can wait :)). Then slice and serve!

IMG_6625


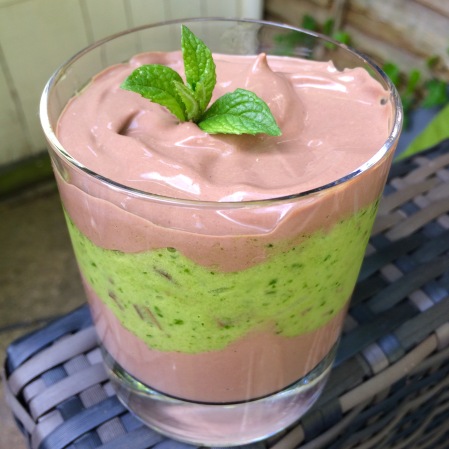
Mint Chocolate Mousse and N’ice cream layered dessert – dairy and gluten free


Does anyone else remember those mint chocolate swirled mousse/ice cream dessert things we used to have as children? They came in a little pot, they were mostly sugar and air but they tasted amazing! I’m such a massive mint choc fan and was feeling a little nostalgic so thought I’d see if I could recreate something similar but a little more classy.

FullSizeRender

This would make a great dinner party pud – it looks fab and tastes amazing. You can prepare the mousse and the n’ice cream in advance and then put it together in a few mins. It’s also a great healthy, high protein treat for you or the kids on summer evenings.

IMG_6551

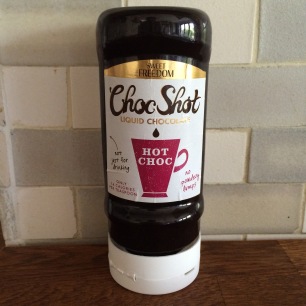
This also gave me a chance to use the yummy choc shot I was sent my the lovely people over at sweet freedom for something other than pouring liberally over my porridge and soya yoghurt 🙂  The mousse recipe is based on Colette’s recipe from The Pure Form Fitness Kitchen and the n’ice cream is my recipe from the other day (here) which I’ll re-post below for ease.

IMG_6550

This will make approx 2 large layered desserts.

For the mousse you will need:

1 packet of Silken tofu

2 tbsp Cocoa powder

2 tbsp sweet freedom Choc Shot (you may want to add a little extra if you want it sweeter)

Natural peppermint extract (to taste)

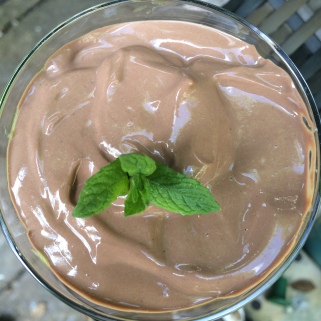
Pop all the ingredients except the peppermint extract in to your blender/processor and mix well until combined. Have a little taste and add a little more choc shot if you feel you need it. Then add the peppermint extract to taste and mix. Store the mousse in the fridge until you’re ready to prepare the dessert (it will last up to a week – it may separate a little but just stir it before you use it).

For the n’ice cream you will need:

Frozen bananas – I used 4 medium bananas

Handful of spinach (adjust according to how green you want it!)

Couple of tbsp Cacao nibs (or you can use any dark chocolate – sugar free or not – your choice)

Natural peppermint extract (to taste) (or fresh mint leaves if you happen to have some)

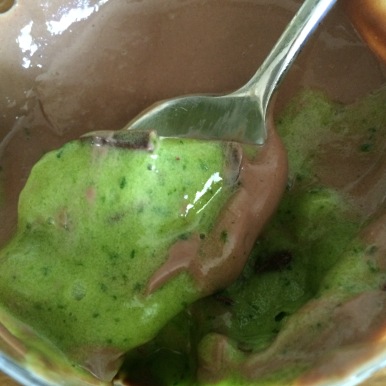
Pop the bananas in to a high speed blender – I use my trusty vitamix but any blender that can handle ice will do, and blitz it to start to break up the bananas. Once they start to smoosh up (technical term 😉 ) add the spinach a little at a time. Then add a few drops of peppermint extract – the amount will depend on how minty you like it! You don’t want it tasting like mouthwash though so go easy to start with! Keep blitzing it and stirring it in until the spinach is combined and the colour you want. Remove from the blender and stir the cacao nibs/chopped chocolate through it.

It melts fast so if you’re making it just before you serve it then that’s fab, but if not then you can refreeze it – ideally refreeze in ice cube trays (or small portions) and then when are ready to put the dessert together pop the cubes in to the blender and give it a very quick blitz!

Assemble the pud

Add a layer of mousse, then a layer of n’ice cream and top with another layer of mousse in a glass, sundae dish or bowl. Top with a sprig of fresh mint and enjoy!

IMG_6544

A host of Easter Treats


With Easter upon us I thought I’d share a few of my favourite, slightly healthier but equally yummy Easter recipes.

So if chocolate is your thing then why not try some quick, raw chocolates like these chocolate coconut treats, or the raw chocolate filled eggs and fruit eggs, or if you fancy something with a little more kick – why not try the chilli chocs.

2014-04-18 19.27.21        2014-04-13 16.29.29

Or how about whipping up some quick, cute, marzipan bunnies!

2014-04-05 17.33.53

What about creating a quick batch of Easter spiced biscuits, or some fresh, light lemon and chia cookies to dunk in your afternoon tea on Easter Sunday.

If you’re feeling adventurous you could try my coffee and amaretto cupcakes (using any instant coffee you have to hand).

2014-04-05 17.37.59

And finally..it wouldn’t be Easter without some hot cross buns right? Try my better bun recipe for some hot cross fun! 🙂

Happy Easter! 🙂


Homemade Toffee Poppets! Raw, dairy-free Chocolate Caramel Balls!


When I was little my grandma (Nannie 🙂 ) would come to pick me up on a Friday night from school and as a treat she’d take me across the road from our house to the newsagents to buy some sweets. I could have whatever I wanted… More often than not I went for a packet of Poppets – either mint, or the toffee ones (also known as Toffets). For those of you who haven’t had the pleasure – they were a little cardboard box full of nuggets of chocolate covered mint fondant or chewy caramel. I always associate them with those friday night treats and my Nannie and so they hold a special place in my heart 🙂

Poppets - Mint CreamsPoppets-toffeePAY-CHW-PPT

I’ve been having a bit of a caramel craving lately so I thought I’d better try to recreate those yummy little balls of goodness. (I’ll have a go at mint ones too at some point 🙂 ). As well as plain ones I also thought I’d try adding some coconut and nuts to the outside – you could coat yours in anything you like!

IMG_2749

You will need:

For the centres:

10 – 12 Medjool dates

3 tbsp Almond butter or Cashew butter if you don’t want the almond taste

(water as required)

For the chocolate:

1/2 cup Coconut oil (melted)

1/3 cup Cacao/cocoa powder

1/4 cup Coconut syrup

Desiccated coconut/chopped roasted nuts to decorate if desired

IMG_2752IMG_2751IMG_2750

Pop the dates and almond/cashew butter in a processor and pulse until blended and smooth. Add water if you want a softer texture. Take small spoonfuls and roll into balls with your hand – this is easier if you can chill it in the fridge for a while first. Pop the balls in the freezer for as long as you can wait!

To make the chocolate combine the coconut oil, cacao powder and coconut syrup and whisk with a fork.

Take the balls out the freezer and pop in to the chocolate to coat. Use a fork to move them around until coated and then pop on some greaseproof paper to set. Once set a little bit turn so the bottoms don’t stick.

IMG_2738 If you want to coat them in coconut or nuts then as soon as you’ve coated in them in chocolate roll in the coconut/nuts and then place on the greaseproof paper.

IMG_2736    IMG_2739

Then place in the freezer until ready to eat! All I need to do now is recreate the little cardboard box!

FullSizeRender

Raw Almond Caramel Chocolate Fingers


I’ve been dying to make something nutty and caramel-ly for ages and just haven’t got round to it  – finally the other weeked I got all my ingredients out and had a play and I’m very very pleased with the results! These are delish! They need to be kept in the freezer and are best eaten cold otherwise they get a bit squishy… although… that’s not such a bad thing!!

IMG_1411

You will need:

For the base:

1 cup Macadamia nuts

2 – 3 Tbsp Coconut syrup (or any liquid sweetener – agave, rice malt syrup etc)

1/2 tsp Vanilla powder or 1 tsp vanilla extract

1/4 tsp Almond extract

For the caramel:

12 – 14 Medjool dates

3 tbsp Almond butter

1/8 tsp Almond extract

pinch of salt

A little Water as needed (it depends how dry your dates are)

For the chocolate:

1/2 cup Coconut oil (melted) or Cacao butter (melted)

1/3 cup Raw cacao powder

1/4 cup Coconut syrup or maple syrup (or any liquid sweetener)

1/4 tsp Vanilla powder or 1/2 tsp Vanilla extract

First you need to make the base. Pop all the ingredients into a food processor and pulse until well blended and it forms a sticky dough. Line a small tray with baking paper and then press the base mixture in to the tray firmly.

IMG_1388    IMG_1390

Pop this in the freezer and then start on the caramel layer. I find it easier if you chop the dates up a bit first, so chop them and pop in to the processor together with the other ingredients, but not the water. Pulse until blended in to a paste. If it’s a little too dry then add some water (carefully so you don’t add to much). Once you have the consistency you want (sticky but spreadable) then take the base out the freezer and spread the caramel on top. You may have some caramel left over – this is no bad thing, I rolled it into balls which I coated in chocolate for some extra little caramel bites! 🙂

IMG_1391

Place this back in the freezer for as long as you can – an hour or more if possible.

Once you’re nearing the end of your the hour you can make up the chocolate (if you want to make it sooner you can, and you can just gently warm it to re-melt it). It’s best to use a large bowl for this so your caramel fingers will fit in (it makes it easier to coat them). Add the cacao, coconut syrup and vanilla to the melted coconut oil or cacao butter and mix well using a fork or a small hand whisk. Remove the caramel from the freezer and slice into fingers (or any shape you want).

IMG_1394

Then comes the fun bit! First of call place a wire rack over some baking parchment (or a board – or anything you don’t mind getting messy!). Make sure your chocolate is melted and combined well, then begin the dipping! Dunk the caramel fingers in the chocolate and ensure they’re coated. Then transfer to the wire rack and allow to set. They will stick to the rack, so before they’re set just move them slightly. If you’re anything like me you will probably end up with a bit of a mess on the bottom side, don’t worry, just wait til the top is set (it won’t take long) and turn them over and drizzle chocolate over them to tidy them up.

If you find the chocolate starts to thicken while you’re still coating them then just pop it in the microwave for a few seconds to re-melt (or even just place in a warm area – like on a radiator for a few moments – it melts so easily). Once they are all coated and lightly set (because the fingers are frozen it sets pretty quickly but will still be fragile) pop back in the freezer (I just popped them in a tupperware pot).

IMG_1395

Store in the freezer until you want to eat them.. then eat! They’re delicious as a quick pick me up.. and if you’re feeling really naughty they’re even better dipped in a tofu chocolate chili mousse (oh yes I did..!).

IMG_1400IMG_1408IMG_1414


Treating myself – Divaliciously Raw, a review


Every now and then it’s important to look after yourself, so when I stumbled across this site –Divaliciously Raw and all Gail’s amazing goodies I decided I should most definitely take the opportunity to treat myself to some deliciousness! I couldn’t decide what to try so went for the Valentine’s box, which gave me a taste of all her main products. Although that box won’t always be available as a package, all the contents are. They are all raw, gluten, wheat and egg free and vegan!

It arrived so beautifully packed – it really was like receiving a valentine’s gift! There was even a card!

IMG_1271IMG_1272

And then just look at how stunning these cakes look! I couldn’t believe it! Wow – just wow!

IMG_1275So in my box of goodies I got:

Raspberry Rapture Love Bomb

Magical Mint Love Bomb

Oriental Orange (Orange and Ginger) Love Bomb

Two Goji Bites

Ultimate bar

Zinger Bar

Unconditional Love Cake

Now where to start…Firstly they were all beautiful so it was really hard to know what to try first! I ended up going for the love bombs.

The love bombs were just perfect – lovely chocolatey coating, moist cake inside and then a surprise creamy filling. The flavours are really good in these and they really feel like a decadent dessert. They have a great nuttiness to them and a texture that really works. The creamy filling is definitely the best bit and it was hard not to eat them all at once! I’m not sure which my favourite flavour was to be honest – they were all so good!

IMG_1339 IMG_1345 IMG_1336

IMG_1340IMG_1348IMG_1338

Goji bites – these were a lot larger than I expected – which was great! They’re a little harder in texture than the bombs and kinda crumble in to your mouth – which i really liked. Lovely flavours – nutty and with enough goji to really taste it and balance the chocolate.

IMG_1335

Ultimate bar and the zinger bar – these were both delish. The ultimate bar has mulberries, goji berries and buckwheaties in which give it a fantastic crunch and sweetness – this was great dipped in a cup of tea! The Zinger was just bursting with flavour from the Incan (golden) berries which were a great balance to the dark raw chocolate.

IMG_1366

Last and by NO means least – the unconditional love cake! Sharing is caring so I did share this – not only with my very good friend Colette, but also with my husband. And we all agreed this was out of this world. Raw chocolate, filled with raw chocolate cake, chocolate ganache, caramel and a malted cashew cream. Oh my word! This was just amazing! Definitely my favourite!

IMG_1358IMG_1363

So there you go! That was one big, delicious treat for me! I highly recommend you check out Gail’s page on facebook and place an order. The cakes aren’t cheap but the amount of love, care and sheer dedication that’s gone in to them mean they are most definitely worth every penny and they’re not small either so you’re getting a lot of cake for your buck! Do let me know if you try any!


A wonderful bowl of love! Chia pudding :)


I thought I’d treat myself with this gorgeous bowl of love!

IMG_1031
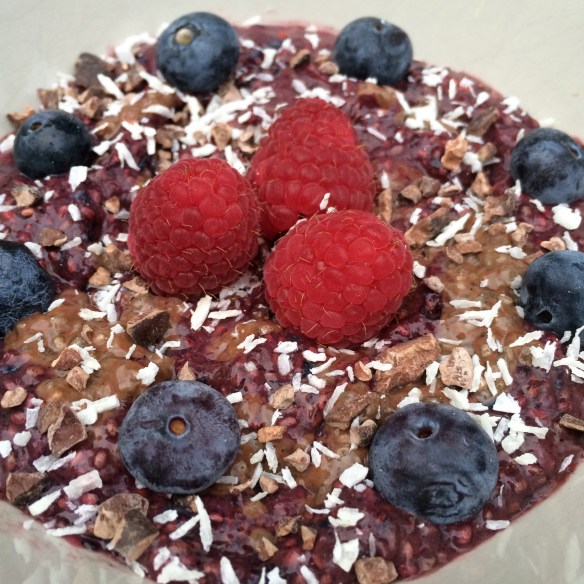
Mixed berry chia pudding swirled with chocolate coconut pudding, topped with cacao nibs, desiccated coconut and berries.

IMG_1038

For the berry pudding you will need:

2 tbsp Chia seeds
1 cup mixed Berries
1/2 cup Almond or soya milk
Liquid sweetener to taste (I used coconut syrup)

For the chocolate coconut pudding you will need:

2 tbsp Chia seeds
1 tbsp Cocoa powder
1/2 cup Coconut milk
1 tbsp desiccated Coconut
1 tsp Lucuma (or vanilla powder if you don’t have this, or 1/2 tsp vanilla extract)
Sweetener to taste ( I used a drizzle of coconut syrup)

For the topping:
Cacao nibs
Desiccated coconut
Berries

For both puddings mix the dry ingredients together well then add the wet ingredients. Mix really well and then allow to sit in the fridge for at least an hour before checking. Adjust the amount of liquid to suit – add more if it’s too thick or if too think you can add some more chia seeds. Let it sit for at least another hour.

Spoon the berry pudding into a bowl, add a couple of spoonfuls of chocolate pudding and then swirl through the berry pudding. Sprinkle with cacao nibs and desiccated coconut and add berries. Serve! 🙂

IMG_1042