Almond Caramel N’ice Cream – quick, healthy and delicious


You can never have too much n’ice cream! Dairy, gluten and added sugar free – this is guilt free loveliness. I think this may be my favourite flavour yet! This is really scrummy and tastes divine. It doesn’t need any extra sugar as the bananas and date caramel give it tonnes of rich sweetness and creaminess. It’s also pretty quick to make. I usually make up a big batch of the date caramel so I can use it for other stuff (or just eat it by the spoonful!).


You will need:

8 – 10 Medjool dates (this will create extra caramel so reduce if you don’t want any spare)

1 tbsp Almond butter

1 tbsp hot Water

4 frozen bananas

Handful almonds

Drizzle of coconut, maple or date syrup

It’s best if you peel and slice your bananas for freezing as it makes it easier for the blender to handle so make sure your bananas are well frozen first.

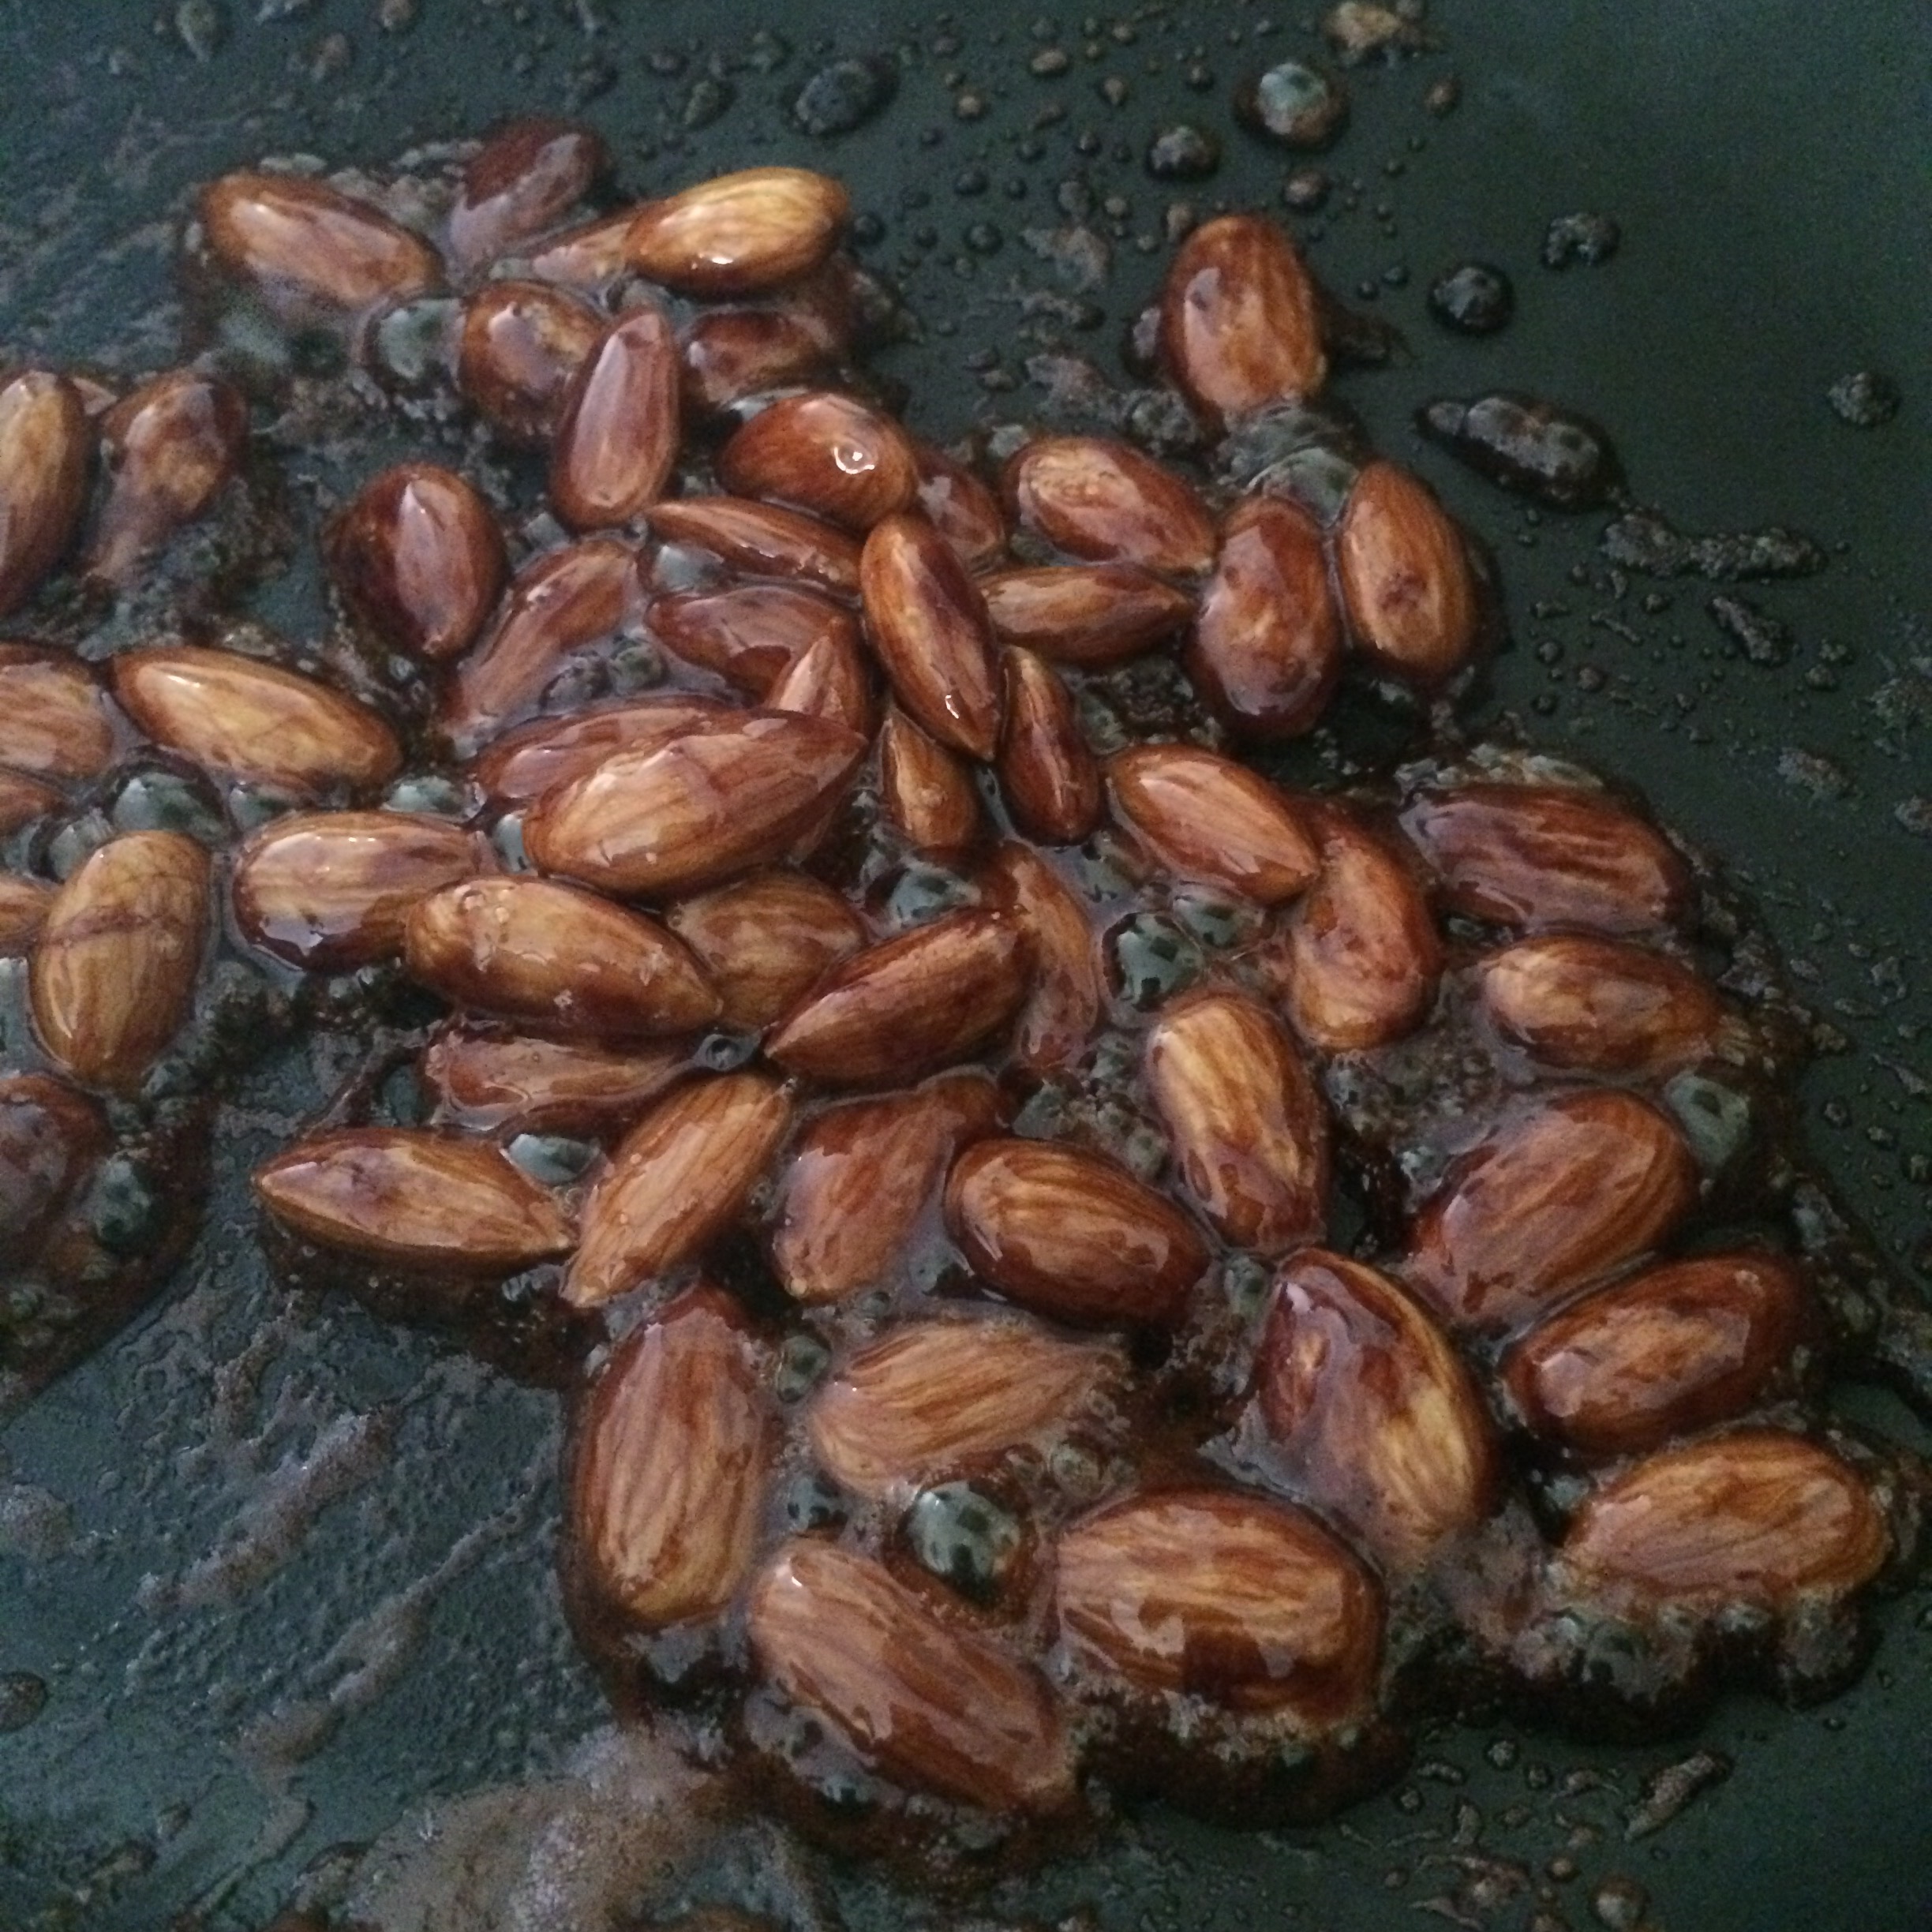
First caramelise the almonds. Pop the almonds into a dry frying pan, add a good drizzle of maple, coconut or date syrup and heat. You need to keep an eye on this – you want it to start to bubble and thicken but not burn. Keep stirring so they don’t catch. Once the syrup is reduced down and they’re well coated tip them out in to some baking paper and allow to cool. You can break them apart once cool.


Then make the caramel. Chop the dates and pop in to a high speed blender together with the almond butter. Depending on how dry your dates are you may not need all the water so start with half. Process well, adding the rest of the water if necessary, until you have a smooth caramel. Remove this from the blender (don’t worry about getting every last bit out and there’s no need to clean the blender).

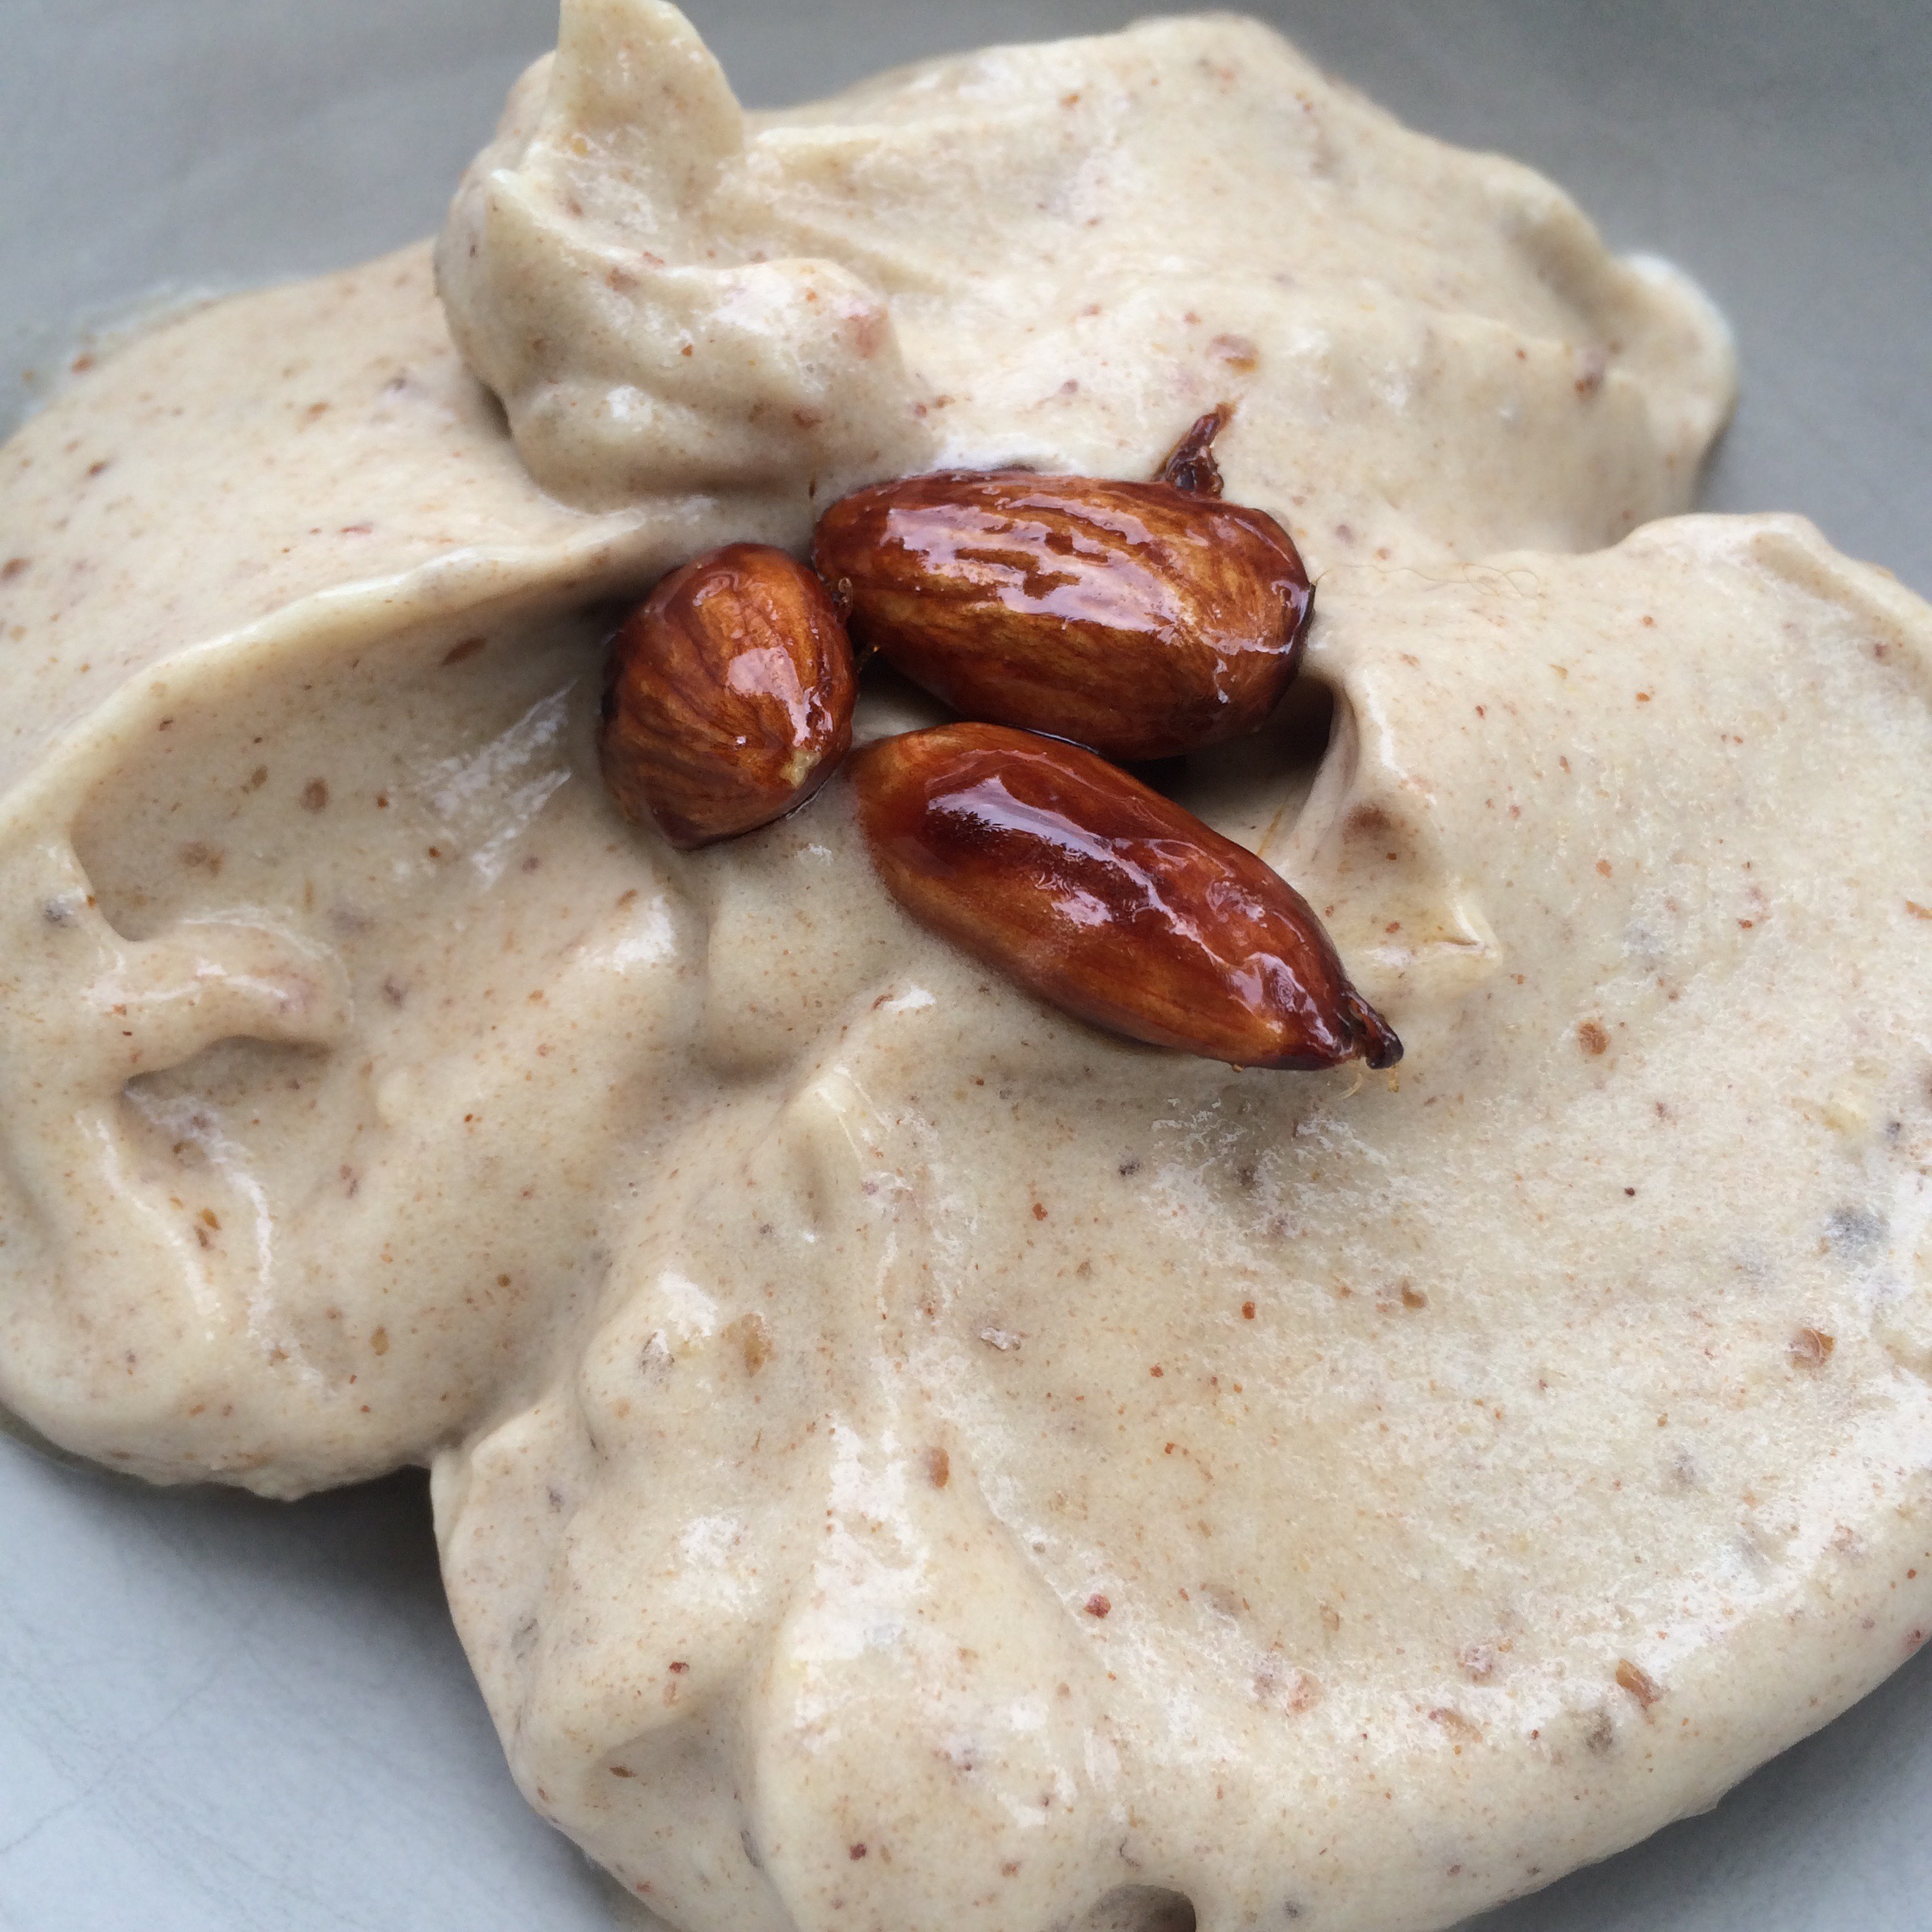
Pop your frozen bananas in to the blender and pulse to blend the banana. Once it’s almost smooth add a tablespoon or so of the caramel back in to the blender with the bananas (add as much as you want – to taste). Blend well and then serve with the almonds sprinkled in top. If you want to serve it later freeze in small portions (plastic food bags or ice cube trays work best) and reblend briefly before serving to remove any large ice crystals.


Advertisement

Apple and Coconut Cinnamon Caramel Swirled Loaf – Dairy free, Gluten Free and Vegan


This may be my best loaf recipe yet… This was so good I had to make it twice, in two days.. and it didn’t last long!


I was sent a bottle of this fab Coconut Syrup, which I was already a big fan of, and I’m really enjoying playing around with date caramel at the moment, so I thought why not combine the two in an appley-caramely-coconutty-squidgy loaf! The coconut syrup adds a lovely richness to the loaf which is fab. The syrup is great for drizzling over yoghurt, sweetening smoothies or pouring over your finished slice of loaf too! You can find out more here – Bali Nutra Coconut Syrup.


I’ve even done a little video too! 🙂


You will need:

2 cups Gluten-free flour or spelt flour
1 cup coconut palm (or any unrefined) sugar (plus a little extra to sprinkle on top)
1/4 cup Coconut Syrup
1/4 cup and 2 tbsps almond oil or olive oil
3/4 cup apple purée (make your own – instructions here)
1/2 cup desiccated coconut (plus a little extra to sprinkle on the top)
1/2 cup date caramel (recipe here)
1 tbsp Cocoa powder
1 small apple – diced
1/4 cup soya milk mixed with 1 tsp apple cider vinegar
1/2 tsp baking soda
1 tsp vanilla extract
1 tsp cinnamon
1/4 tsp allspice
1/2 tsp himalayan rock salt

Preheat oven to 350 F / 175 C. Line and grease a small loaf tin (approximately 8 inches x 4 inches).

Mix the flour, baking soda, coconut, cinnamon, allspice and salt together in a large bowl. In a separate bowl mix the oil and sugar together until well combined. Add the apple purée and the soya milk (to which vinegar has been added), the coconut syrup and the vanilla extract. Add this mix to the flour mixture and stir well. Add the diced apple and stir well.

Remove about one cup of this batter and put it in a separate bowl. Stir the date caramel in to this mix. Add the cocoa powder and mix well – this adds a lovely richness to the batter and also darkens it to make the swirls more obvious, without giving a Chocolate flavour 🙂

Start by adding a layer of the plain batter in your loaf tin. Drop a few spoonfuls of the caramel batter and use a fork to marble it, then add another layer of plain batter. Continue to layer and marble the batters until you’ve used it up! Sprinkle with a little coconut sugar and desiccated coconut.


Place in the oven for an hour, or until a skewer inserted in the middle comes out clean. Once cooked remove from the oven and allow to cool in the tin for 5 mins then transfer to a wire rack to cool.


This is absolutely divine when warm and if you have any spare date caramel I highly recommend smearing some on top!

You can easily freeze this too – it keeps brilliantly.

Caramel Buckwheat Crispy Squares – Dairy and Gluten free


When I was at school I used to take a Kellogg’s Rice Krispie Marshmallow square with me every day for my breaktime snack. Does anyone else remember them? I was addicted! All gooey and sweet… and delicious…but so full of rubbish…..

So I thought I’d recreate a healthier version of them! So I’ve had a play and come up with  Caramel Buckwheat Crispy Squares. Super easy to make and really scrummy! You could use any puffs you like – buckwheat, spelt, quinoa, rice…. These are better than the originals I think and not half as bad for you 🙂

You will need:

10 -12 medjool dates

2 tbsp Cashew or almond butter

1 – 2 tbsp warm Water

1 – 2 cups of Buckwheat (or any) puffs

Optional Chocolate for decoration:

1/2 cup Coconut oil (melted)

1/3 cup Cacao/cocoa powder

1/4 cup Coconut syrup

Start by making your caramel. Pit and chop the dates and pop them in to your blender together with the nut butter. Add a little of the water and blitz. You want to nice smooth caramel which is thick enough to hold the puffs together, so you may need to add a little more water but not too much. I have to say, watching the caramel in the blender is very pleasing… look….

Once you have a smooth but sticky caramel remove it from the blender. You will probably have more caramel than you need but that’s ok as you can use it for some other yummy treats like my apple cinnamon smoothie or homemade toffee poppets.

Put your puffs in a bowl and add a few spoonfuls of caramel. Stir it through and keep adding caramel until you have a sticky mess! Line a tupperware pot or tray with some baking paper and press the caramel puff mess in to the tray and push down well.

Pop in the freezer for at least an hour to set. It won’t set firm – it will be all sticky and chewy 🙂

Once set remove from the freezer, slice and serve!

If you want to decorate with raw chocolate then combine the coconut oil, cacao powder and coconut syrup and whisk with a fork. Drizzle the chocolate over the bars and then pop back in the freezer briefly to set. Enjoy!

  IMG_3833

Homemade Toffee Poppets! Raw, dairy-free Chocolate Caramel Balls!


When I was little my grandma (Nannie 🙂 ) would come to pick me up on a Friday night from school and as a treat she’d take me across the road from our house to the newsagents to buy some sweets. I could have whatever I wanted… More often than not I went for a packet of Poppets – either mint, or the toffee ones (also known as Toffets). For those of you who haven’t had the pleasure – they were a little cardboard box full of nuggets of chocolate covered mint fondant or chewy caramel. I always associate them with those friday night treats and my Nannie and so they hold a special place in my heart 🙂

Poppets - Mint CreamsPoppets-toffeePAY-CHW-PPT

I’ve been having a bit of a caramel craving lately so I thought I’d better try to recreate those yummy little balls of goodness. (I’ll have a go at mint ones too at some point 🙂 ). As well as plain ones I also thought I’d try adding some coconut and nuts to the outside – you could coat yours in anything you like!

IMG_2749

You will need:

For the centres:

10 – 12 Medjool dates

3 tbsp Almond butter or Cashew butter if you don’t want the almond taste

(water as required)

For the chocolate:

1/2 cup Coconut oil (melted)

1/3 cup Cacao/cocoa powder

1/4 cup Coconut syrup

Desiccated coconut/chopped roasted nuts to decorate if desired

IMG_2752IMG_2751IMG_2750

Pop the dates and almond/cashew butter in a processor and pulse until blended and smooth. Add water if you want a softer texture. Take small spoonfuls and roll into balls with your hand – this is easier if you can chill it in the fridge for a while first. Pop the balls in the freezer for as long as you can wait!

To make the chocolate combine the coconut oil, cacao powder and coconut syrup and whisk with a fork.

Take the balls out the freezer and pop in to the chocolate to coat. Use a fork to move them around until coated and then pop on some greaseproof paper to set. Once set a little bit turn so the bottoms don’t stick.

IMG_2738 If you want to coat them in coconut or nuts then as soon as you’ve coated in them in chocolate roll in the coconut/nuts and then place on the greaseproof paper.

IMG_2736    IMG_2739

Then place in the freezer until ready to eat! All I need to do now is recreate the little cardboard box!

FullSizeRender

Raw Almond Caramel Chocolate Fingers


I’ve been dying to make something nutty and caramel-ly for ages and just haven’t got round to it  – finally the other weeked I got all my ingredients out and had a play and I’m very very pleased with the results! These are delish! They need to be kept in the freezer and are best eaten cold otherwise they get a bit squishy… although… that’s not such a bad thing!!

IMG_1411

You will need:

For the base:

1 cup Macadamia nuts

2 – 3 Tbsp Coconut syrup (or any liquid sweetener – agave, rice malt syrup etc)

1/2 tsp Vanilla powder or 1 tsp vanilla extract

1/4 tsp Almond extract

For the caramel:

12 – 14 Medjool dates

3 tbsp Almond butter

1/8 tsp Almond extract

pinch of salt

A little Water as needed (it depends how dry your dates are)

For the chocolate:

1/2 cup Coconut oil (melted) or Cacao butter (melted)

1/3 cup Raw cacao powder

1/4 cup Coconut syrup or maple syrup (or any liquid sweetener)

1/4 tsp Vanilla powder or 1/2 tsp Vanilla extract

First you need to make the base. Pop all the ingredients into a food processor and pulse until well blended and it forms a sticky dough. Line a small tray with baking paper and then press the base mixture in to the tray firmly.

IMG_1388    IMG_1390

Pop this in the freezer and then start on the caramel layer. I find it easier if you chop the dates up a bit first, so chop them and pop in to the processor together with the other ingredients, but not the water. Pulse until blended in to a paste. If it’s a little too dry then add some water (carefully so you don’t add to much). Once you have the consistency you want (sticky but spreadable) then take the base out the freezer and spread the caramel on top. You may have some caramel left over – this is no bad thing, I rolled it into balls which I coated in chocolate for some extra little caramel bites! 🙂

IMG_1391

Place this back in the freezer for as long as you can – an hour or more if possible.

Once you’re nearing the end of your the hour you can make up the chocolate (if you want to make it sooner you can, and you can just gently warm it to re-melt it). It’s best to use a large bowl for this so your caramel fingers will fit in (it makes it easier to coat them). Add the cacao, coconut syrup and vanilla to the melted coconut oil or cacao butter and mix well using a fork or a small hand whisk. Remove the caramel from the freezer and slice into fingers (or any shape you want).

IMG_1394

Then comes the fun bit! First of call place a wire rack over some baking parchment (or a board – or anything you don’t mind getting messy!). Make sure your chocolate is melted and combined well, then begin the dipping! Dunk the caramel fingers in the chocolate and ensure they’re coated. Then transfer to the wire rack and allow to set. They will stick to the rack, so before they’re set just move them slightly. If you’re anything like me you will probably end up with a bit of a mess on the bottom side, don’t worry, just wait til the top is set (it won’t take long) and turn them over and drizzle chocolate over them to tidy them up.

If you find the chocolate starts to thicken while you’re still coating them then just pop it in the microwave for a few seconds to re-melt (or even just place in a warm area – like on a radiator for a few moments – it melts so easily). Once they are all coated and lightly set (because the fingers are frozen it sets pretty quickly but will still be fragile) pop back in the freezer (I just popped them in a tupperware pot).

IMG_1395

Store in the freezer until you want to eat them.. then eat! They’re delicious as a quick pick me up.. and if you’re feeling really naughty they’re even better dipped in a tofu chocolate chili mousse (oh yes I did..!).

IMG_1400IMG_1408IMG_1414