Christmas Gingerbread Tree – gluten and dairy free


The gingerbread christmas tree has become a bit of a tradition for me now and my friend’s husband is a big fan so I couldn’t let this year pass without making him one. This is a quick dough to make and is something fun to do on Christmas Eve πŸ™‚

/home/wpcom/public_html/wp-content/blogs.dir/ca7/32324338/files/2014/12/img_3654.jpg

/home/wpcom/public_html/wp-content/blogs.dir/ca7/32324338/files/2014/12/img_3629.jpg

To make the gingerbread biscuits: (if you’re going for a really big tree then you can always double this)

1/3 cup Olive oil

3/4 cup unrefined raw sugar (golden raw caster sugar, coconut palm sugar, or dark raw cane sugar)

1/4 cup molasses

1/4 cup soya milk

1 cup amaranth flour / quinoa flour

1 cup gluten free flour mix (make your own or you can use an organic pre-mixed one. If you want low gluten not gluten free then go for spelt flour instead of the amaranth and gluten free flours)

1/2 tsp ground nutmeg

1/2 tsp ground cloves

1/2 tsp ground cinnamon

1 and 1/2 tsp ground ginger

1/2 tsp bicarbonate of soda

1/2 tsp baking powder

1/2 tsp Himalayan rock salt salt

Whisk the oil and sugar together in a large bowl. Add the soya milk and the molasses and whisk all together. Sieve the flours, spices and baking powder, salt and bicarbonate of soda in to the wet ingredients and mix until it forms a dough. The dough may seem quite moist. You want it to be workable but not so sticky that you can’t lift it. Add a bit more flour if it is too wet. Wrap in cling film and leave in the fridge to chill for an hour if you can (the dough can be left in the fridge for several days so you don’t have to use it all at once. It can also be frozen).

Preheat the oven to 175 C and line a baking tray with greaseproof paper. Roll the dough out on a floured surface. It’s worth trying small amounts of dough at a time and be generous with the flour. It will stick a bit but don’t worry. You want it to be rolled out fairly thin but not too thin – maybe 5mm thick or so.

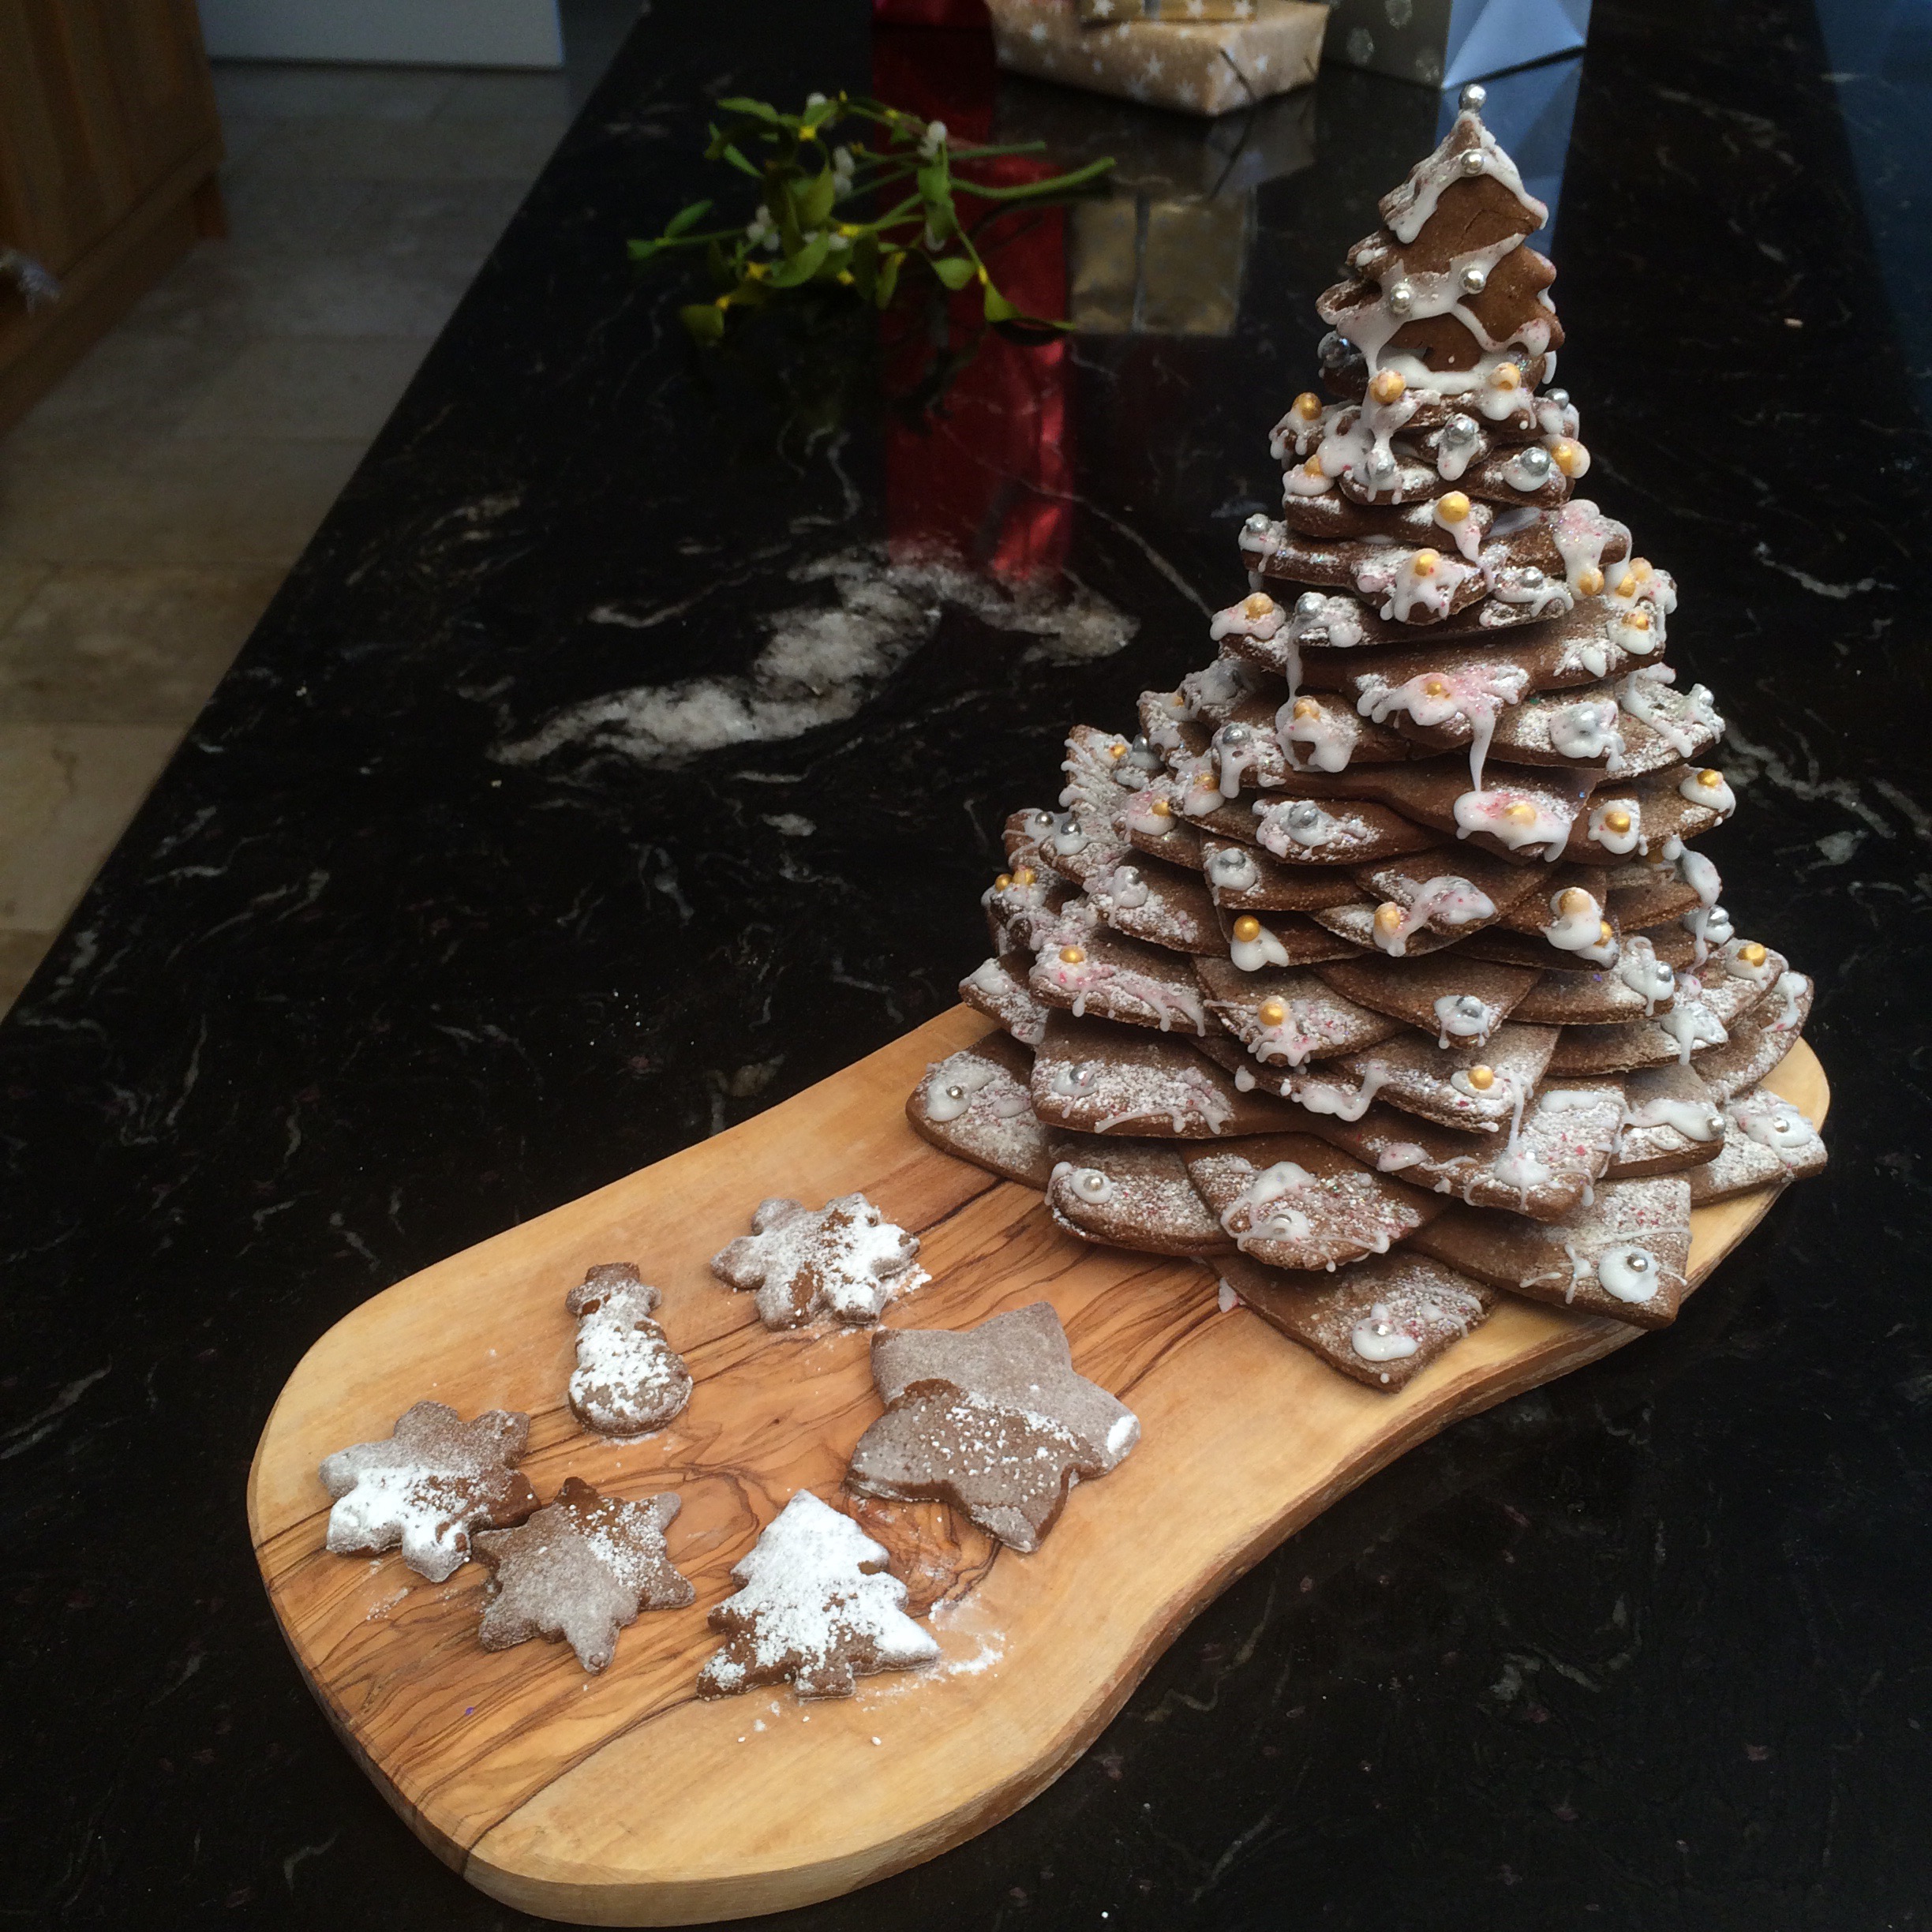
To make the tree you need star cutters of different sizes. If you don’t have them don’t fret. Draw some stars out on a piece of card and use them to draw around πŸ™‚ If you want to make a massive tree then you could use more stars. You want at least 2 or 3 of each sized star. I used two tiny christmas tree shaped cutter for the very top, but you could use another star.

Cut out the biscuits and transfer to the baking tray. Bake for 8 minutes. Then remove from the oven and allow to cool on the tray for 3 minutes before transferring to a wire rack. They will seem soft when they come out the oven but as they cool they harden. If you want super crispy biscuits just pop them back in the oven for another few minutes.

/home/wpcom/public_html/wp-content/blogs.dir/ca7/32324338/files/2014/12/img_3649.jpg

For the icing:

1/2 cup raw icing sugar

1 tsp soya milk (or any non dairy milk)

Mix the icing sugar with the milk until it’s smooth. If the icing is too runny just add more icing sugar until you get the consistency you want. Transfer to a piping bag (if you don’t have one then use a plastic freezer bag and snip the corner off to pipe through).
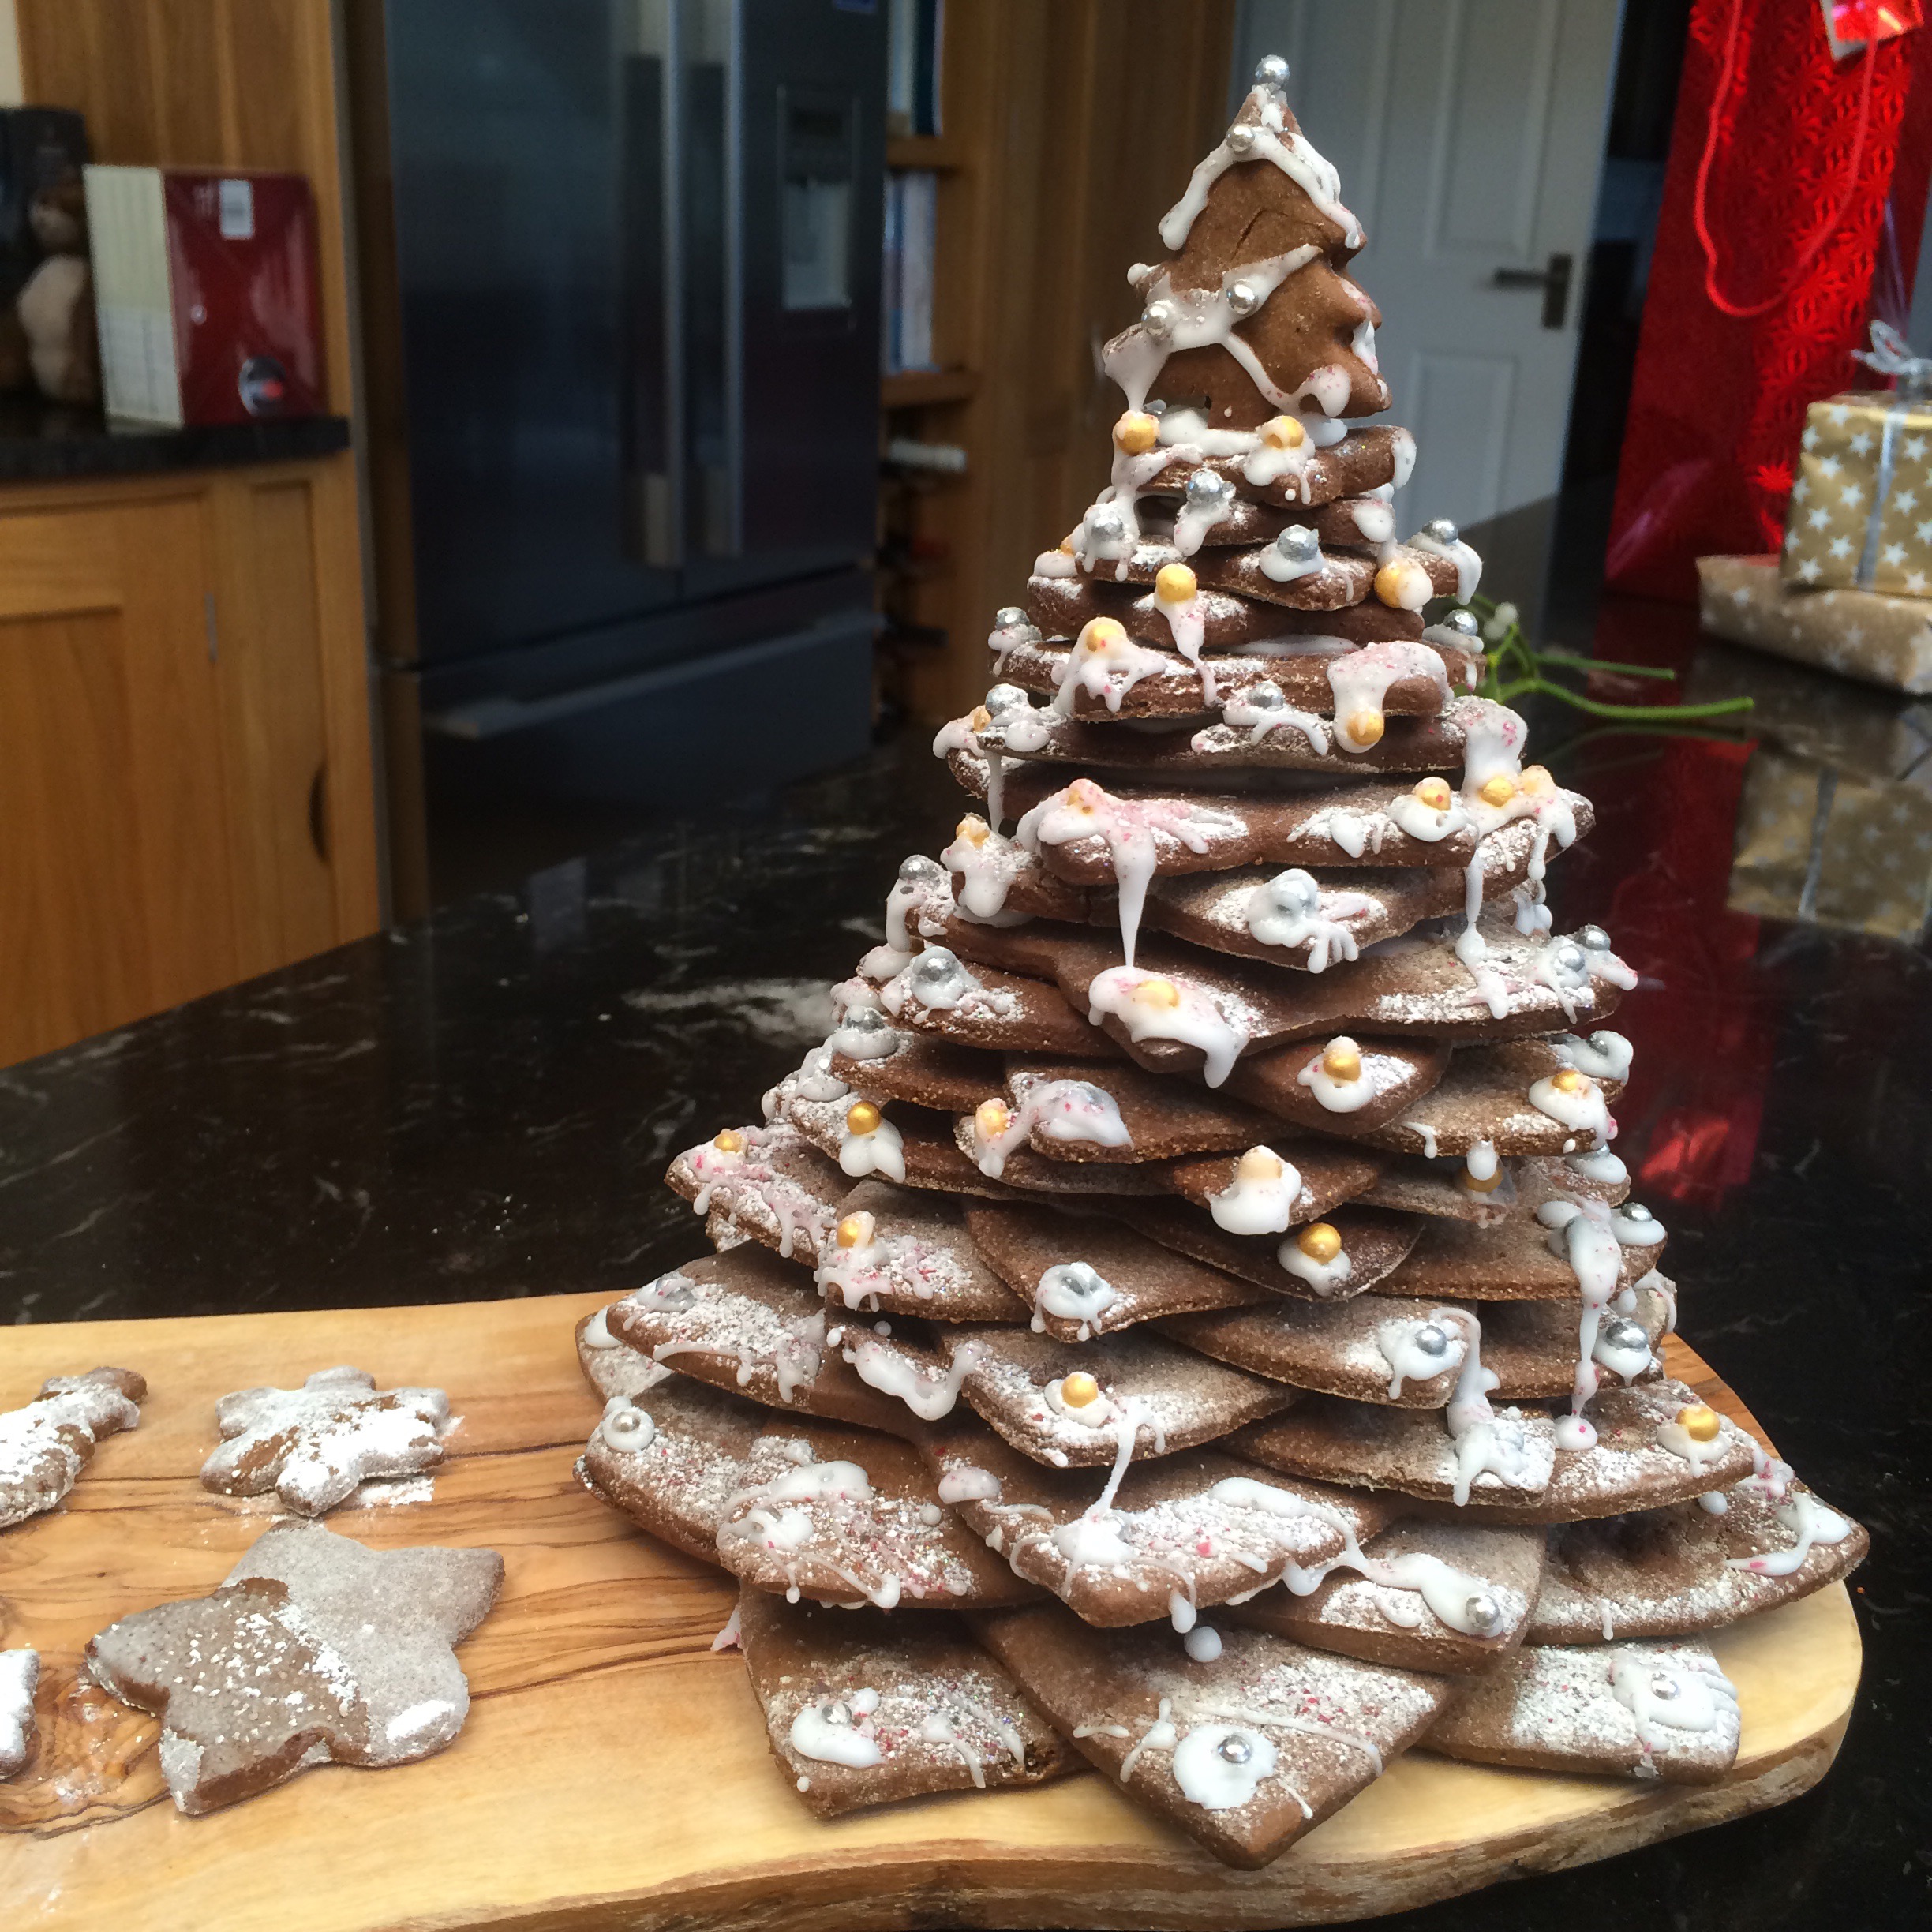
Assemble the tree!

This is the fun bit πŸ™‚

Start with your biggest star and place it on the plate. Add a glob of icing to the centre and stick the next star on top (arranged so the points don’t overlap).  Then add a glob of icing to the top of the uppermost star and stick the next one one… continue, going down in size until you get to the top! I then added a glob of icing and popped two tree shaped biscuits on the top.

/home/wpcom/public_html/wp-content/blogs.dir/ca7/32324338/files/2014/12/img_3650.jpg

Now you can decorate each layer. Pipe icing on to the points of the bottom star and decorate with silver balls, gold balls, edible glitter etc.

/home/wpcom/public_html/wp-content/blogs.dir/ca7/32324338/files/2014/12/img_3651.jpg

Finally dust with icing sugar so it’s all snowy-looking! Then you’re done!

yay! πŸ™‚

/home/wpcom/public_html/wp-content/blogs.dir/ca7/32324338/files/2014/12/img_3655.jpg

/home/wpcom/public_html/wp-content/blogs.dir/ca7/32324338/files/2014/12/img_3652.jpg

Advertisement

Spicy Hallowe’en biscuits


I couldn’t resist whipping up a batch of my favourite biccies for Hallowe’en. These are so super easy! And I had these fun spooky icing eyes I’ve been wanting to use so I just had to make some.

IMG_7614.JPG

The original recipe is here (click here) but I’ll quickly run over it here.

You just need:

2 cups Spelt or gluten-free flour

1 cup unrefined Icing sugar

6oz dairy-free spread

Spices to taste – in this version I used

1 tsp cinnamon

1/4 tsp ground cloves

Pinch nutmeg

Preheat oven to 180 C. Mix the flour, icing sugar and spices together and then cream the spread in. Mix well until it forms a dough but try not to over mix. Pop in the fridge to chill for as long as you can wait! Then remove, sprinkle a little flour down on a clean surface and roll out to your desired thickness. Use biscuits cutters to cut in to shapes and then pop in the oven for 5 – 7 mins or until golden brown. Do keep an eye on them – especially if they’re thin!

Allow them to cool and then if you want to you can ice them – just mix icing sugar with a little water or non-dairy milk and then have some fun!

Enjoy Hallowe’en!

IMG_7644.JPG

Gingerdead men! Quick and Easy Spooky Biccies!


Happy Hallowe’en!

photo 1

I couldn’t resist whipping up a few little Hallowe’en biccies today!

photo 4 (3)

It’s been a bit of a challenge as my oven is broken (yes, broken – an absolute disaster!) but luckily I was able to get the little mini part of the oven working so can bake really really tiny batches of things! Phew!

So these are so easy and so fun! You can choose to keep them plain or add some spices. I have also iced them with a cinnamon icing but you could keep the icing plain or add any flavour you want. I had such fun finding some cool little hallowe’en cutters but obviously you could just use any shapes! For the gingerdead man I used a normal gingerbread man cutter and then iced on the bones.

photo 1 (2)

You will need:

2 cups of Spelt flour (or gluten free flour mix)

1 cup unrefined Icing sugar

6 oz Dairy free margarine

Optional: 2 tsp ground Ginger or 2 tsp ground Cinnamon

For the icing:

1 cup unrefined Icing sugar

1 tbsp Soya, almond or coconut milk

Optional: 1 tsp ground Cinnamon

Preheat the oven to 180 C. Put the margarine in a large mixing bowl, sieve the flour, icing sugar and spices (if using) and cream it together using your hands. Try not to over mix but make sure the margarine is properly mixed with the dry ingredients. Β Once it’s formed a dough wrap in cling film and chill for 30 mins. If you find the dough is too sticky then add some more flour.

Once chilled, roll out and use biscuit cutters to cut out the shapes of your choice. Use a palate knife to transfer them carefully to a greased baking tray. Sprinkle with a little raw sugar if you like and bake for 8 – 10 mins, or until golden. Remove from the oven and allow to cool on the tray.

photo 4

Mix the icing ingredients together and then pipe the icing on to the biccies. Enjoy!

These won’t last long!

photo 5 (2)


Ninjabread men! Chocolate, cherry and ginger dairy free biscuits


Gosh it’s been a long time since i’ve had time to bake – sorry! Real life has got in the way (in good and bad ways!), but oh how i’ve missed it!

20130709-202434.jpg

Thankfully I had an excuse to bake again πŸ™‚ yippee! I wanted to make something yummy to celebrate (or rather commiserate) the last body combat class with a very special friend of mine. What better way to mark the occasion than by baking some funky little Ninjabread men! I used ginger, dark chocolate and dried cherries in mine but you could flavour the biscuits any way you like πŸ™‚

For the biscuits you need:

2 cups Spelt flour or gluten-free flour mix

1 cups Unrefined Icing sugar

6 oz Dairy-free margarine (get the best quality you can)

2 tsp ground Ginger

handful of chopped dried Cherries

handful of dairy free chocolate (I used Willie’s chef’s drops)

Ninja cutters (available online) or just use normal ginger bread man cutters πŸ™‚

Pre-heat the oven to 180 C. Put the margarine in a large mixing bowl, sieve the flour, icing sugar and ground ginger in and cream it together. Try not to over mix but make sure the margarine is properly mixed with the dry ingredients. Add the cherries and chocolate and combine well. Once it’s formed a dough wrap in cling film and chill for 30 mins. If you find the dough is too sticky then add some more flour.

Once chilled, roll out and use the biscuit cutter to cut out your little ninjas. Use a palate knife to transfer them carefully to a greased baking tray. Sprinkle with a little raw sugar if you like and bake for 8 – 10 mins, or until golden. Remove from the oven and allow to cool on the tray.

20130709-202620.jpg

Decoration

Once the biscuits are cool you can have some fun! I used a variety of ninja designs. For the dark icing you can get black food colouring or use melted dark chocolate. Unleash your best ninja using skills!! πŸ™‚

20130709-201914.jpg

20130709-201957.jpg

20130709-202032.jpg

Dad’s Ginger Cake (dairy-free, low-gluten)


Nine years ago today my dad passed away. There isn’t a day that goes by when I don’t think about him, miss him and wish he was still here.Β  It may seem a little odd but I like to do something “nice” to remember him on this day and since baking is something I love (and the results are something he loved!) I baked a ginger cake this weekend in his honour! Ginger cake was one of his favourites, though being a bit odd πŸ˜‰Β  whenever he was offered a sliceΒ  he would usually tell us he couldn’t possibly have it then and that he’d save it and have it for breakfast.. and he did! πŸ™‚ We always used to take the mickey out of him for it and it still makes me chuckle to think about it. This cake is sticky and gooey and just gets better the longer you leave it in the tin (IF you can leave it alone that is!)

So, Dad, this cake’s for you! I’m sure you’d love it πŸ™‚

1/2 cup Almond oil
1 cup Coconut sugar / unrefined raw sugar
1/2 cup Molasses
1/2 tsp Salt
1/2 tsp Cinnamon
1/2 tsp Nutmeg
2 cups Spelt flour or gluten free flour mix
1 tsp Baking powder
1 tsp ground Ginger
1 tsp Bicarbonate of soda
2/3 cup boiling Water
6 tbsp pureed Apple
1/4 – 1/2 cup Crystallised ginger

Preheat the oven to 170 C and line a small cake tin with greaseproof paper (I used a square brownie tray approx 8 inch square).

Mix the sugar and oil together in a large bowl. Add the molasses, salt, cinnamon and nutmeg in to the mix and stir well. Sieve the flour with the baking powder and ginger into a large bowl and leave to one side. Put the bicarbonate of soda into a wet measuring cup and add the boiling water then immediately pour the mixture into the sugar/oil/molasses mix and stir to combine. Add the flour gradually and stir well until there are no lumps.
Add the apple and mix well. Finally stir in the crystallised ginger. Pour the batter into the tin and bake for 40 minutes. Allow the cake to cool for 10 minutes then turn out on to a wire rack to cool. Then enjoy!