It’s mince pie time again! whoop! It’s so hard to find plant-based, dairy and gluten free mince pies that don’t taste like cardboard so I decided to make my own and boy are they good! I could eat these by the dozen… and in fact I do!
This recipe has been posted here before but has recently been featured over at Pure Form Fitness Kitchen so I thought I’d repost for you 🙂
and here’s a little video of me making them too :

For the Pastry:
4 oz Buckwheat flour
2 oz ground Almonds
5 tbsp Agave nectar
Up to 6 tbsp Water
For the Mincemeat:
3 oz Bramley apples, cored and finely chopped
6 oz Mixed dried fruit (I prefer raisins, currants, cranberries and apricots)
1 oz Vegetable suet
2 oz Raw sugar (coconut palm or dark raw muscovado)
Juice and grated zest of half an Orange
1 level tsp of ground allspice
1 pinch ground Cinnamon
1 pinch ground Cloves
1 pinch grated / ground Nutmeg
1 small handful chopped Almonds
1 tbsp Date syrup
Make the pastry first. Put the buckwheat flour and ground almonds in a processor and add the agave. Pulse and gradually add the water until it forms a dough. You may find you need more or less water. If it is too wet add a little more flour. Once it is forming a firm dough remove, wrap in cling-film and place the mixture in the fridge. You can do this by hand if you prefer – just ensure you mix the flour and almonds thoroughly.
Put all the ingredients for the mincemeat into a saucepan. Cook on a low heat, stirring frequently. Cook until the apple is soft and the mixture is thick – it may take some time. Remove from the heat and allow to cool.
Preheat the oven to 180 C/ gas mark 6.
Lightly oil a mini muffin tin with almond, coconut or hazelnut oil. Remove pastry from the fridge and roll out on a lightly floured surface. Roll it as thin as you can – a few mm. Use a round biscuit cutter to cut out the bases. Place them in the tin. Place in an oven to blind bake for 5–10 mins. Keep an eye on them – this pastry browns quite fast. Once the edges are brown and the middle is firm remove them. While the cases are in the oven take a smaller star shaped (or any shaped) biscuit cutter to cut out the “lids”.

Roll and cut out the pastry cases and lids
Place a generous helping of mincemeat in each of the cases and place your chosen “lid” on top. Lightly oil and sprinkle with a little cinnamon and raw sugar.
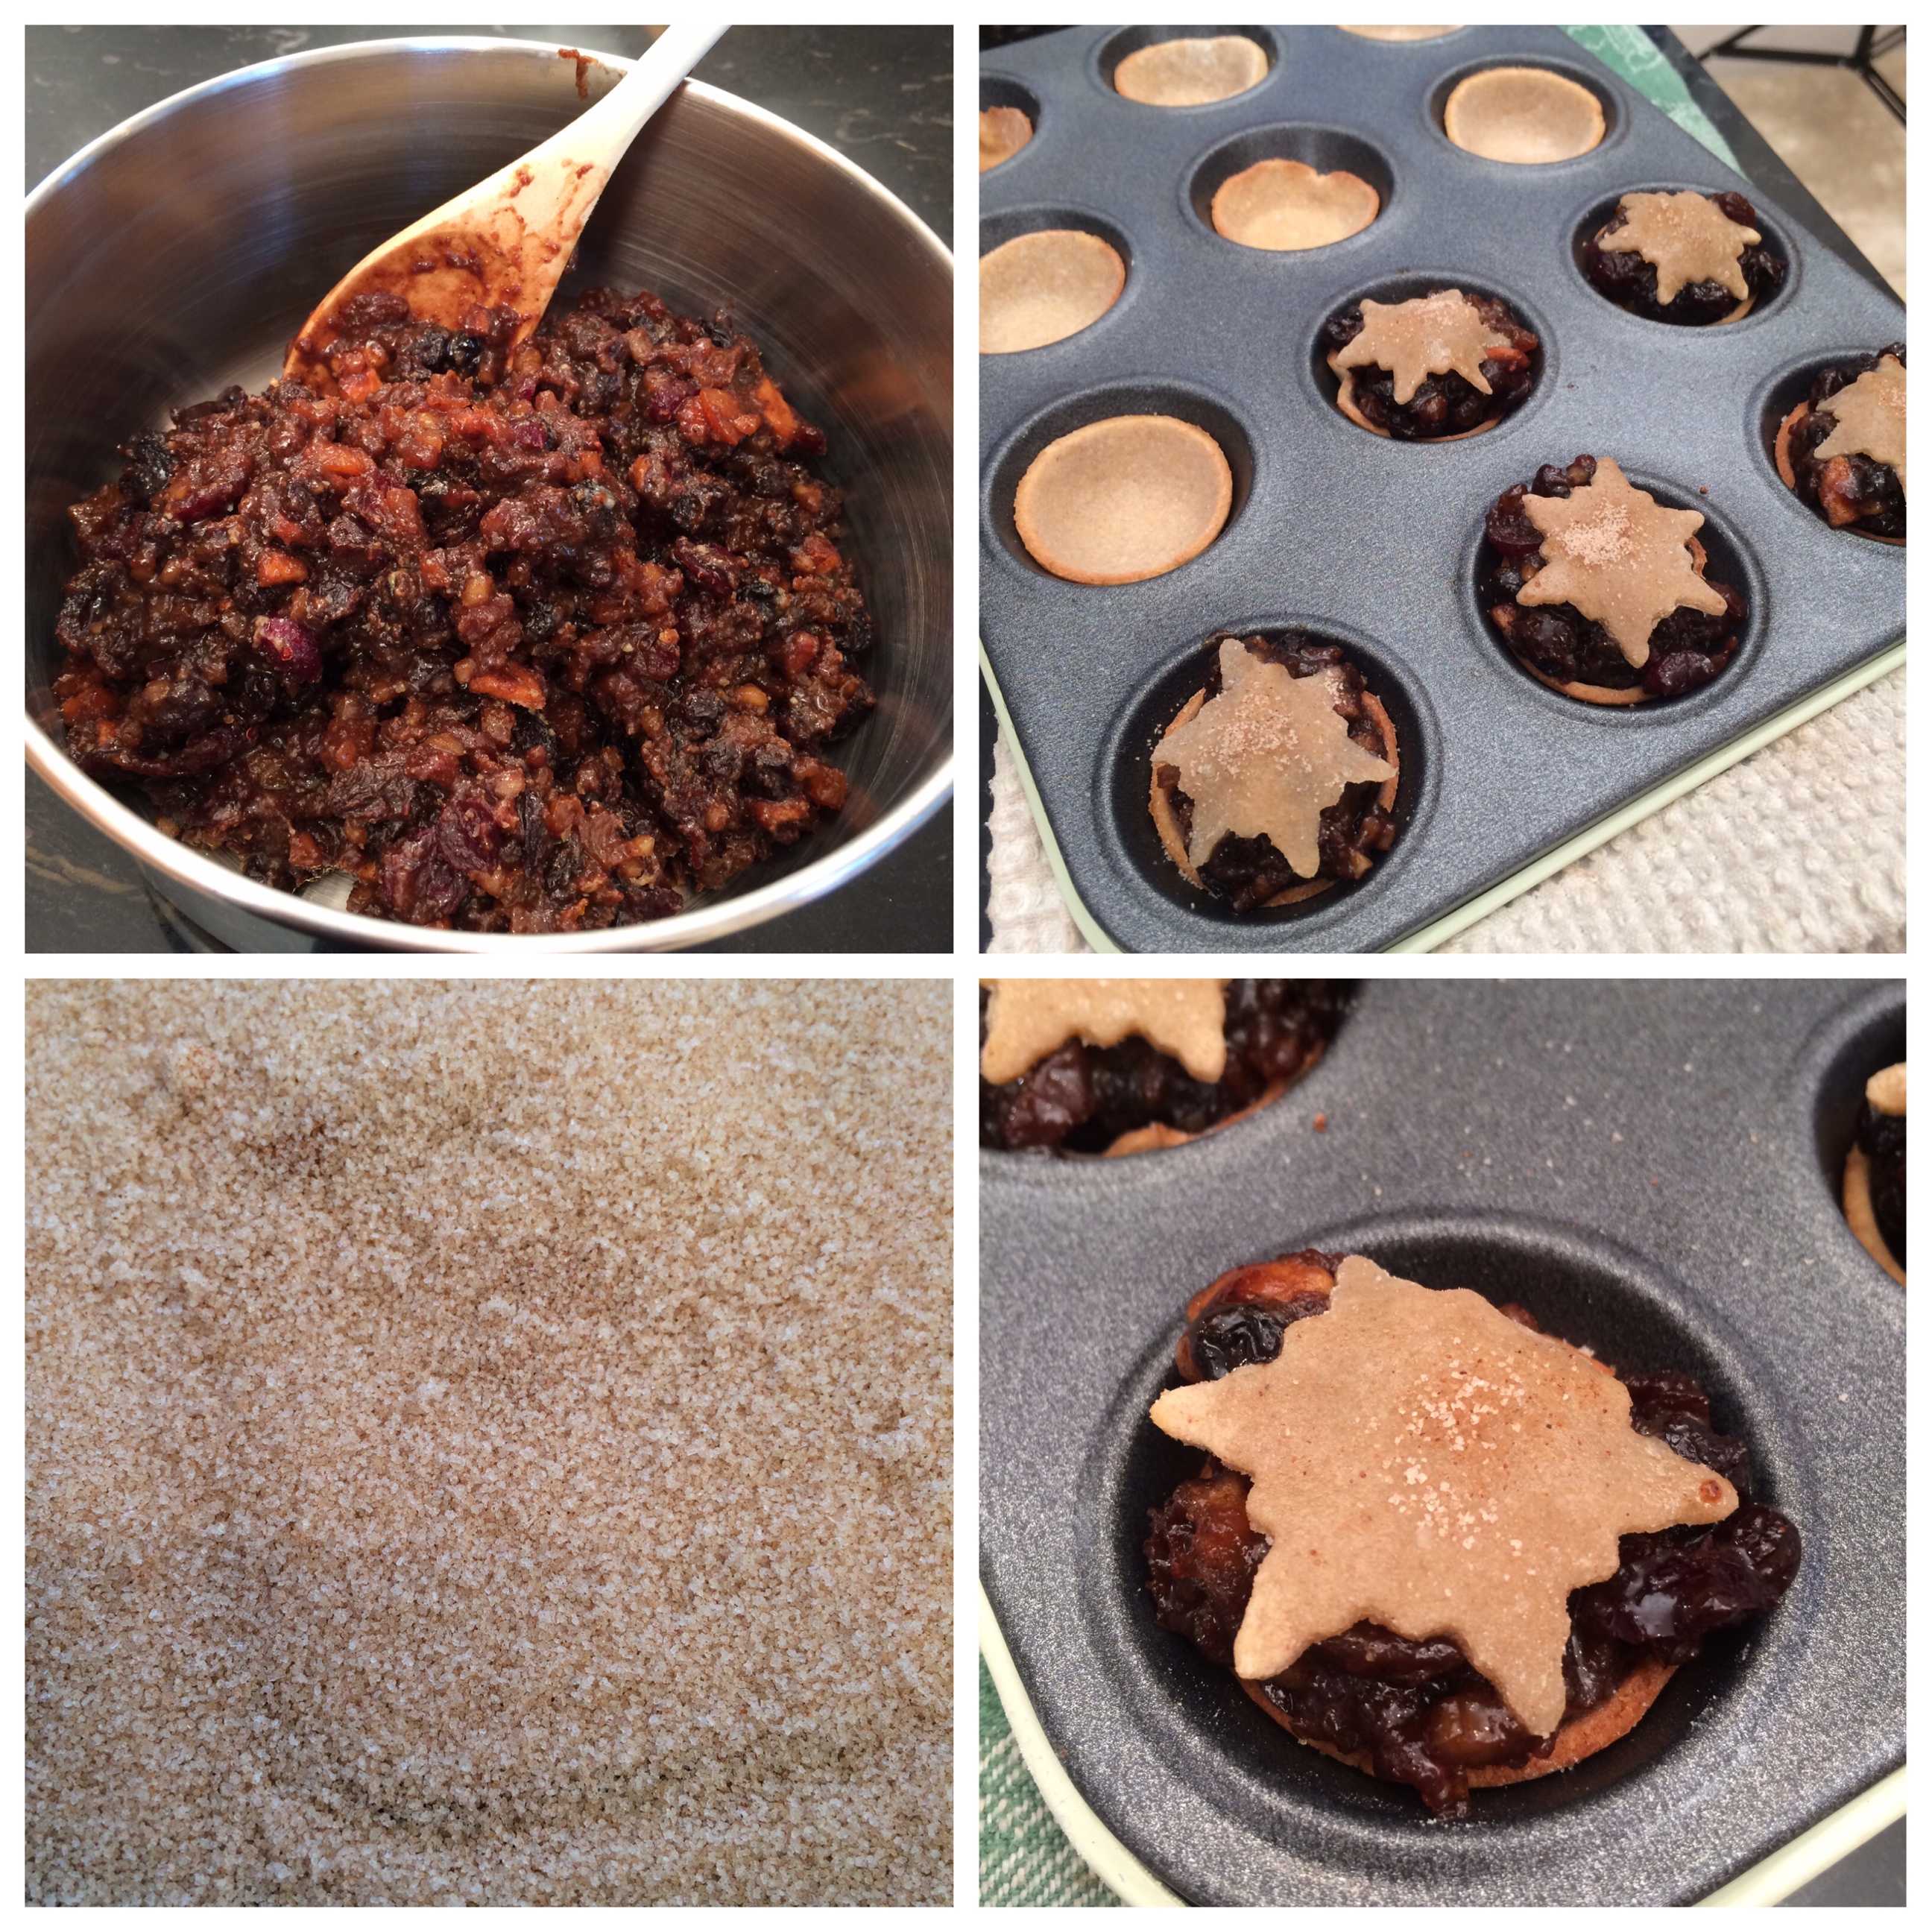
Fill the cases and add the lids
Place the pies back in the oven and bake until golden (5 – 7 mins but check regularly). Keep a careful eye on them. You want the tops to brown but be careful the bases don’t burn. Remove from the oven and leave to cool for 5 mins, then remove and place on a wire cooling rack.

Enjoy!