I’m trying to usher in summer with my second batch of summer fruit compote!
Mixed berries – this one has strawberries, blackberries, raspberries, red currants and black currants and nothing else! Beautiful! 🙂


I’m trying to usher in summer with my second batch of summer fruit compote!
Mixed berries – this one has strawberries, blackberries, raspberries, red currants and black currants and nothing else! Beautiful! 🙂
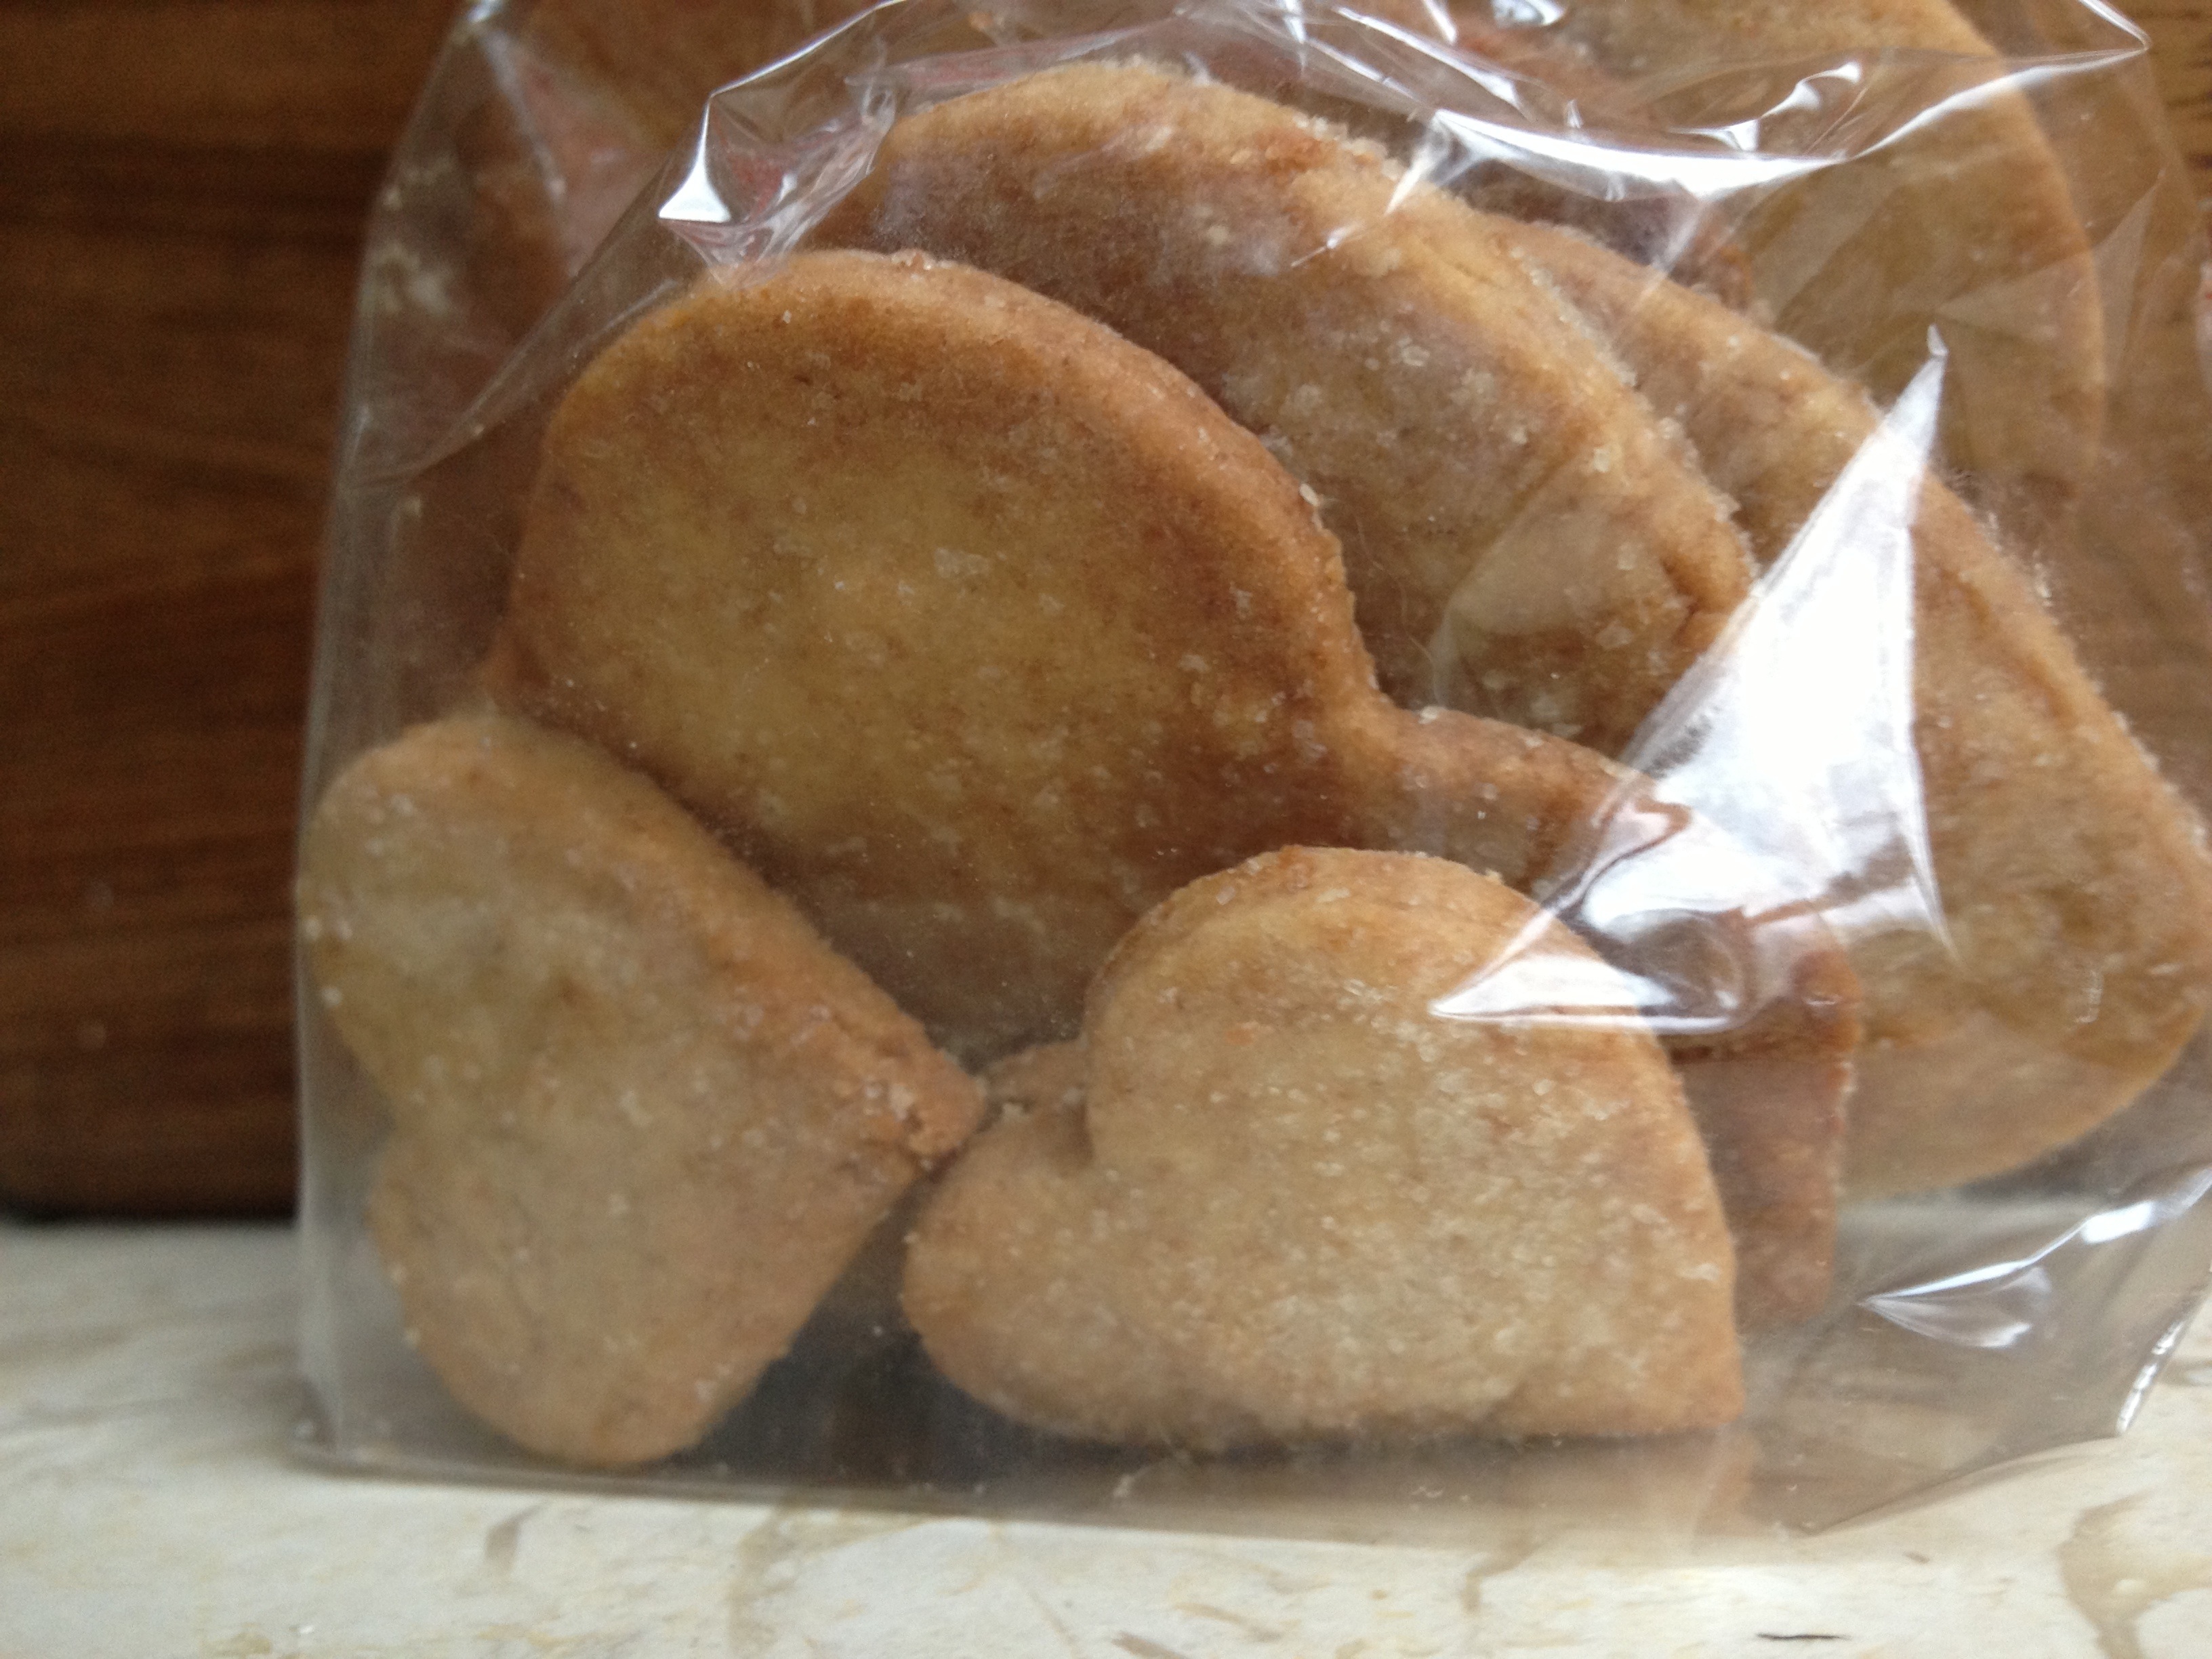
I couldn’t let the day pass without whipping up some tasty treats! These are fun spicy Easter and spring biccies that are great fun to make, and eat! Perfect holiday activity for the kids too!

The icing is flavoured with either lemon, fresh raspberry or fresh blueberries.
For the biscuits you need:
2 cups gluten free or spelt flour
1 cup raw Icing sugar
6 oz Dairy free spread
2 tsp Cinnamon
1/2 tsp Nutmeg
1/2 tsp Cloves
For decoration:
Raw coconut palm sugar
Cinnamon and chilli sugar (see here)
Currants
Raw Icing sugar
Lemon juice, raspberries and blueberries
Sugar balls etc
Preheat the oven to 175 C. Mix all the biscuit ingredients together in a bowl – ensuring the spread is well combined with the flour an sugar. Once it forms a dough pop it in the fridge for 30 mins if you have time. Remove and roll out. Use whatever shaped cutters you like to it your biscuit shapes and transfer to a baking tray.
If you are using currants for bunny eyes and noses then add those now. Sprinkle with raw coconut sugar and cinnamon and chilli sugar. Place in the oven and cook for 8 – 12 mins or until golden. Remove and allow to cool on a wire rack.
Once cool you can ice the biscuits. Mix up your icing powder with lemon juice or fresh raspberries or blueberries and then spread on the biscuits. Add sugar decorations if you like. Allow to set and then eat!


A little bit of Easter fun… Strawberry mice! Happy Easter everyone 🙂

I thought I’d mix things up a bit with a modified version of my yummy chunky cherry loaves. These have a delicious hit of chilli and a sneaky bit of cinnamon too. I happened to get a new mini mini loaf tin so made some chunky chilli chocolate cherry fingers as well as loaves!
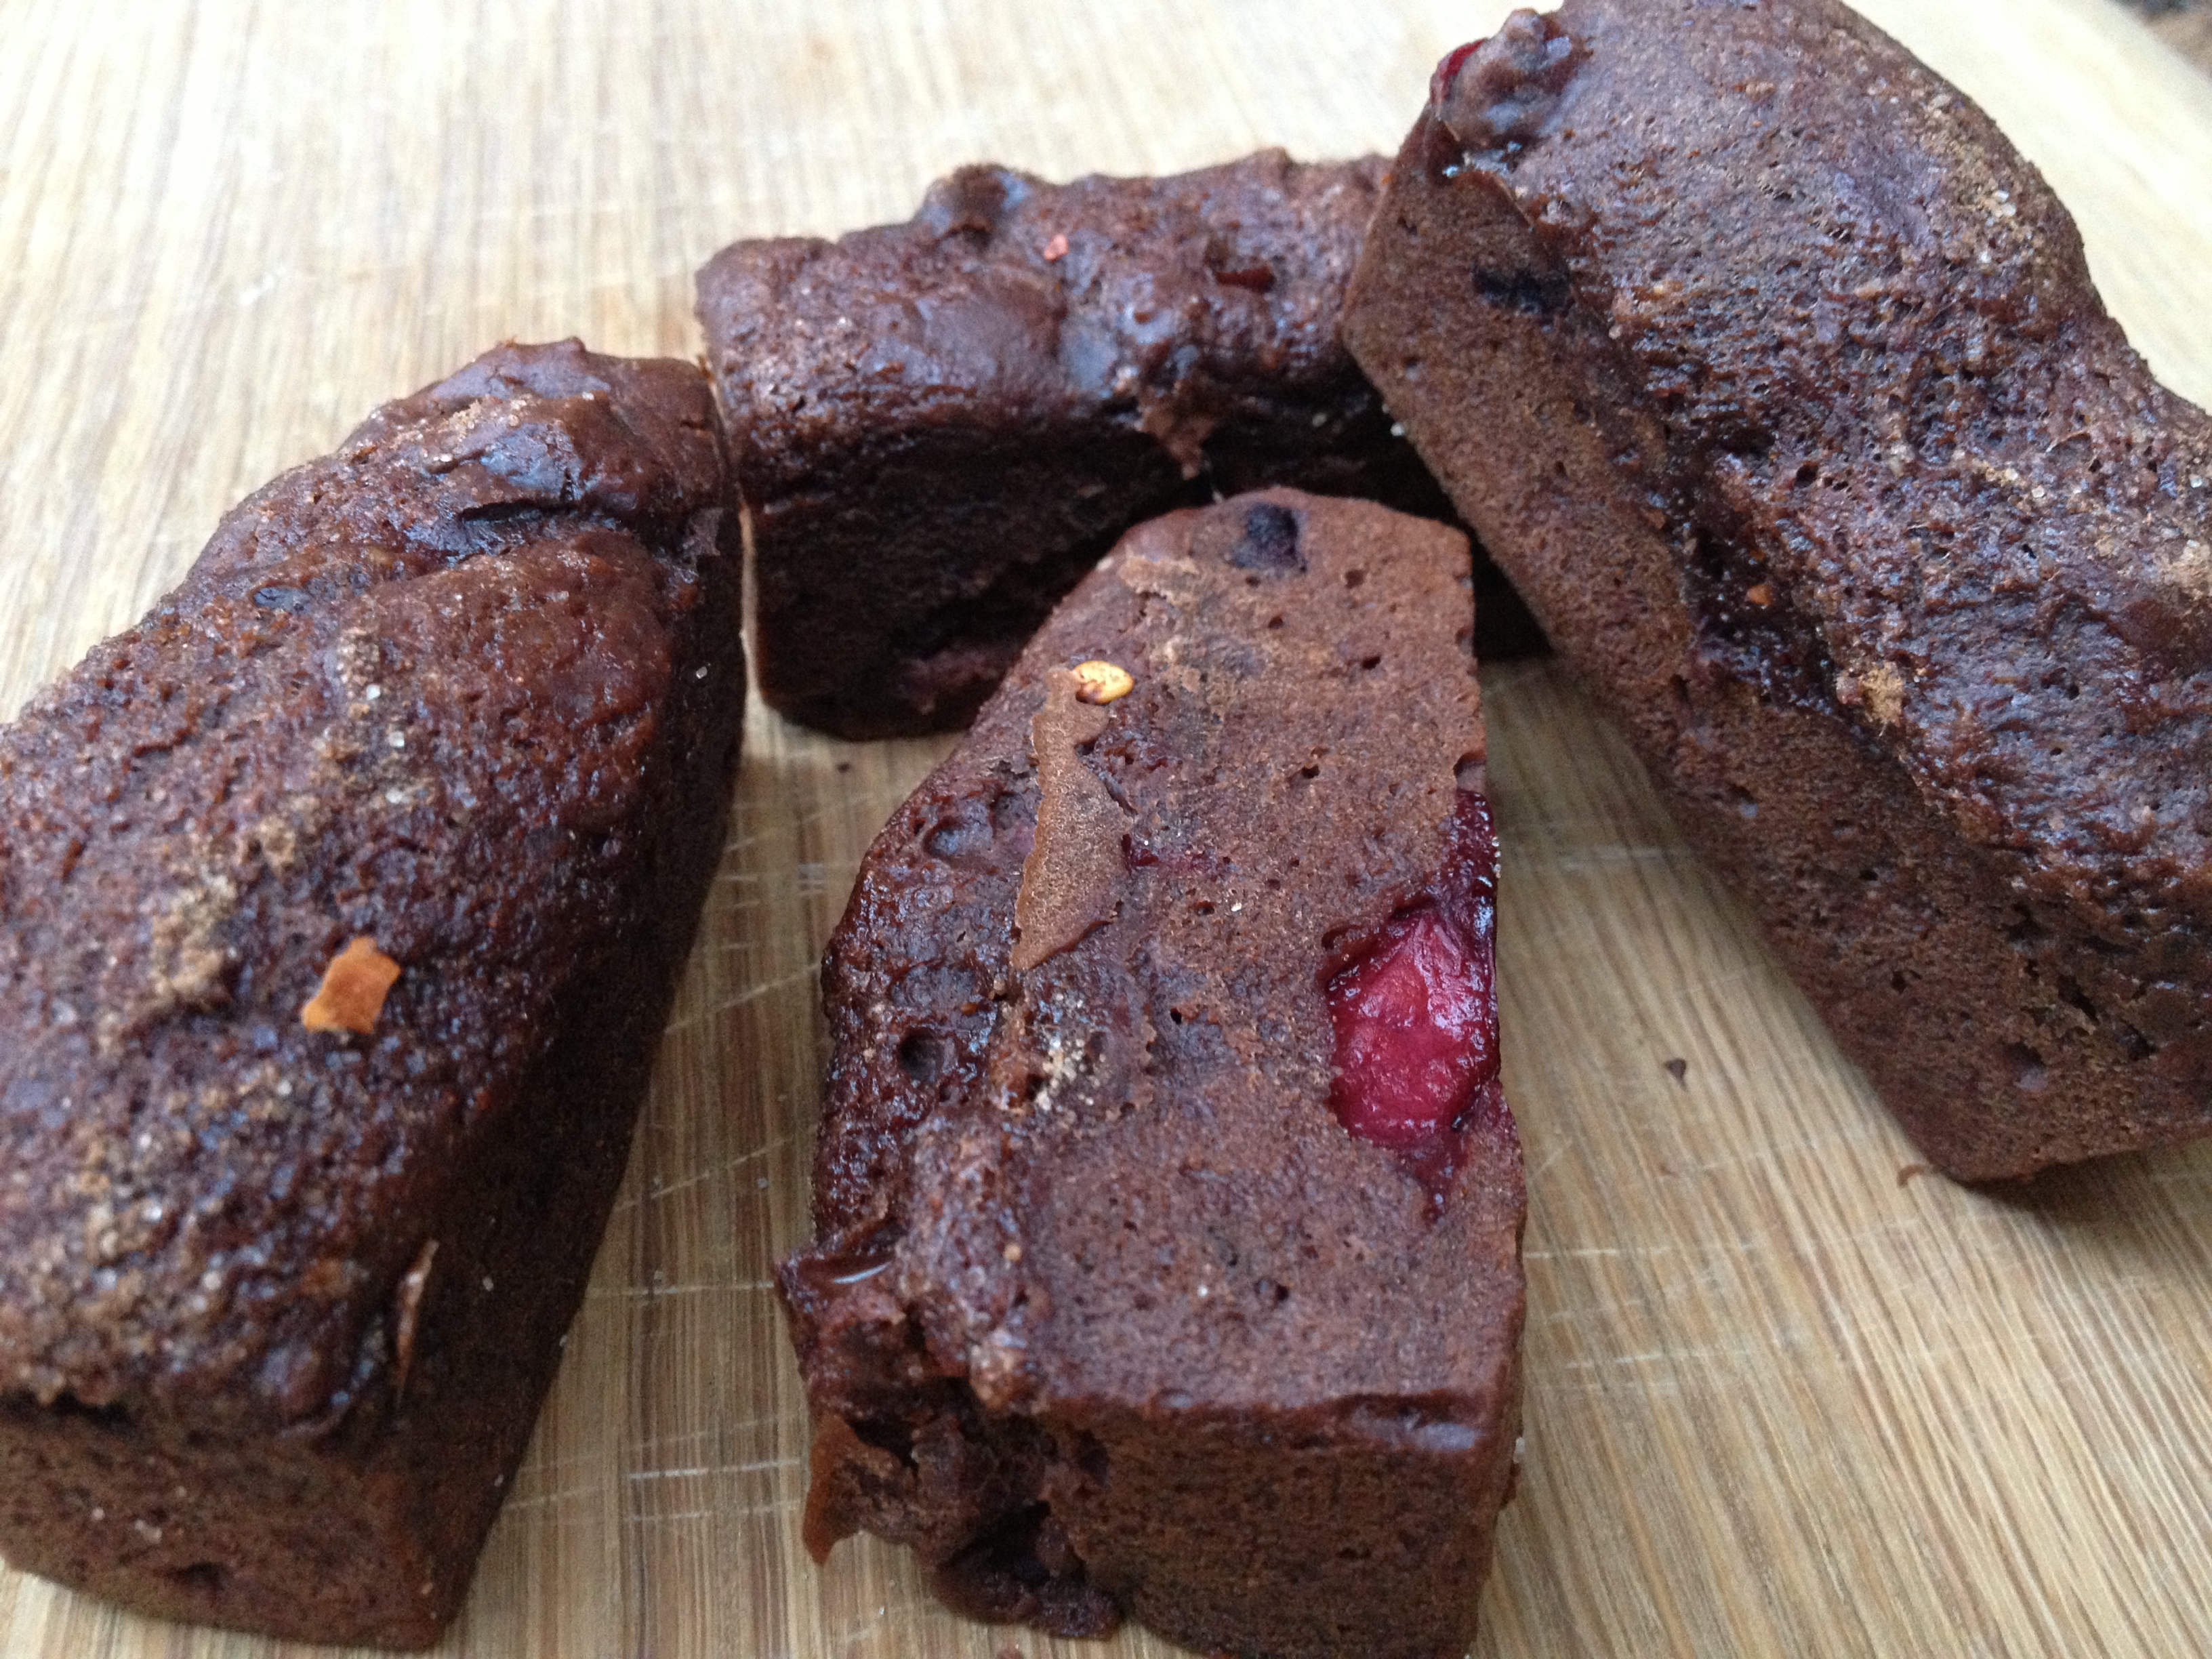
I used some chilli and chocolate infused sugar for this recipe. You can buy this ready mixed or you could easily make it yourself – it’s simply a mix of sugar, cocoa powder, chilli powder and cinnamon. Mix 100g sugar with 10g of cocoa powder, 2 tsp cinnamon and 1 tsp chilli powder (or more if you want it hotter!). Adjust the amounts depending how much you need but keep them in those ratios 🙂
For the loaves/fingers you will need:
1/2 cup Apple puree
1/4 cup Almond butter
1/3 cup Cocoa powder
1/3 cup Almond milk/soya milk/any non-dairy milk
1/3 cup + 2 tbsp boiling water
3/4 cup Chilli and chocolate infused sugar (plus extra to sprinkle on the top)
1 tsp Vanilla extract
1 tsp Chocolate extract (if you don’t have this then use another tsp vanilla extract)
1/8 tsp Almond extract
1 1/2 cups Gluten-free flour mix (or spelt flour if you’re not worried about gluten-free)
3/4 tsp Bicarbonate soda
3/4 tsp Himalayan rock salt
1 tsp chilli flakes (adjust to taste)
4 oz Chocolate chopped into chunks (I used Willie’s chocolate for this)
1 cup chopped Sweet cherries

Preheat oven to 175 C and boil the kettle (no, not for tea – though that wouldn’t hurt!).
Put the apple, almond butter, milk and cocoa powder in a mixing bowl. Add 1/3 cup boiling water and mix quickly with a fork to make a thick chocolate sauce. Add the sugar and extracts and mix well. Sieve half the flour, bicarbonate soda and salt into the mix and mix gently. Add 1 tbsp boiling water and mix again. Add the rest of the flour mixture and another tbsp boiling water and stir until smooth. Go gently – don’t over mix. Add the chilli flakes and adjust to taste – if you want it with a bit more of a hit add more! Finally add the chocolate chunks and cherries and fold in to the mixture.
Pour into the tins (this recipe will give approx 8 – 9 tins) or if you have a mini mini loaf/finger tin then use that. Put in the oven for 10 – 25 mins (if making fingers you will need to start checking them after 10 mins as they’re so much smaller).
Check they’re done by sticking a skewer in the centre, if it comes out clean they’re done (bear in mind you may hit a cherry or chocolate when you do this so you’re looking for a lack of cake dough on the skewer – chocolate or cherry juice is fine!). Allow to cool in the tins for 10 mins then take out of the tins and cool on a wire rack. They really need to be eaten warm so the chocolate is all melty! ![]() Yum Yum Yum!
Yum Yum Yum! ![]()

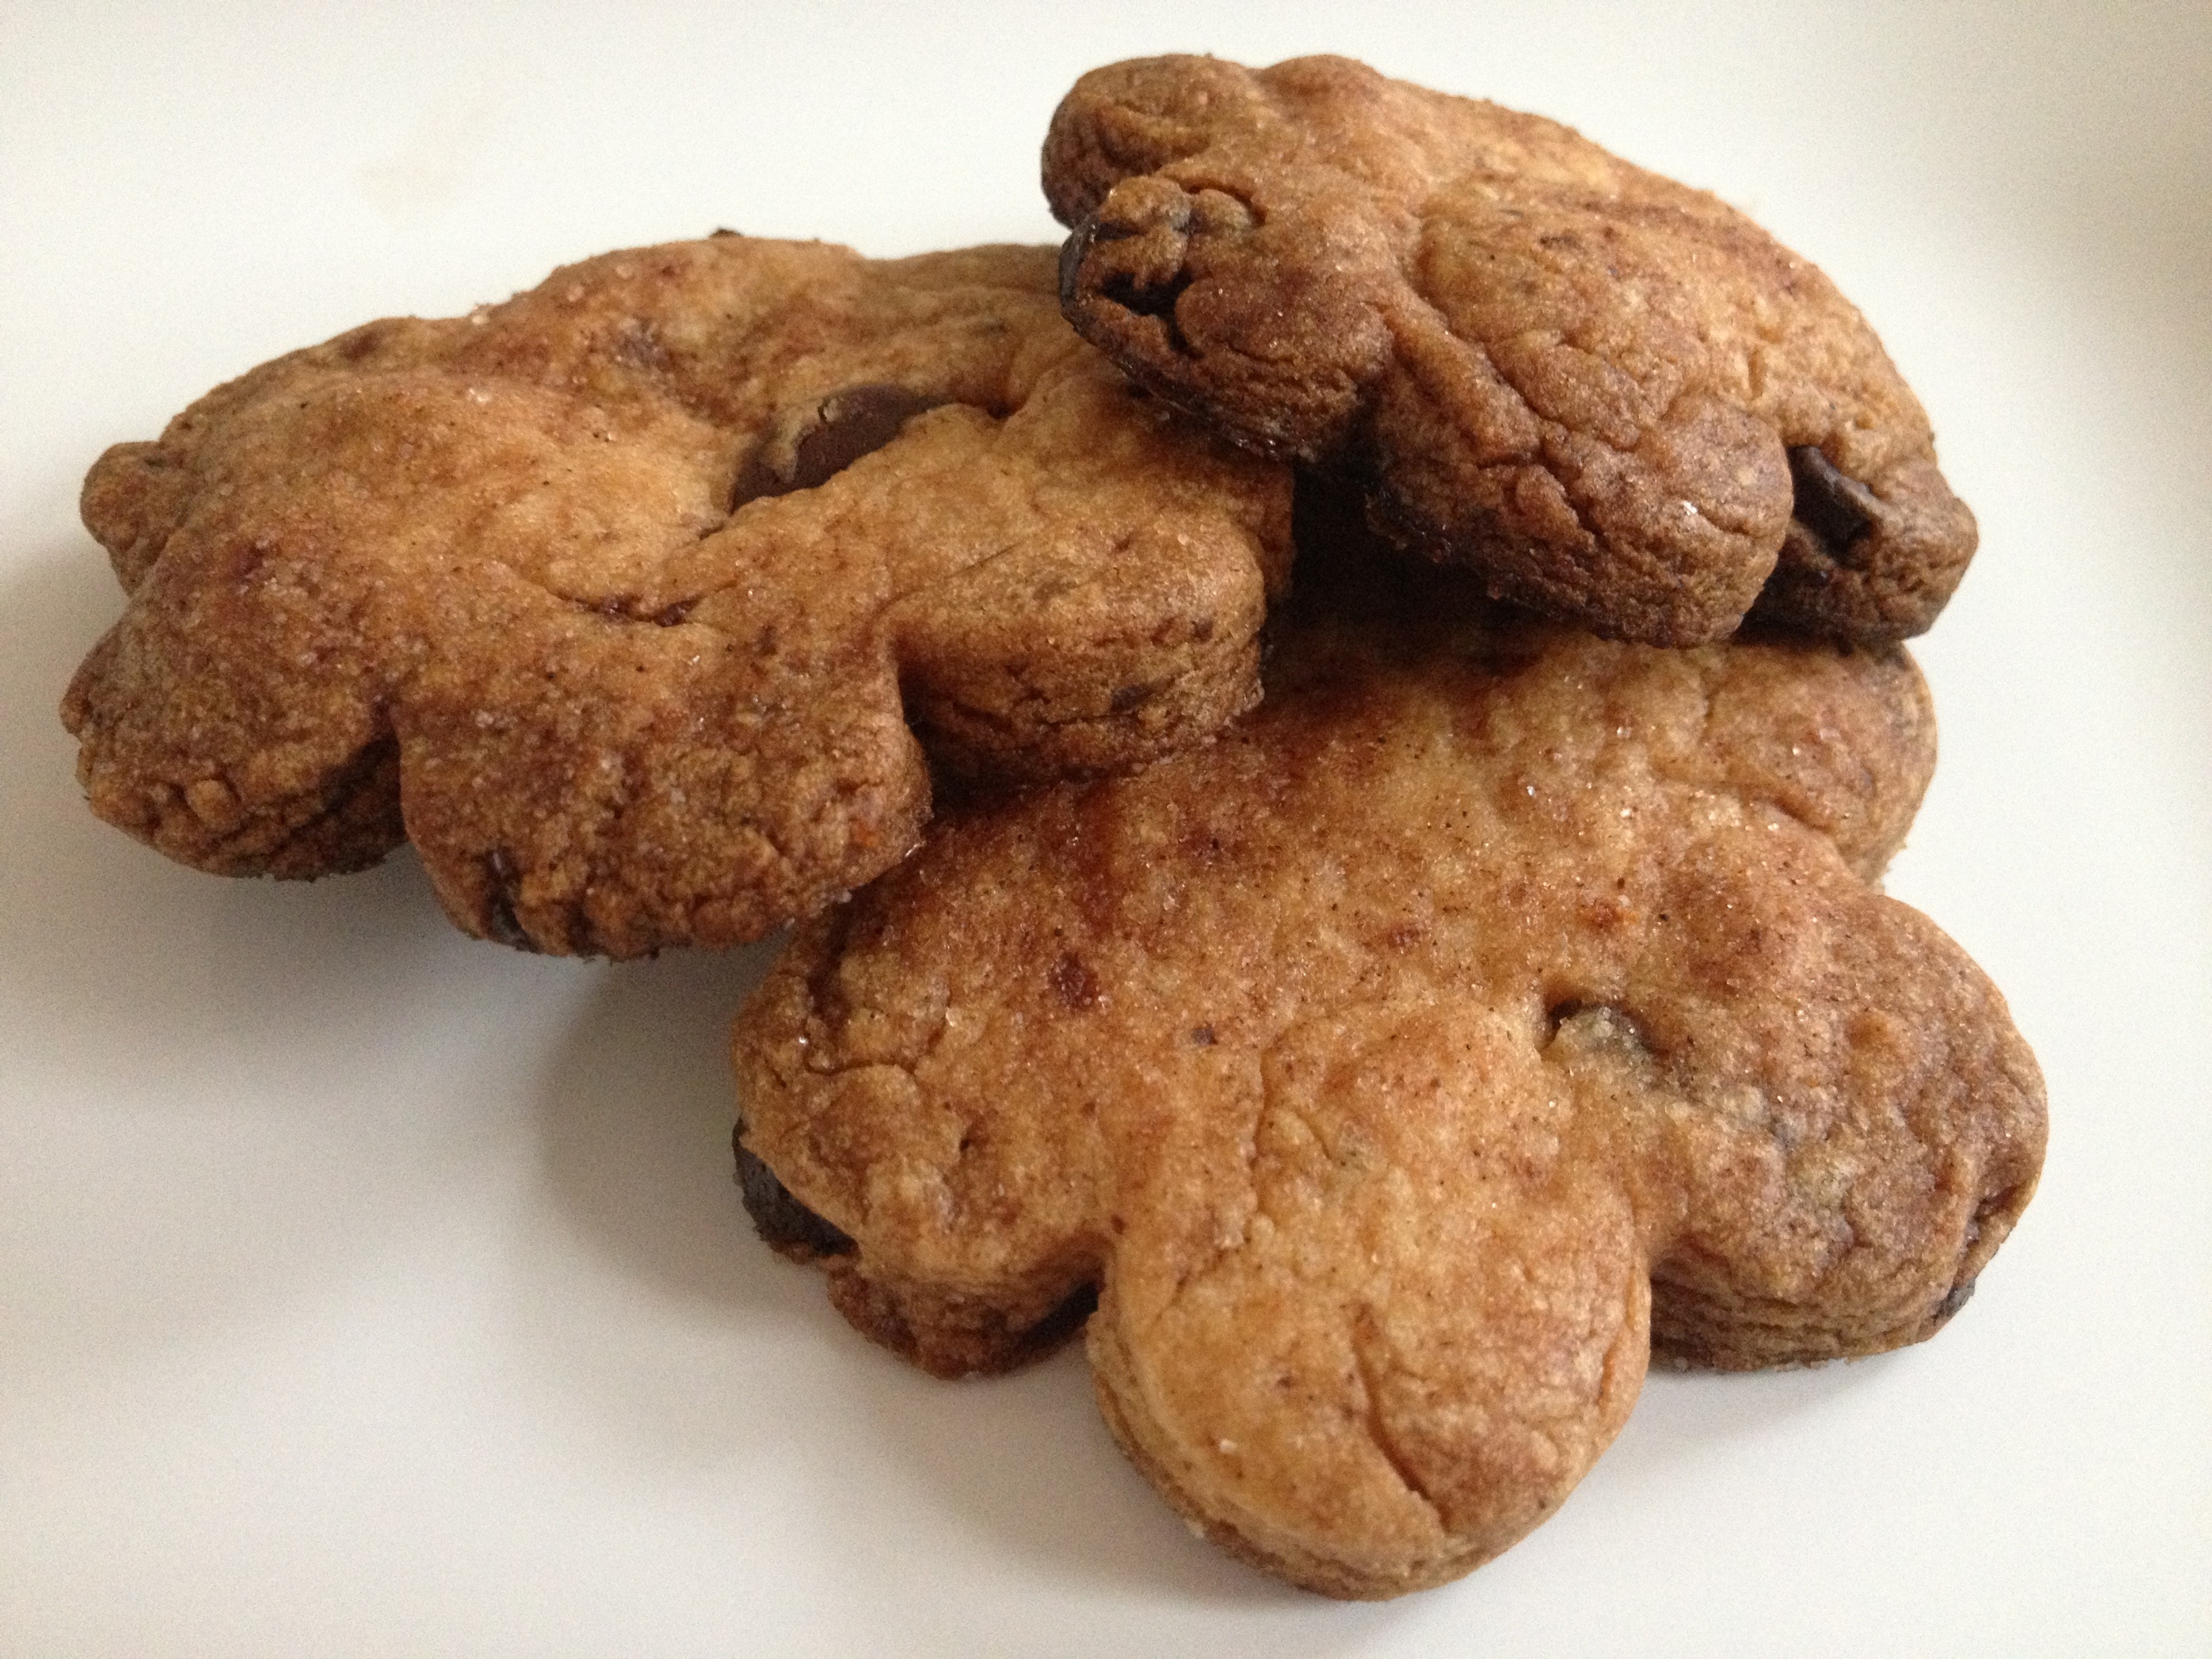
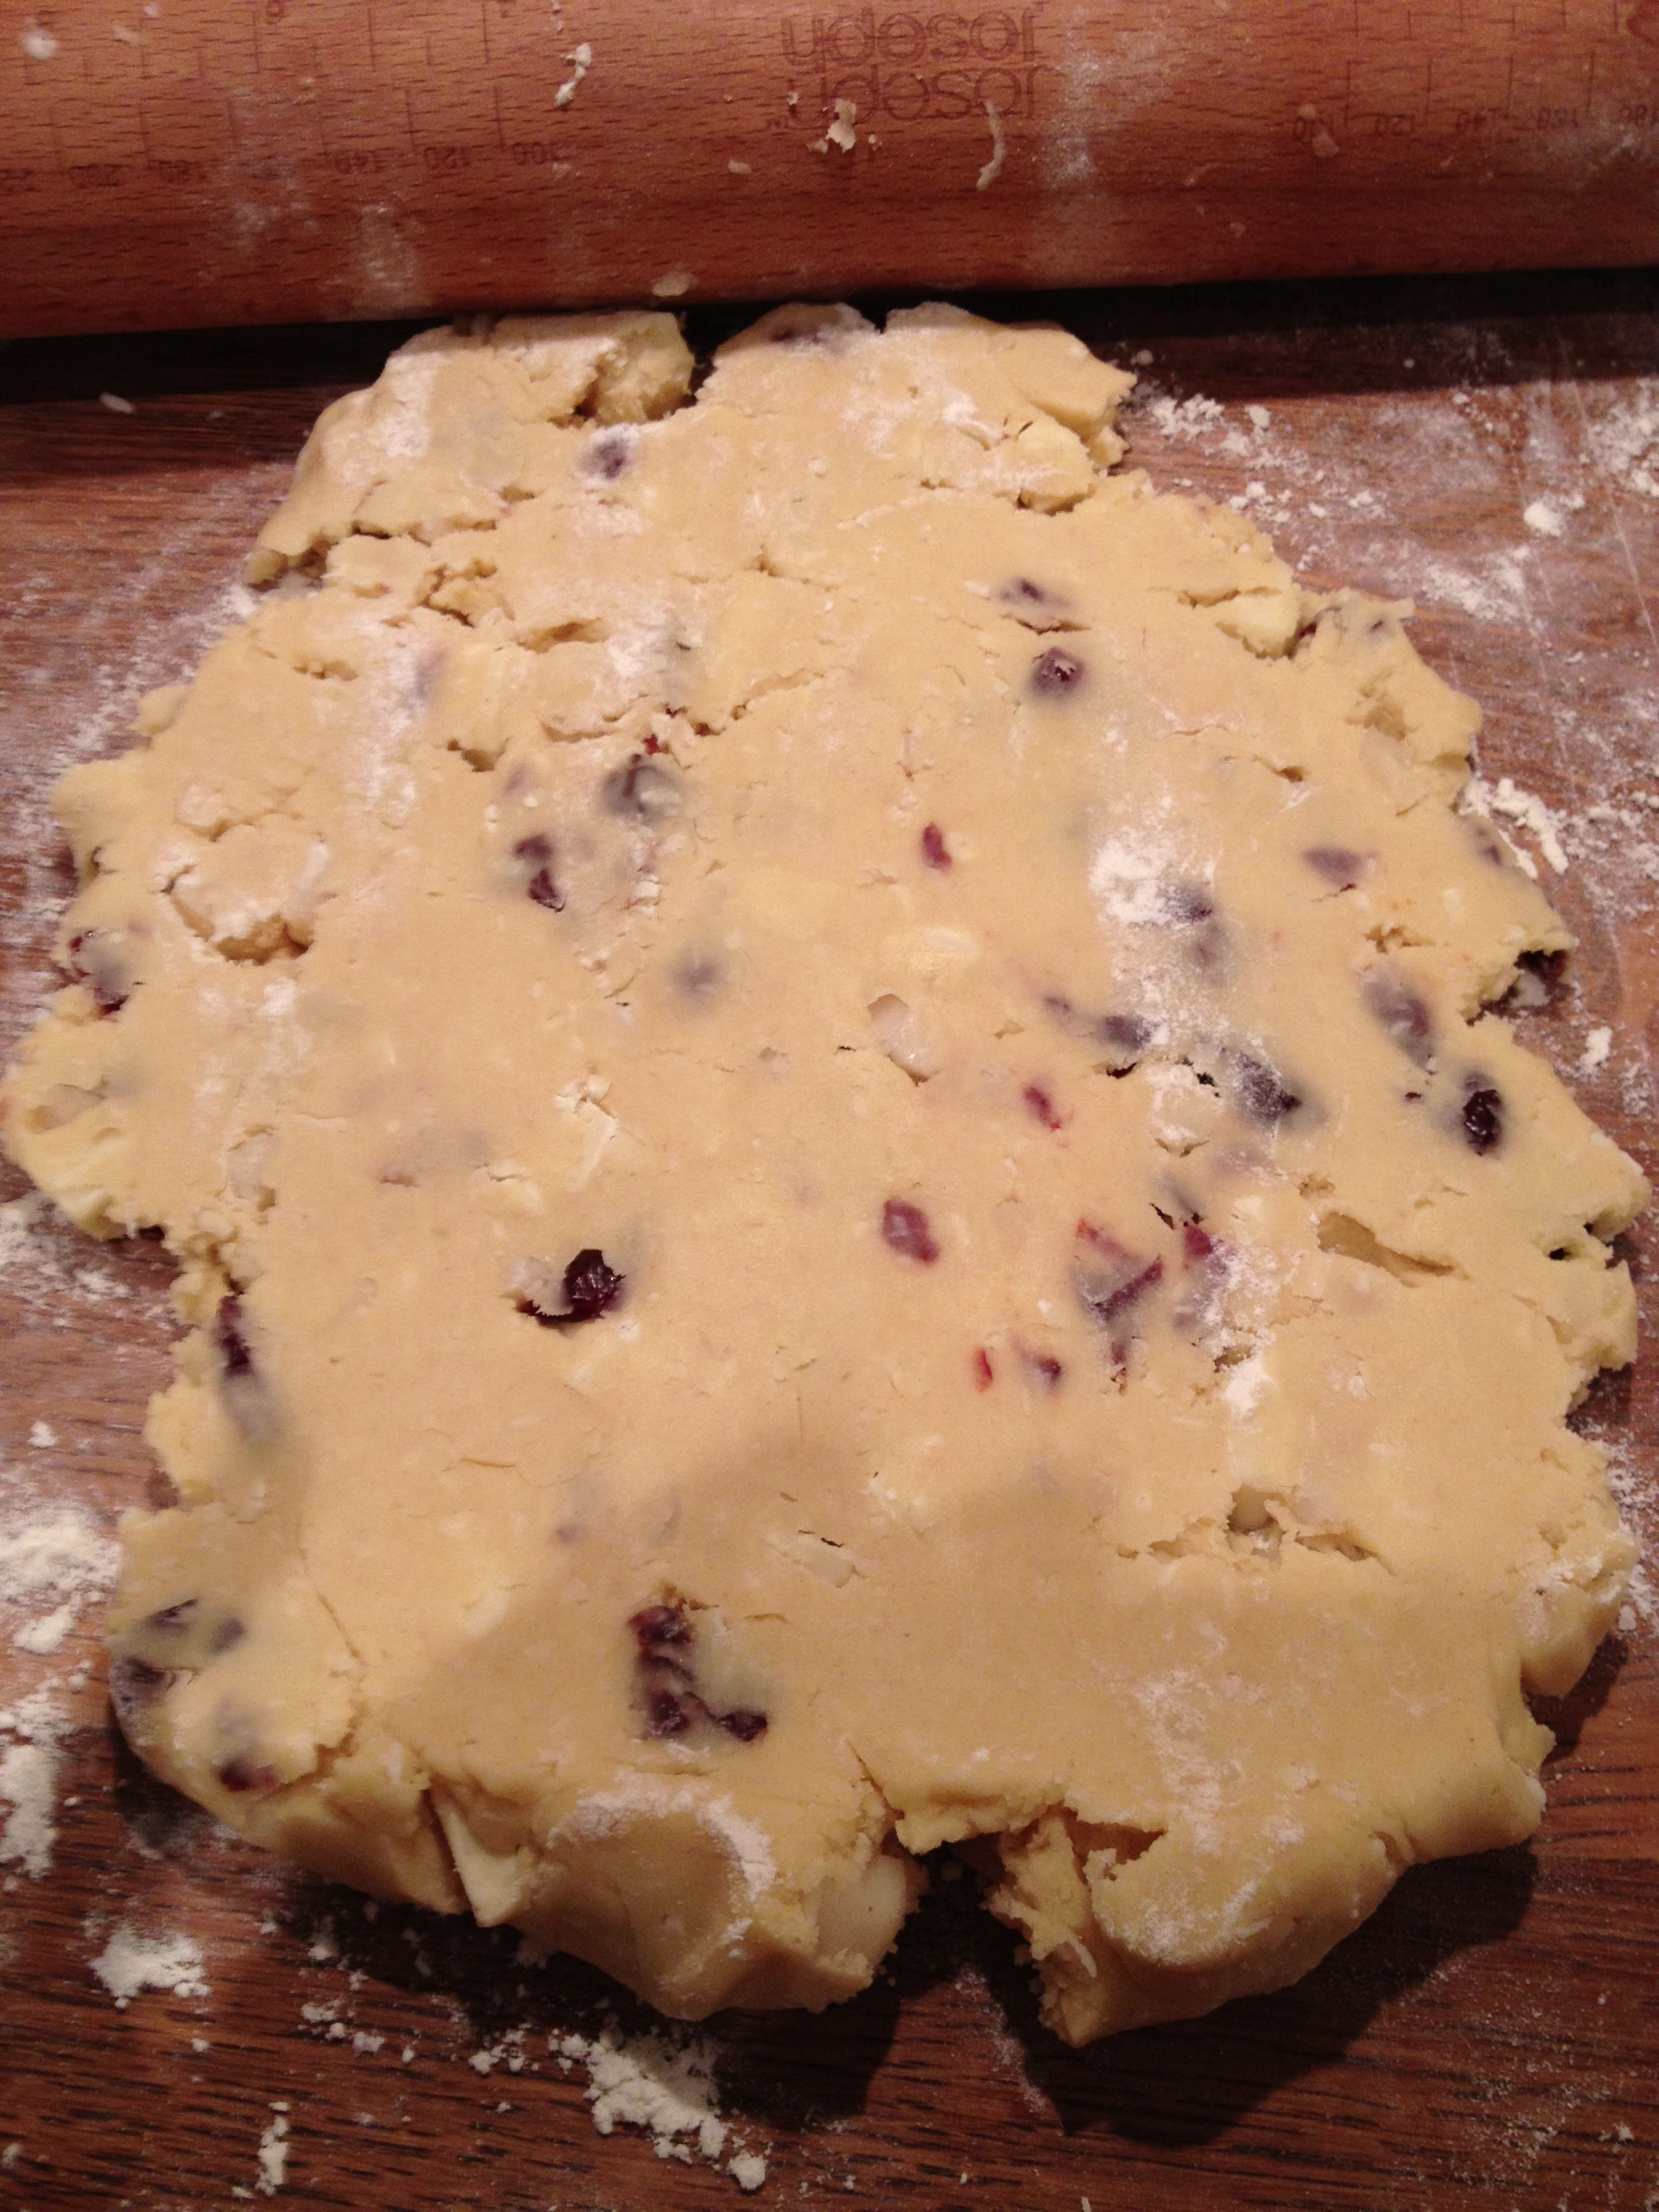
You’d think I’d be bored of biscuits by now …but no, I just keep thinking of new scrummy flavour combos! Today it’s dark choc and cherry – a winning combination. The tartness of the cherries works so well with the rich, dark chocolate 🙂

These use the same basic ingredients as my choc and ginger biccies but just replace the ginger with a handful of dried cherries! Simple! 🙂

You may have noticed a certain penchant for cookies and biscuits lately? what can i say? I just love this simple recipe and how easy it is to customise it with whatever flavours you like 🙂
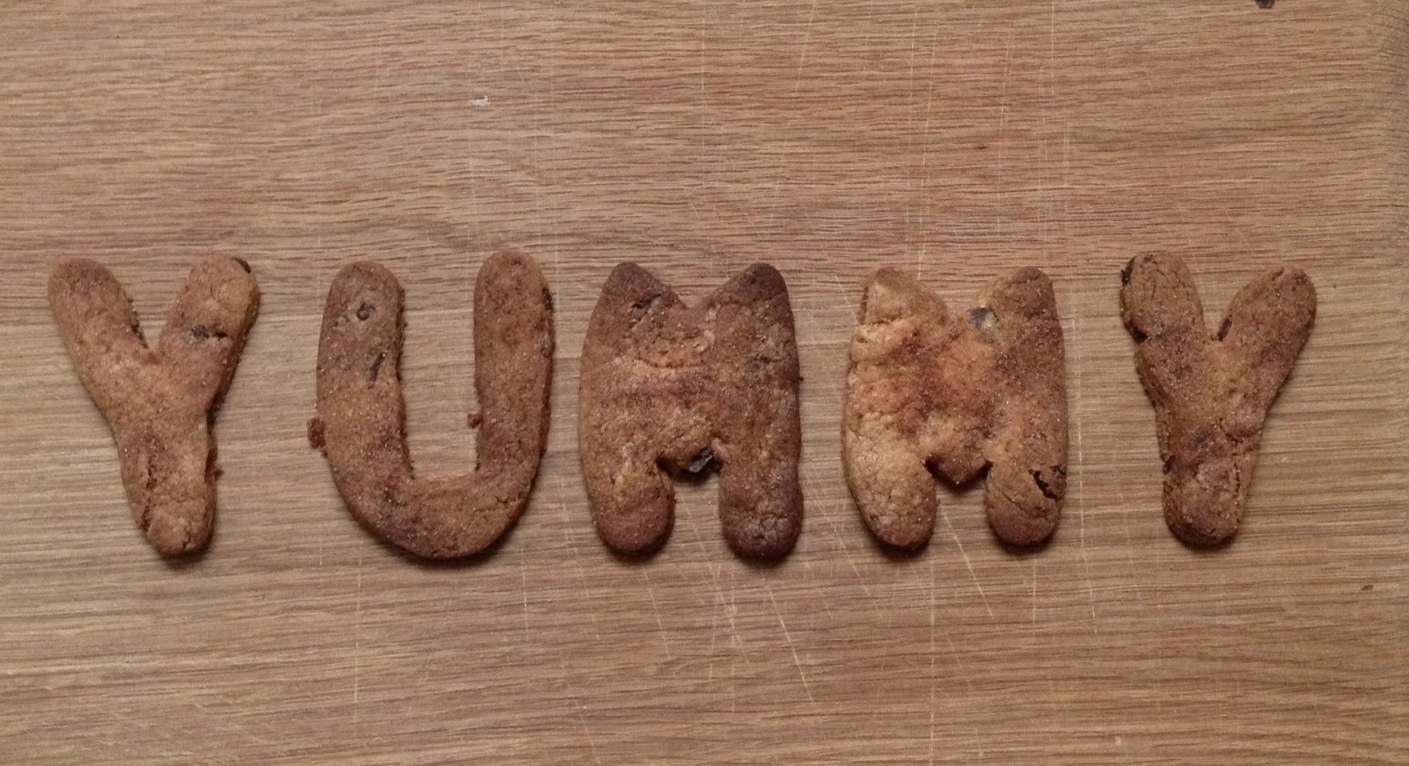

So this weekend Mother’s Day and the return of my lovely friend from holiday inspired me to bake some more biscuits for both of them 🙂 Both are fans of the combo of ginger and dark chocolate and they work brilliantly with these cookies. I also had some fun with a cool set of letter cutters (I’m such a child!).

You will need:
2 cups Spelt flour or gluten-free flour mix
1 cup Unrefined Icing sugar
6 oz Dairy-free margarine (get the best quality you can)
A handful of crystallised ginger
A handful of dairy free chocolate (I used Willie’s chef’s drops)

Pre-heat the oven to 180 C. Put the margarine in a large mixing bowl, sieve the flour and icing sugar in and cream it together. Try not to over mix but make sure the margarine is properly mixed with the dry ingredients. Chop the ginger and chocolate into small pieces and add to the mix. Once it’s formed a dough wrap in cling film and chill for 30 mins (optional). If you find the dough is too sticky then add some more flour.
Roll the dough out and use cutters to cut your biscuit shapes and transfer to a greased baking tray. I found that this dough worked best as a thick biscuit (about half a cm). If you don’t want to roll it then take small balls and flatten on to the baking tray. Bake in the oven for 10 – 12 mins or until as brown as you like them (I like my biscuits bordering on burnt so I kept them in a little longer! 🙂 ).
If you have some letter cutters (or you’re handy with a knife and can freehand them) then you can have fun spelling stuff in biscuit form! 😉

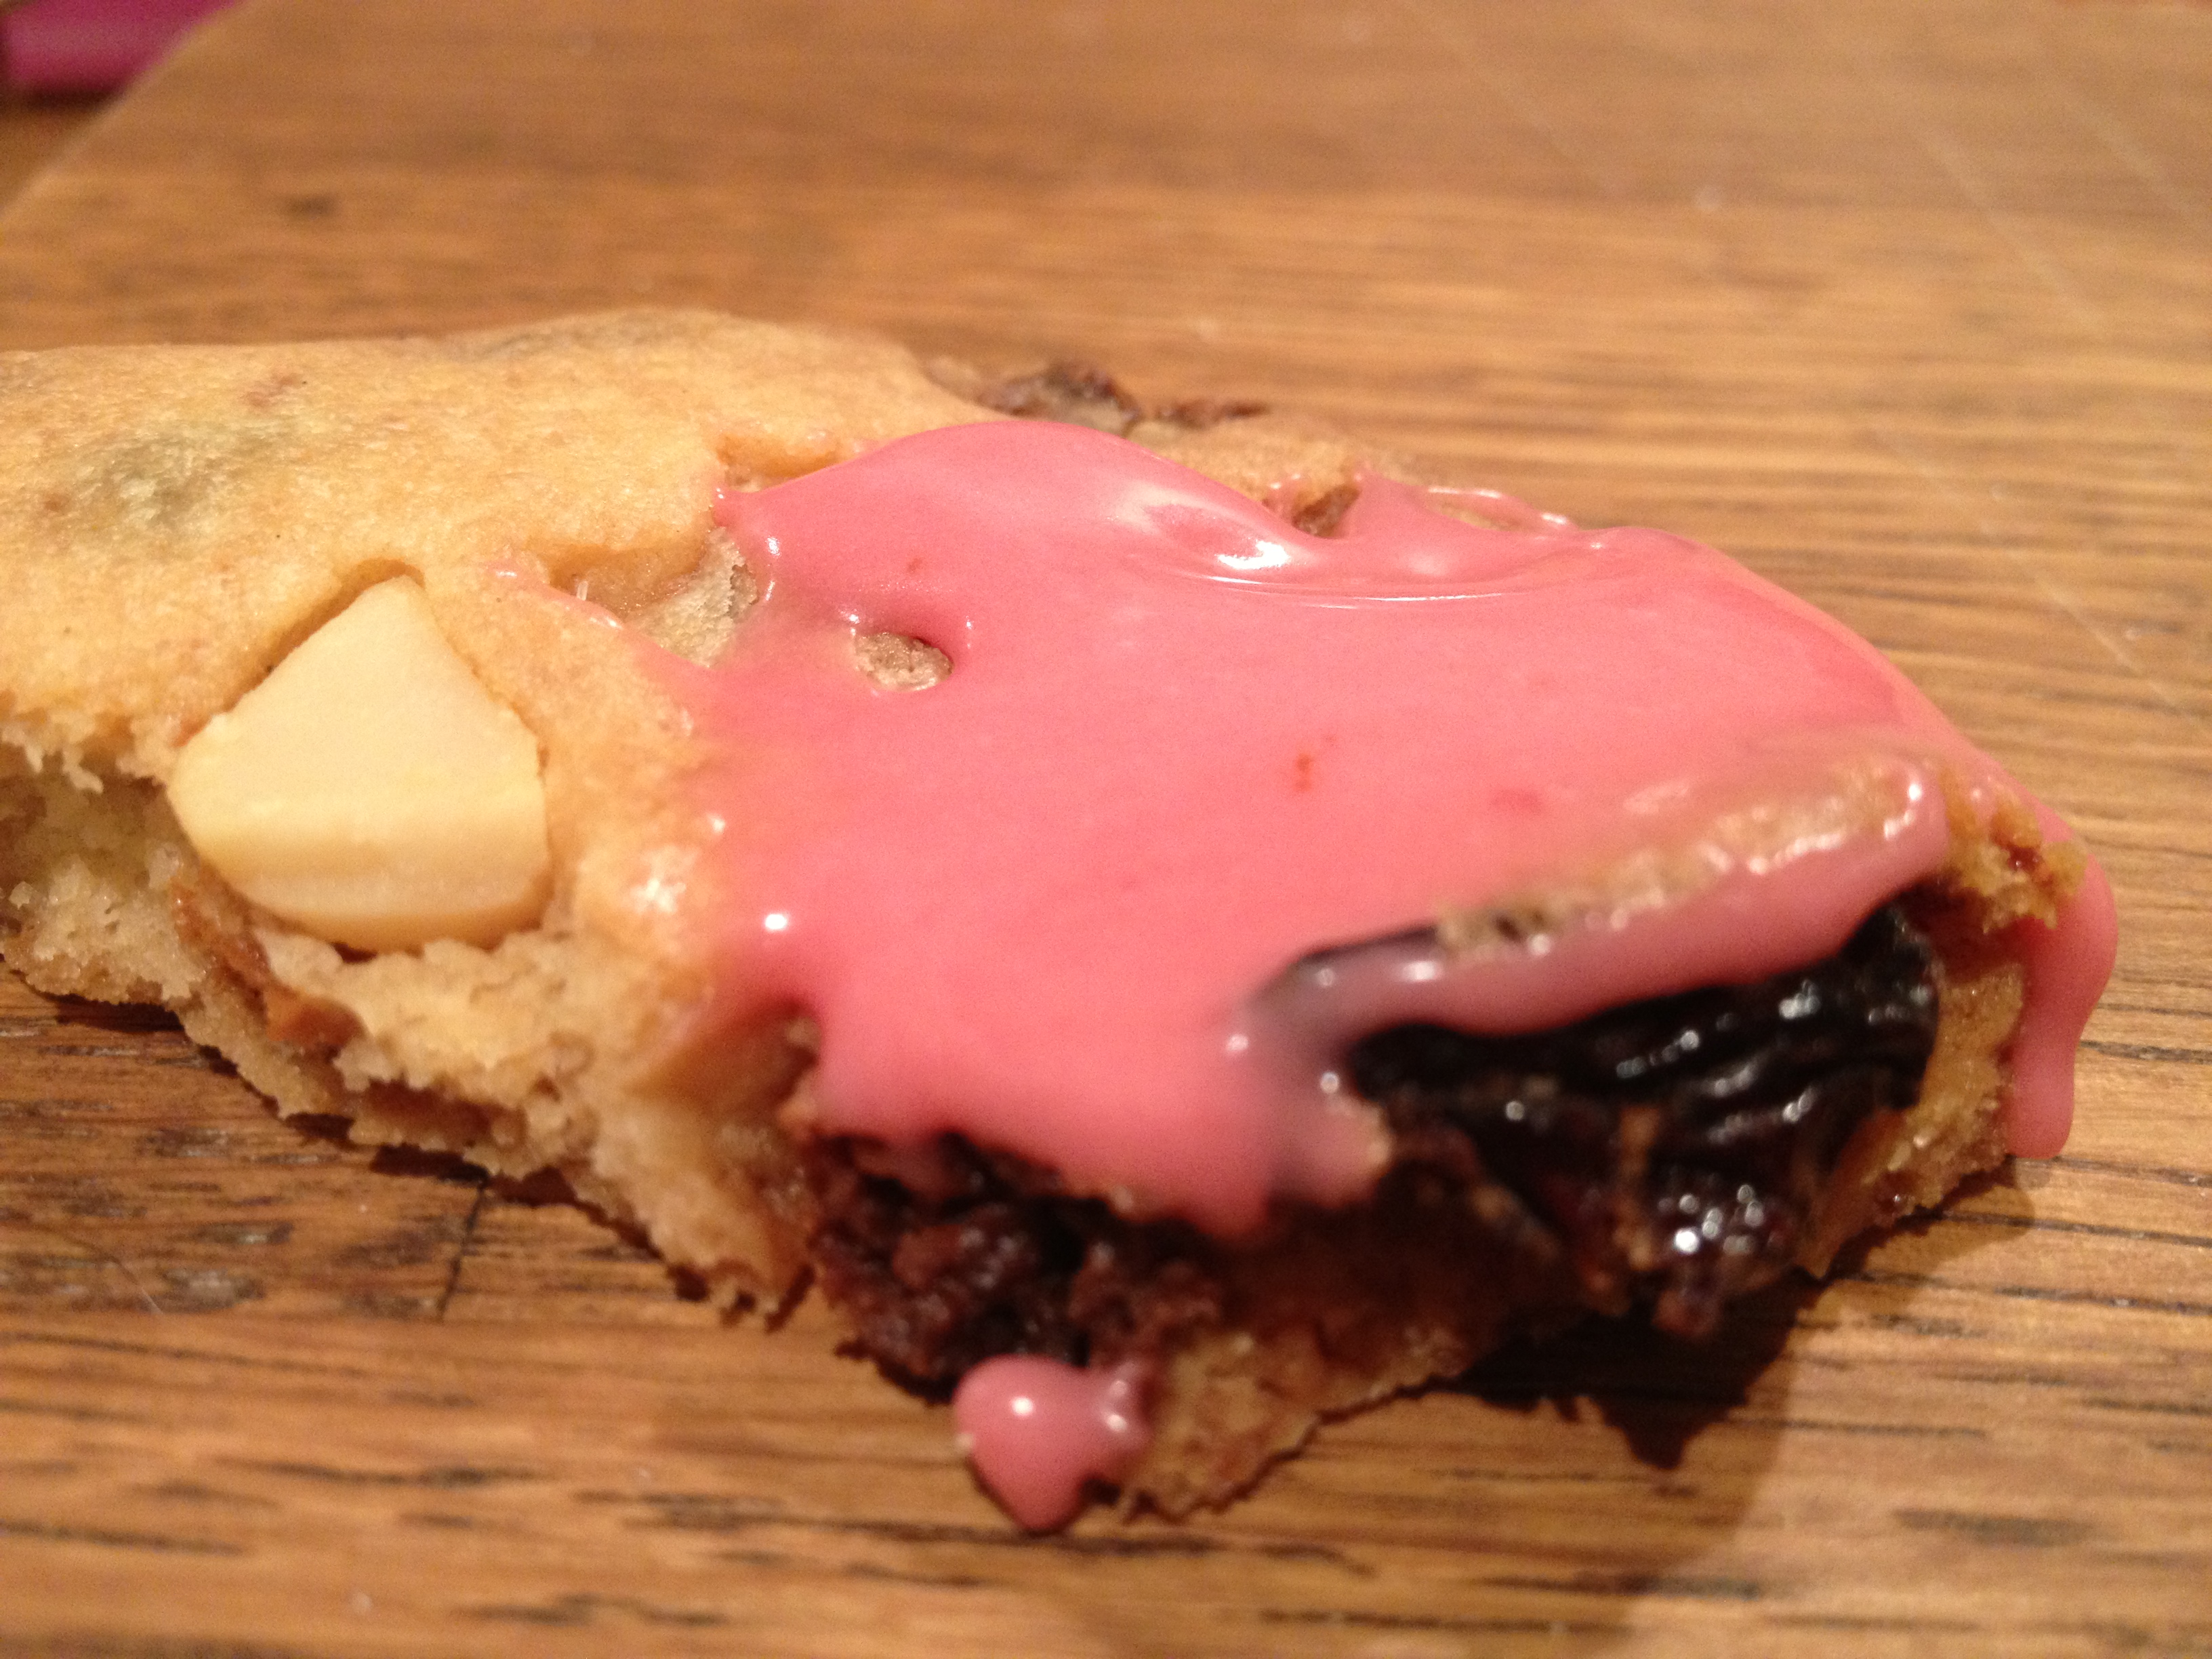
As we move from winter in to spring my thoughts turn to lighter bakes and lemon always features highly in my list of spring and summer baking yumminess!Once again this is the result of a little seed planted in my head by my good friend Colette (anyone would think she had a bit of a thing for these biscuit recipes… 😉 ).

This is super-easy and fun – perfect to make for the kids and can be done pretty quickly after school or on a sunday afternoon. Equally yummy for adults too though! 🙂

You will need:
2 cups Spelt flour or gluten-free flour mix
1 cup Unrefined Icing sugar
6 oz Dairy-free margarine (get the best quality you can)
zest of 2 small Lemons
1 tbsp fresh Lemon juice
Dairy- free (or non dairy free if you want!) Lemon curd – it will depend how much you use but less than half a jar should do it 🙂
Pre-heat the oven to 180 C. Put the margarine in a large mixing bowl, sieve the flour and icing sugar in and cream it together. Try not to over mix but make sure the margarine is properly mixed with the dry ingredients. Add the zest and lemon juice and combine it well. Once it’s formed a dough wrap in cling film and chill for 30 mins (optional). If you find the dough is too sticky then add some more flour. Once chilled, make small balls of dough (approx 1 inch diameter) and pop them on a greased baking tray. Push them down to flatten them and use your thumb to create a deep hollow in the centre. Prick the bottom of the hollow with a fork.

Bake for 8 minutes. Then remove from the oven and spoon in a small amount of lemon curd in to each hollow.
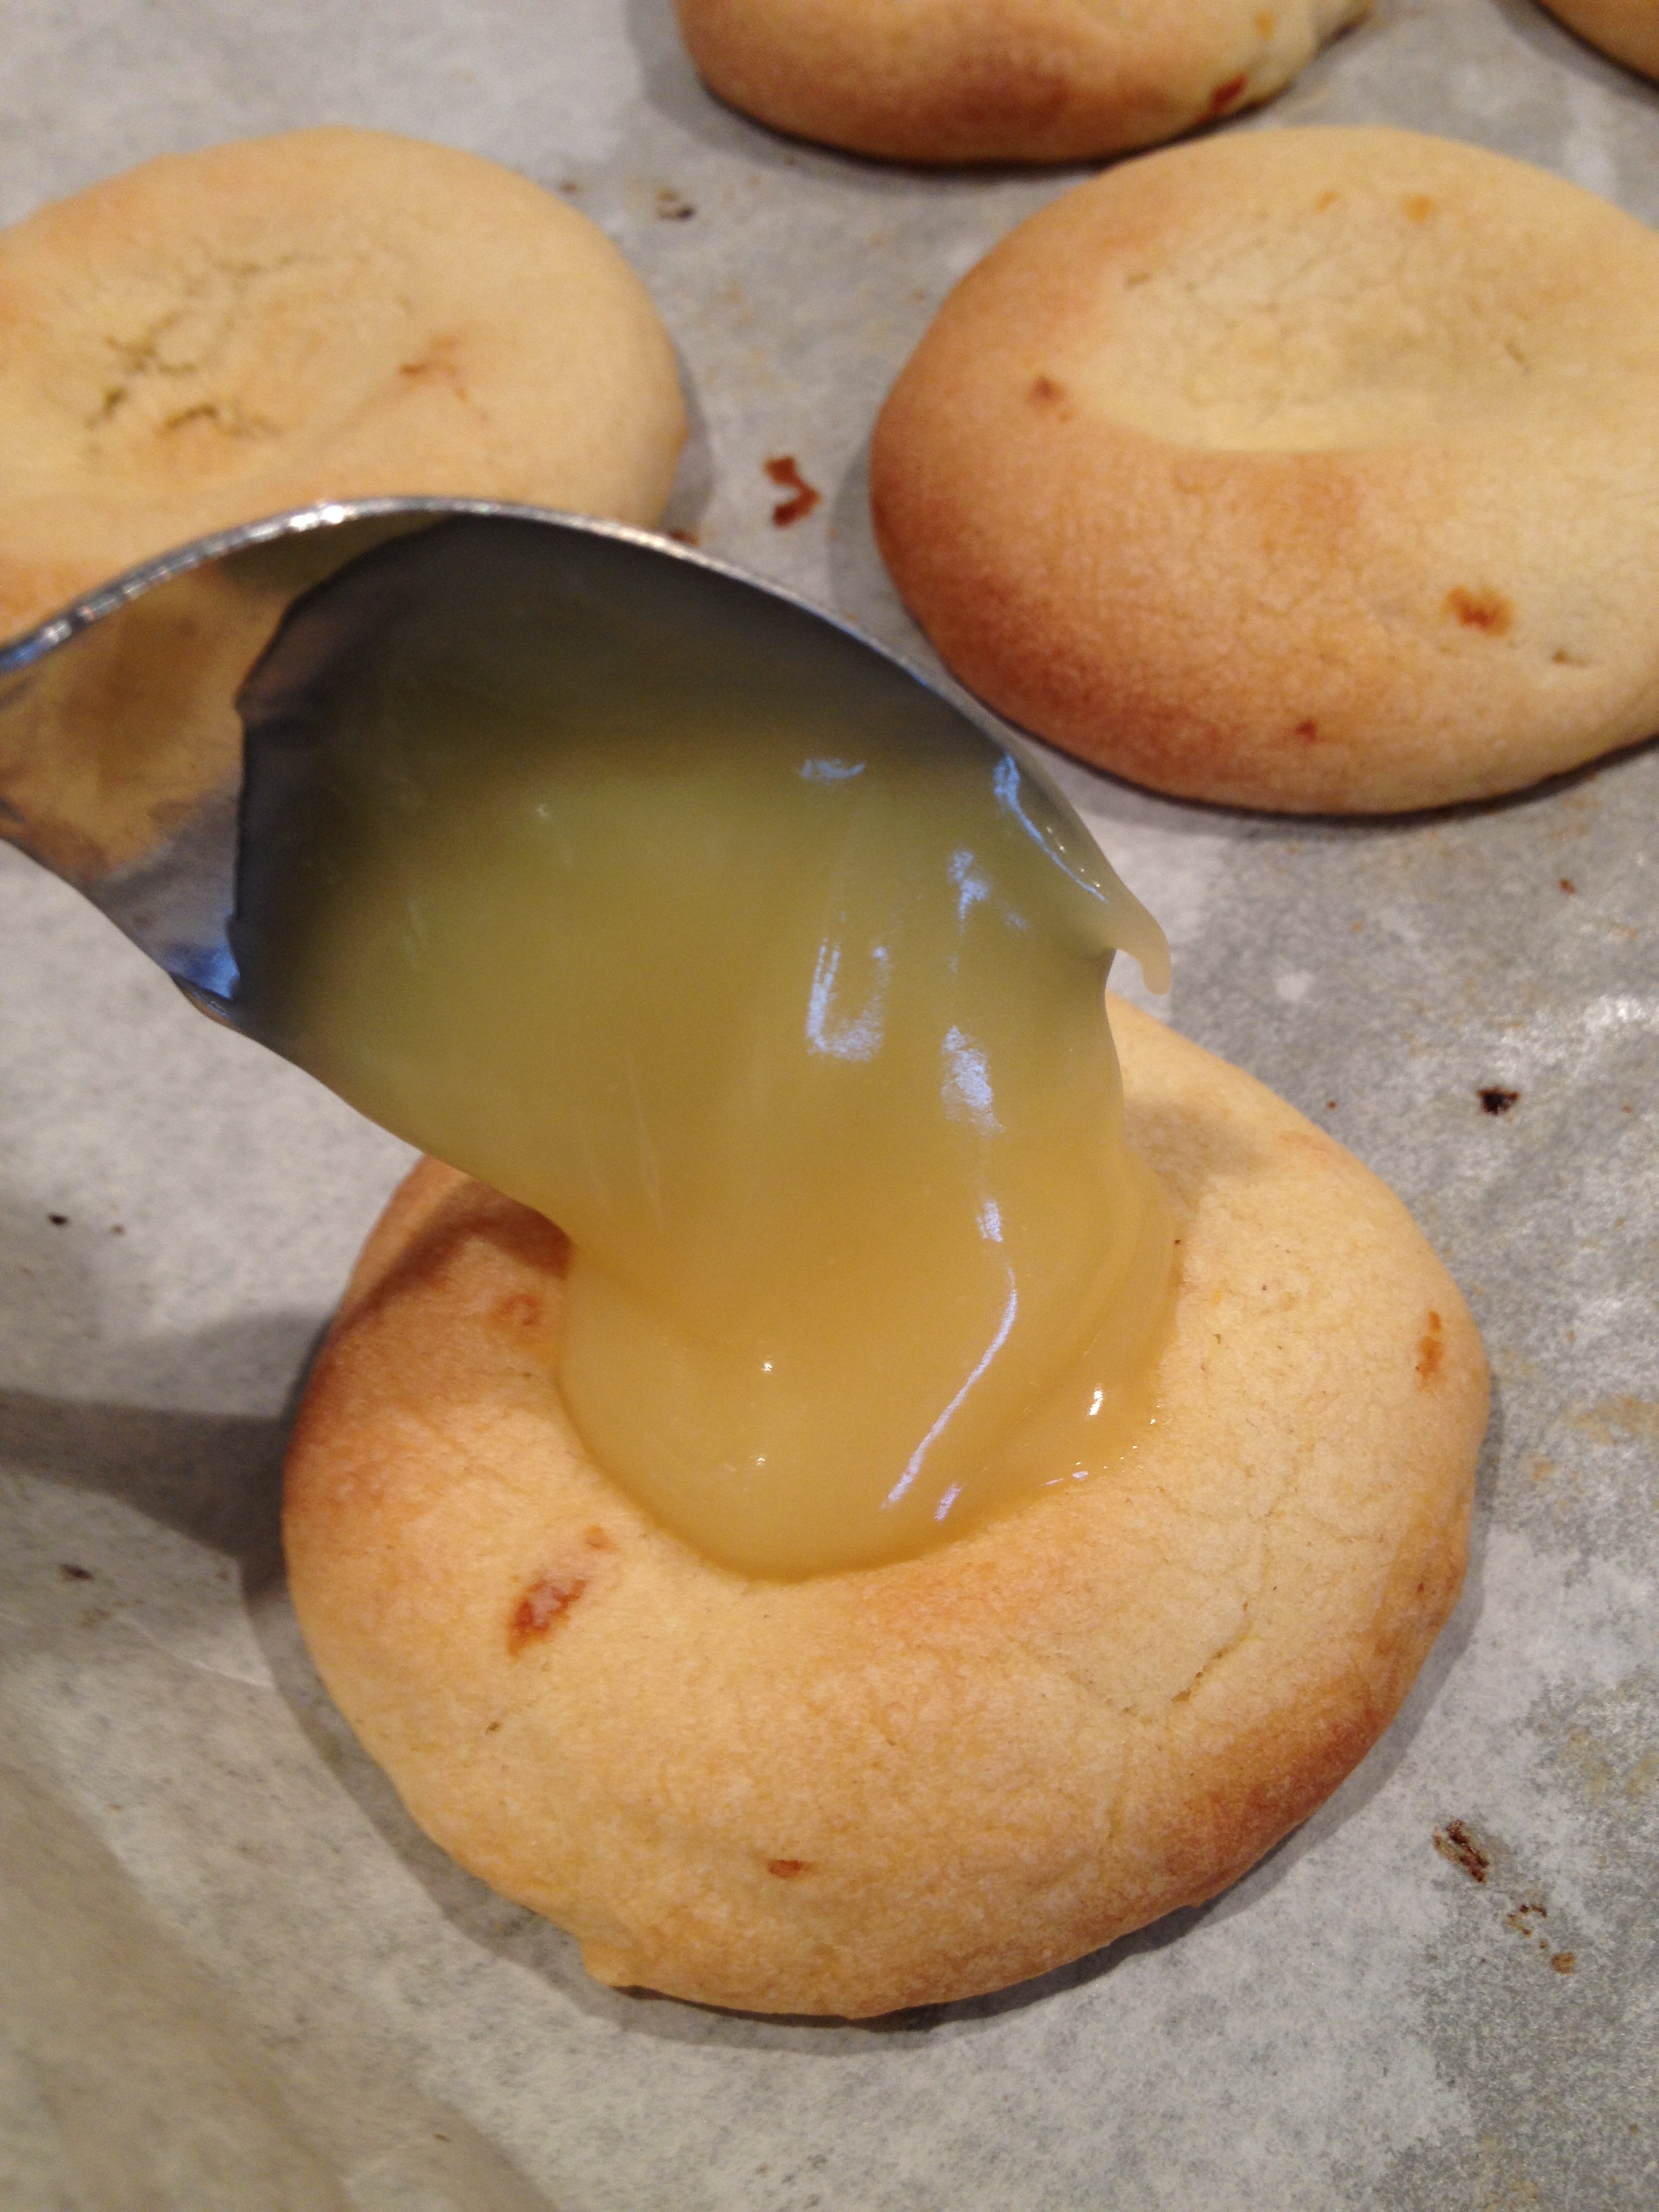
Bake for a further 2 minutes or so, or until golden. Remove from the oven and allow to cool on the tray. Be very careful when you remove them from the oven as the curd will be molten! Avoid the temptation to eat them straight away (trust me on this one!), just allow them to cool a little before you tuck in! 🙂

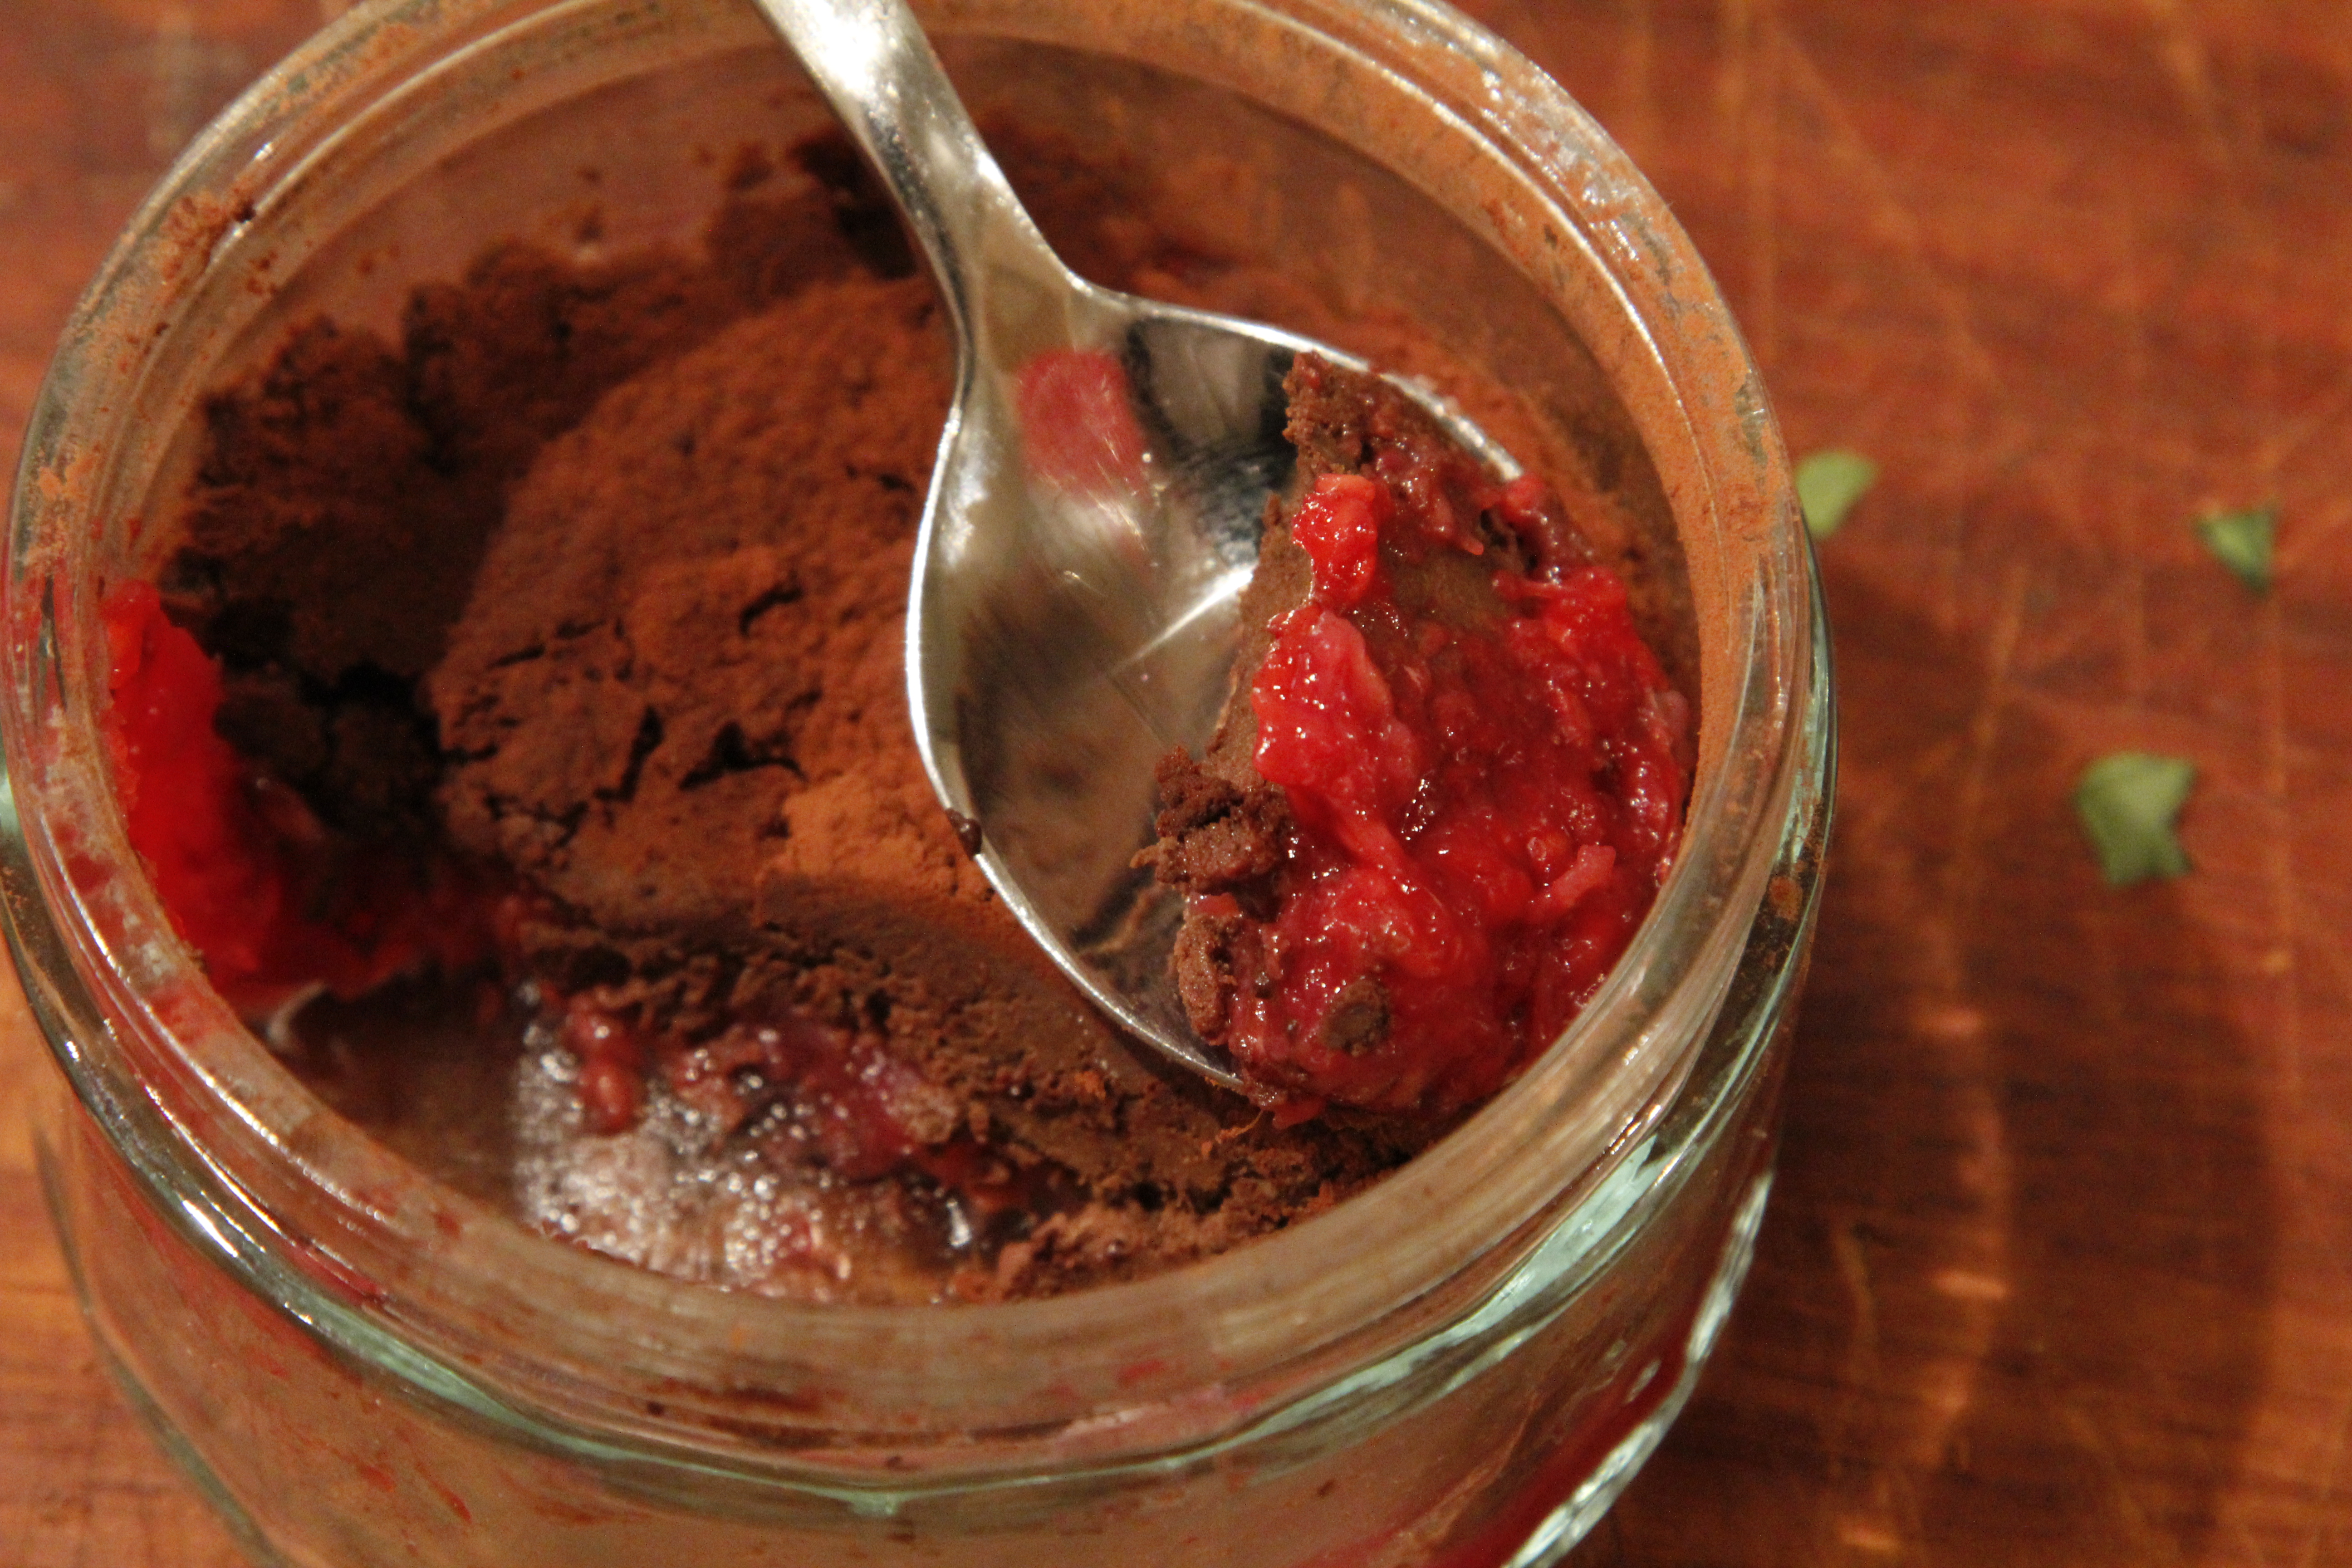
This is a simple dessert recipe marrying two of my favourite flavours – raspberry and chocolate! Tastes like it shouldn’t be as healthy as it is! 🙂
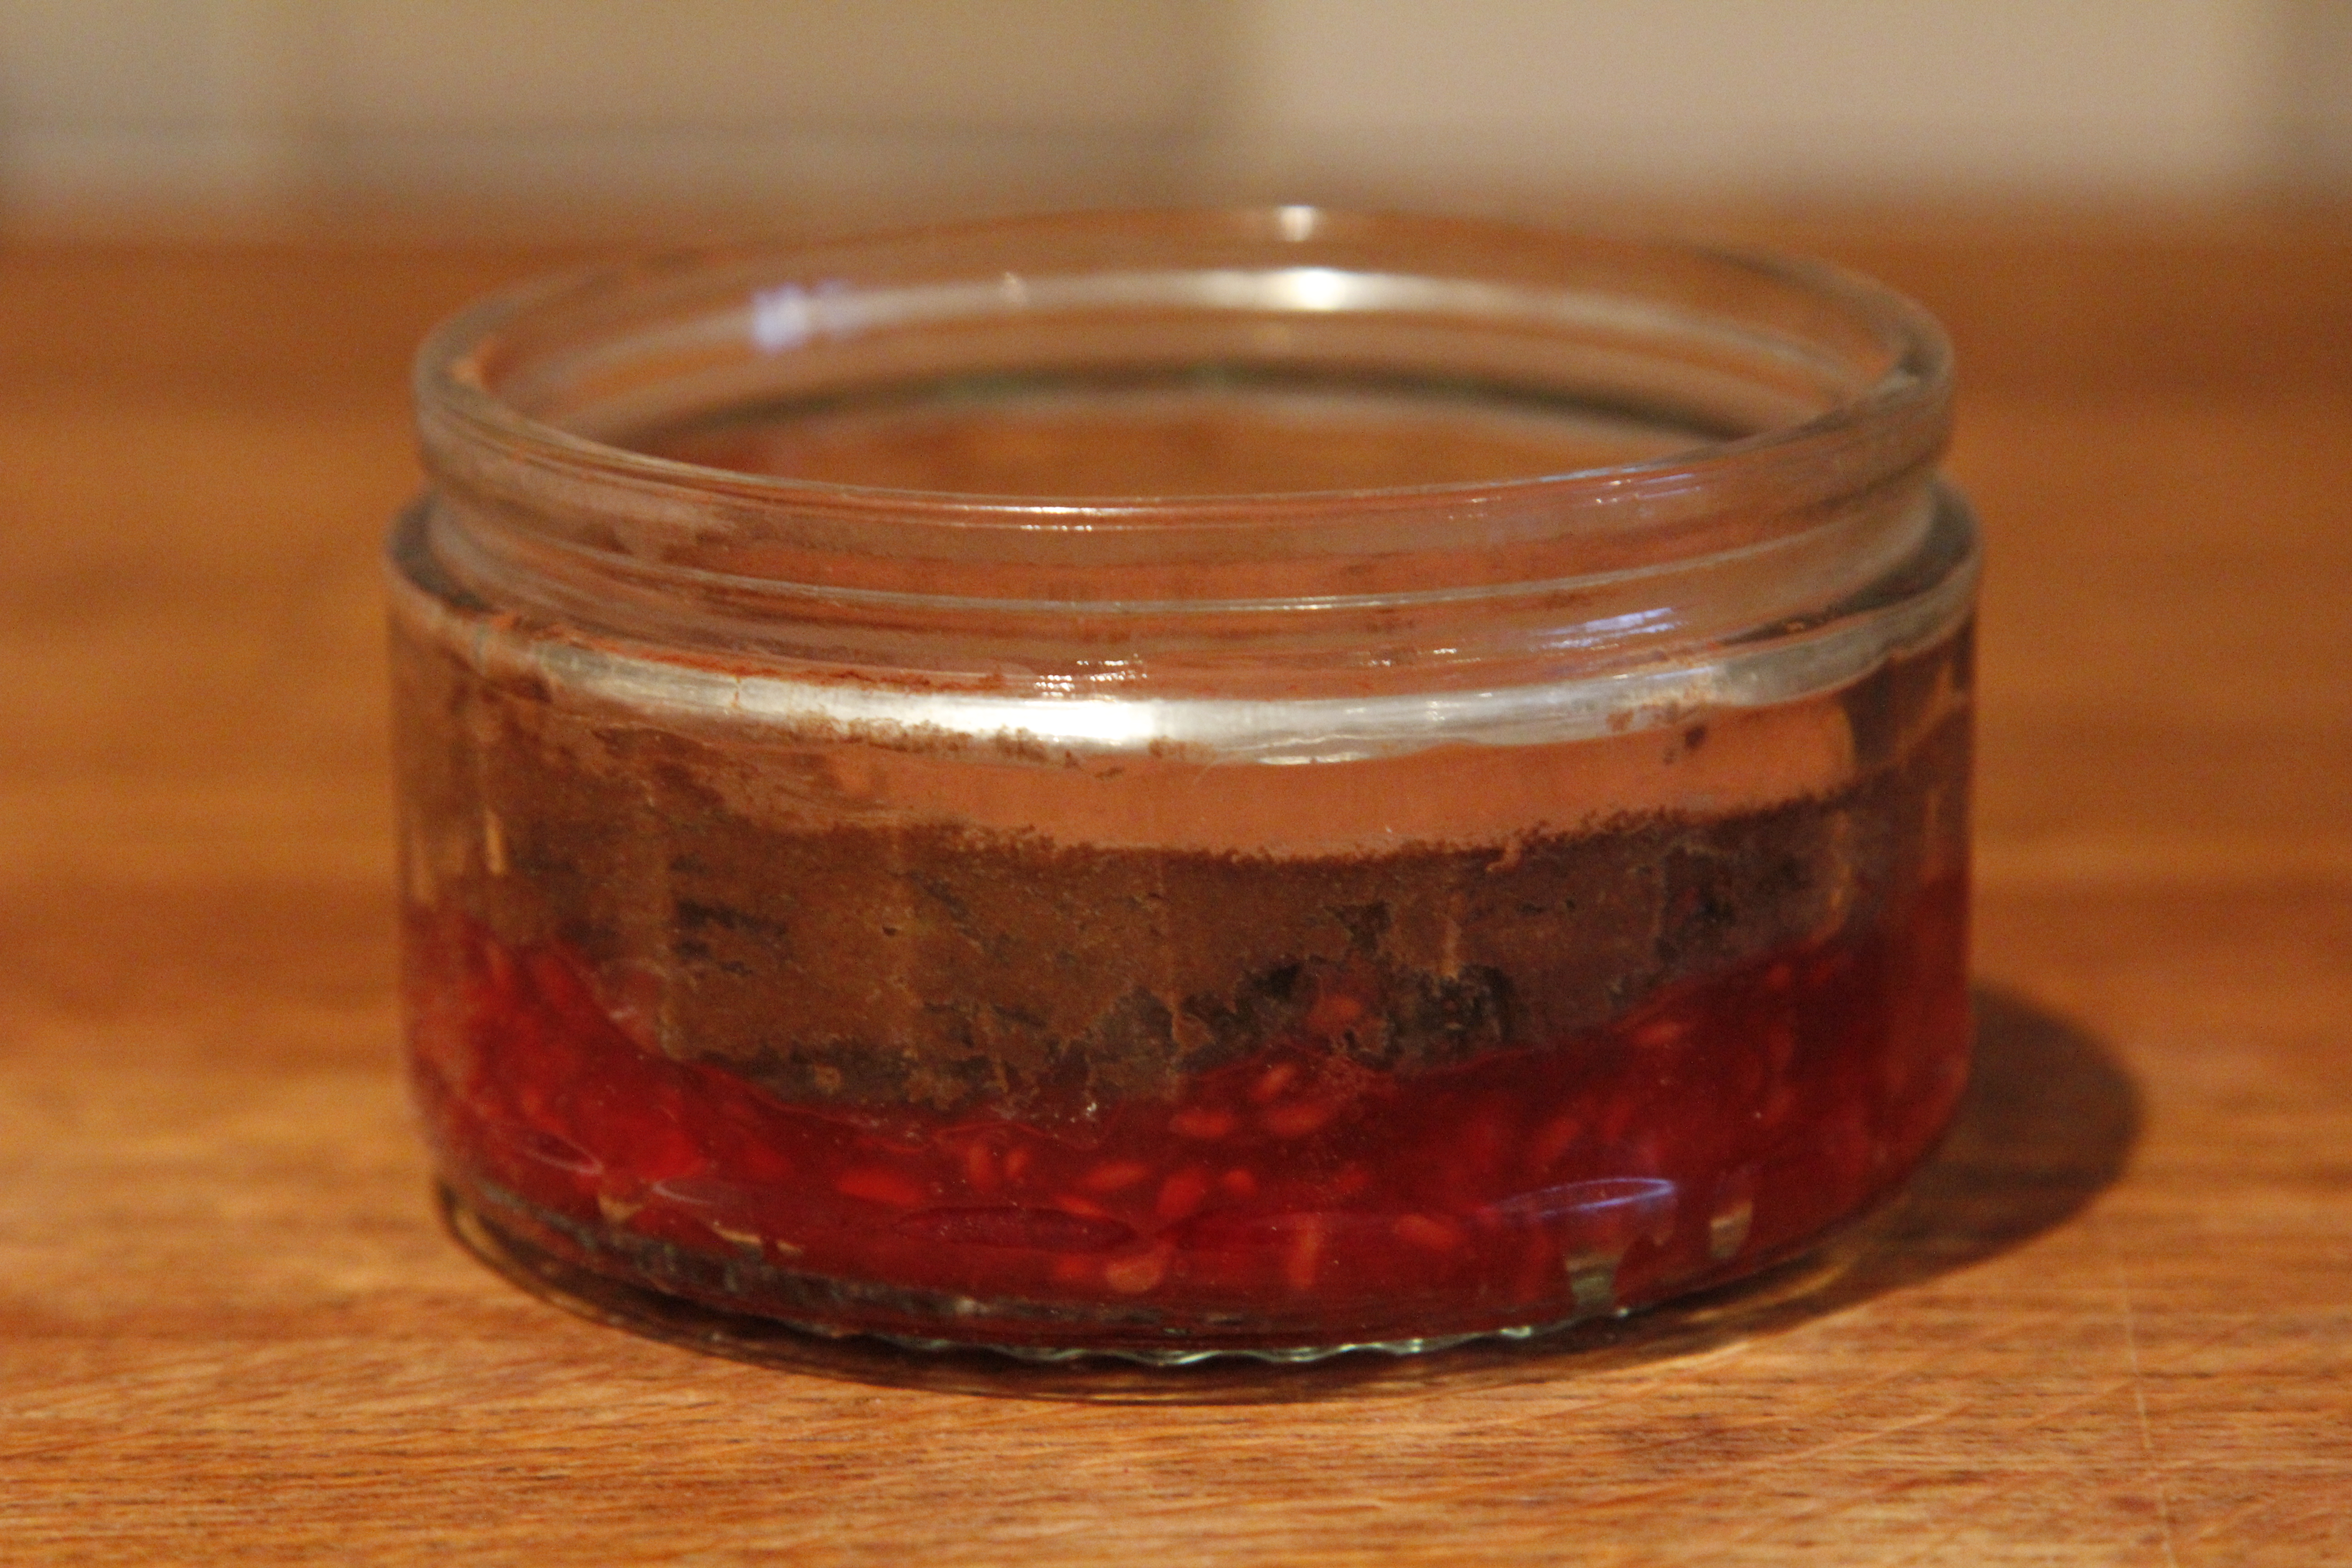
The chocolate part of this recipe is this awesome chocolate pudding from Colette’s Fitness Kitchen. Check out the original recipe on her site, but I’ve copied it below for you for ease too (I’ve omitted the orange extract for this pud) 🙂

Raspberry layer
17g fresh Raspberries
1 1/2 tbsp Cornflour
2 1/2 tbsp of raw unrefined Caster sugar
1 1/2 tbsp cold Water
Put all the ingredients in to a small pan. Stir well until the flour is dissolved whilst heating gently. Bring to a boil and then reduce the heat and allow it the mixture to thicken (probably about 5 minutes). Remove and pour straight in to ramekins and set to one side. Now on to the chocolate pud bit!
Chocolate pud
1oz Cocoa butter
3 tbsp Cocoa powder
2 tbsp Pure protein powder (vanilla)
½ Avocado
Agave syrup to taste
Melt the cocoa butter gently on the hob or in the microwave. Mix the cocoa in until well combined. Add the avocado and blend until smooth (a wand blender works best). Mix in the protein powder and agave to taste. When smooth transfer to the ramekins and spread a layer on top of the raspberry mixture. Place in the fridge to cool and then serve with a dusting of cocoa powder
Ok, I think I need new friends, or maybe I need ones that don’t have such great ideas…. Once again I find myself in my kitchen, baking biscuits at nearly 11pm….Definitely worth it though (thank you my lovely friend Colette from Colette’s Fitness Kitchen for planting yet another seed in my head for some scrummy biscuits!).
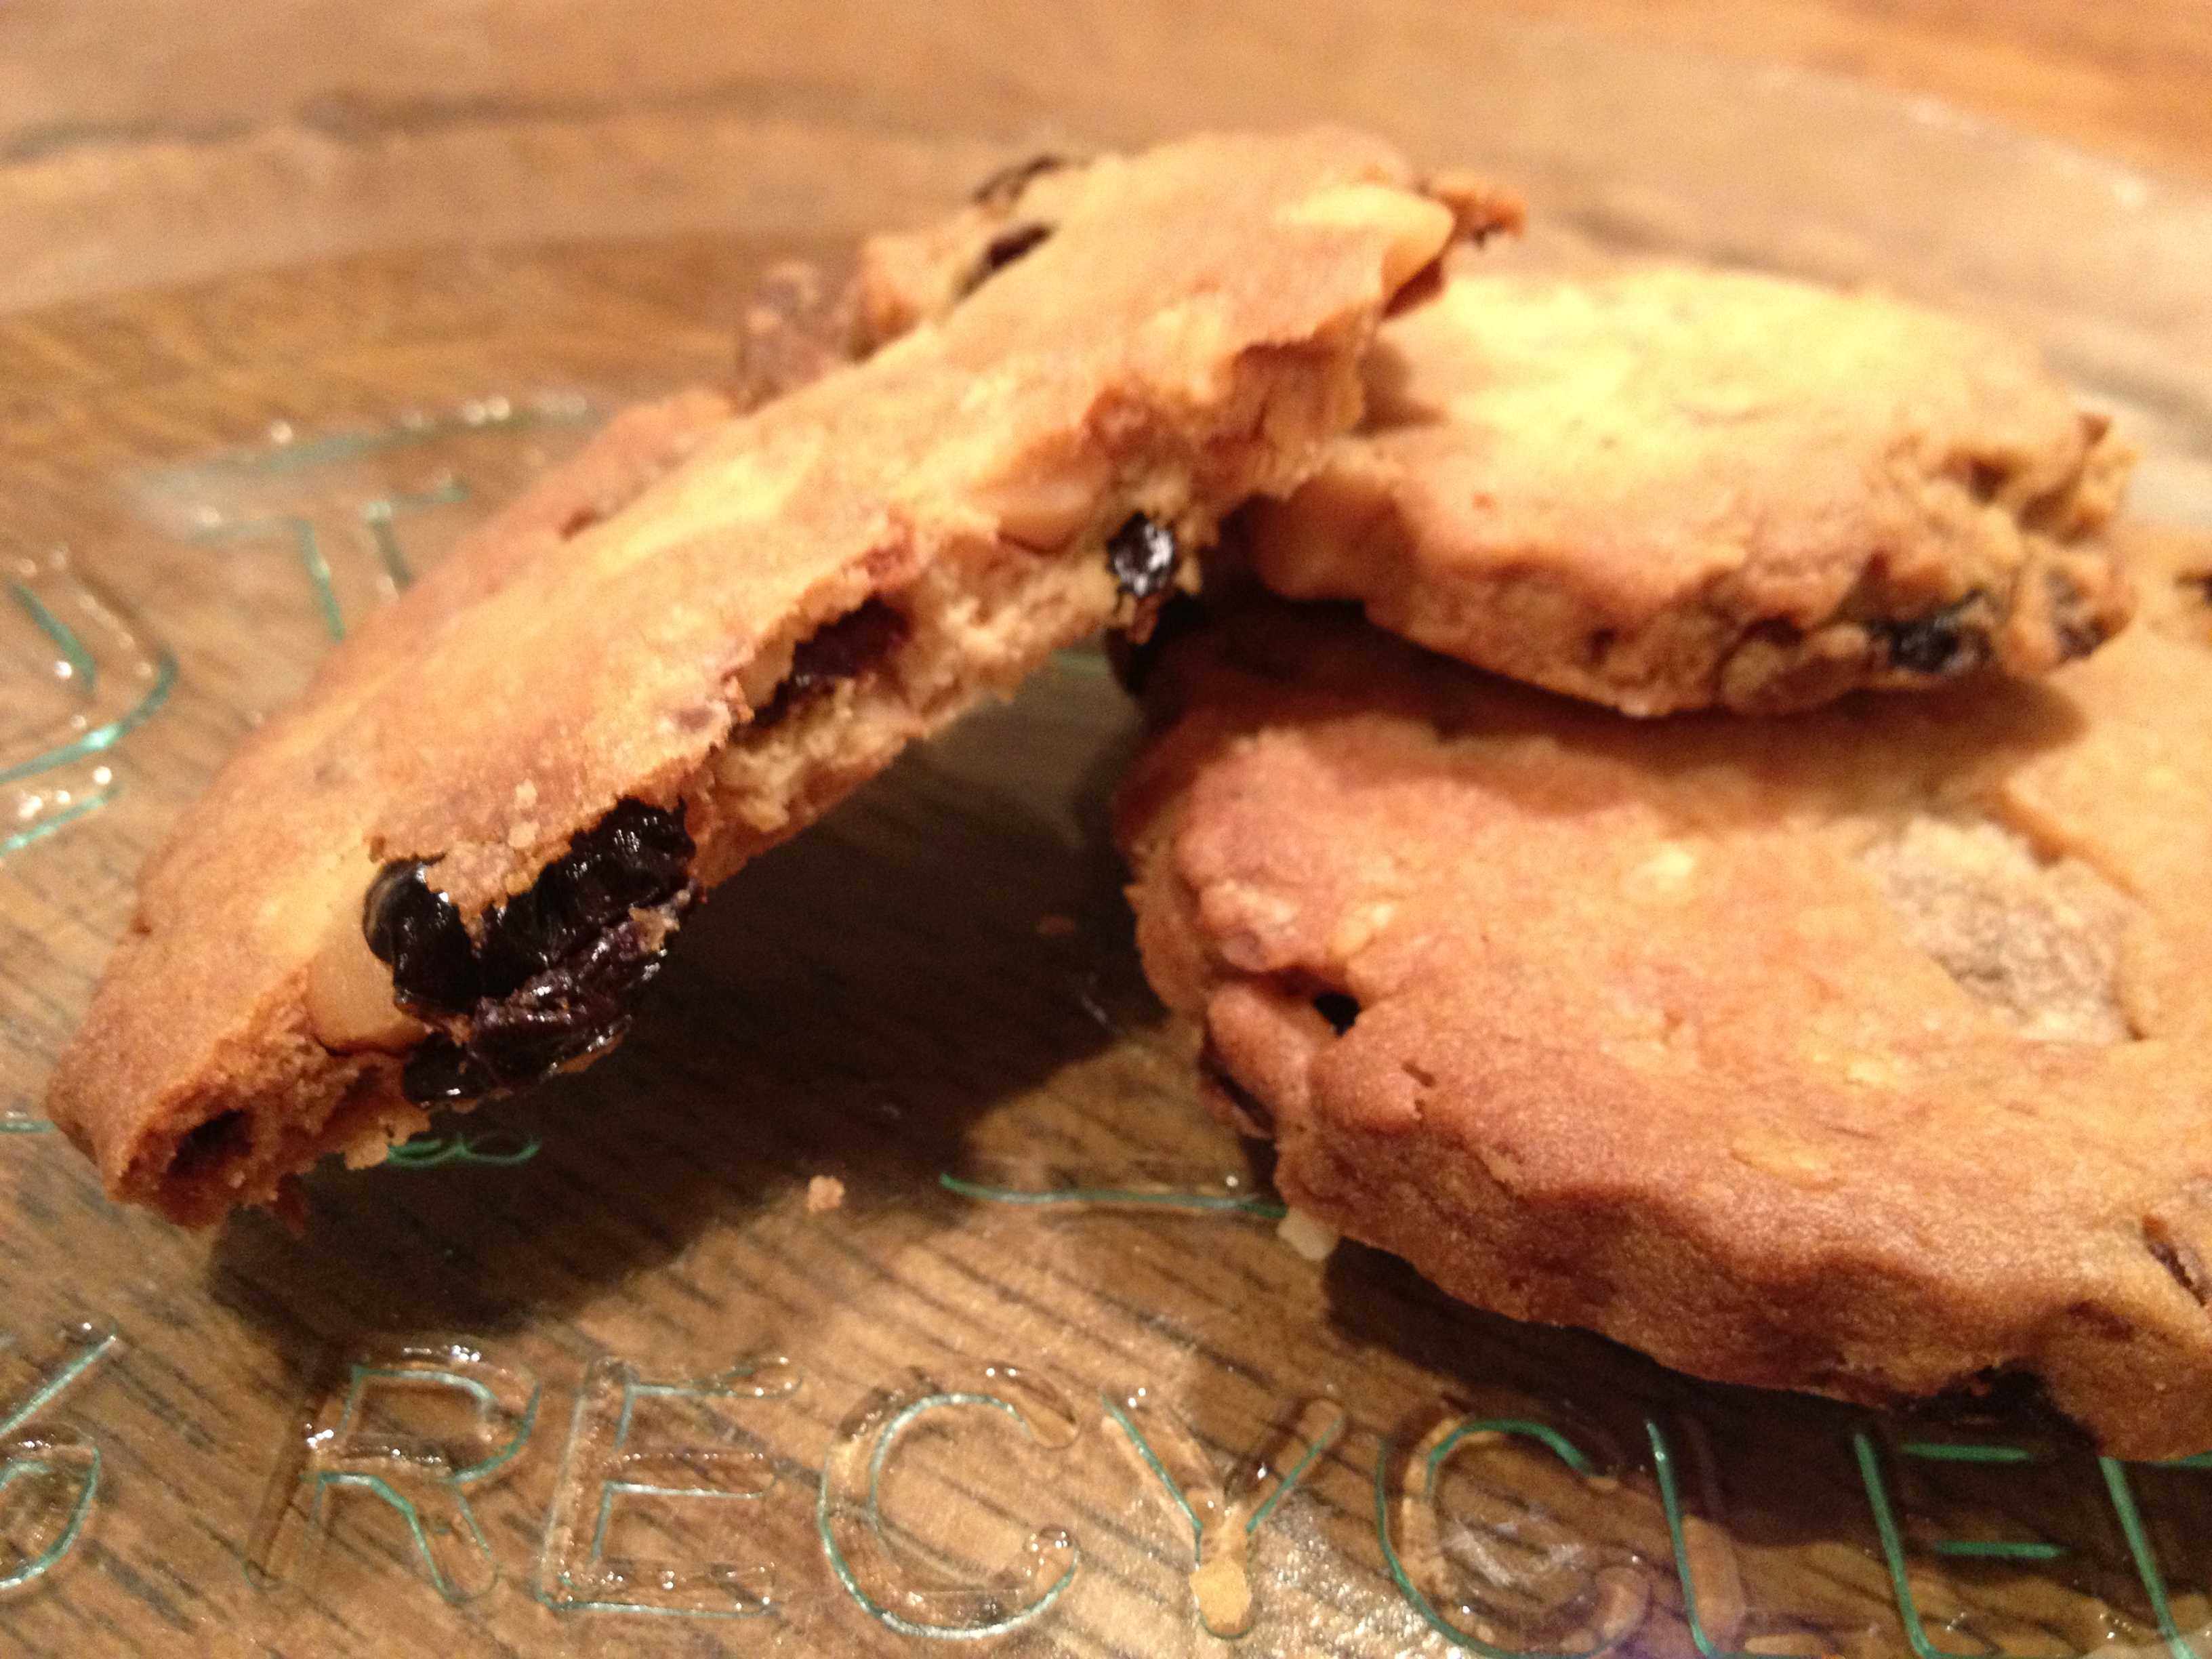
So it’s the same biscuit recipe as before but this time I’ve added in:
approximately 100g Dried cherries
approximately 75g Macadamia nuts
100g of good quality white chocolate (omit this if you want it dairy free – or better yet replace with dairy free dark chocolate! yummo!)
a handful of dessicated coconut!

Chop the cherries, nuts and chocolate fairly small and then add all of the ingredients in to the dough at the end and ensure they’re mixed well throughout. You can just make little round dollops of these, or you can roll them out (gently!) and use a cutter as I’ve done.
They will be bit thicker so may need longer in the oven. Enjoy! 🙂
Oh and I should say… they are also yummy with the raspberry icing on…! 🙂
With you every step of the way
Travel tips-Restaurant reviews-Recipes
One woman's take on whole foods, clean living and boundless energy.
{salty wit + a sweet tooth}
Simple Gluten Free recipes for any time of day.
wildernesswalking123
This WordPress.com site is the bee's knees