Does anyone else remember those mint chocolate swirled mousse/ice cream dessert things we used to have as children? They came in a little pot, they were mostly sugar and air but they tasted amazing! I’m such a massive mint choc fan and was feeling a little nostalgic so thought I’d see if I could recreate something similar but a little more classy.

This would make a great dinner party pud – it looks fab and tastes amazing. You can prepare the mousse and the n’ice cream in advance and then put it together in a few mins. It’s also a great healthy, high protein treat for you or the kids on summer evenings.

This also gave me a chance to use the yummy choc shot I was sent my the lovely people over at sweet freedom for something other than pouring liberally over my porridge and soya yoghurt 🙂 The mousse recipe is based on Colette’s recipe from The Pure Form Fitness Kitchen and the n’ice cream is my recipe from the other day (here) which I’ll re-post below for ease.

This will make approx 2 large layered desserts.
For the mousse you will need:
1 packet of Silken tofu
2 tbsp Cocoa powder
2 tbsp sweet freedom Choc Shot (you may want to add a little extra if you want it sweeter)
Natural peppermint extract (to taste)
Pop all the ingredients except the peppermint extract in to your blender/processor and mix well until combined. Have a little taste and add a little more choc shot if you feel you need it. Then add the peppermint extract to taste and mix. Store the mousse in the fridge until you’re ready to prepare the dessert (it will last up to a week – it may separate a little but just stir it before you use it).
For the n’ice cream you will need:
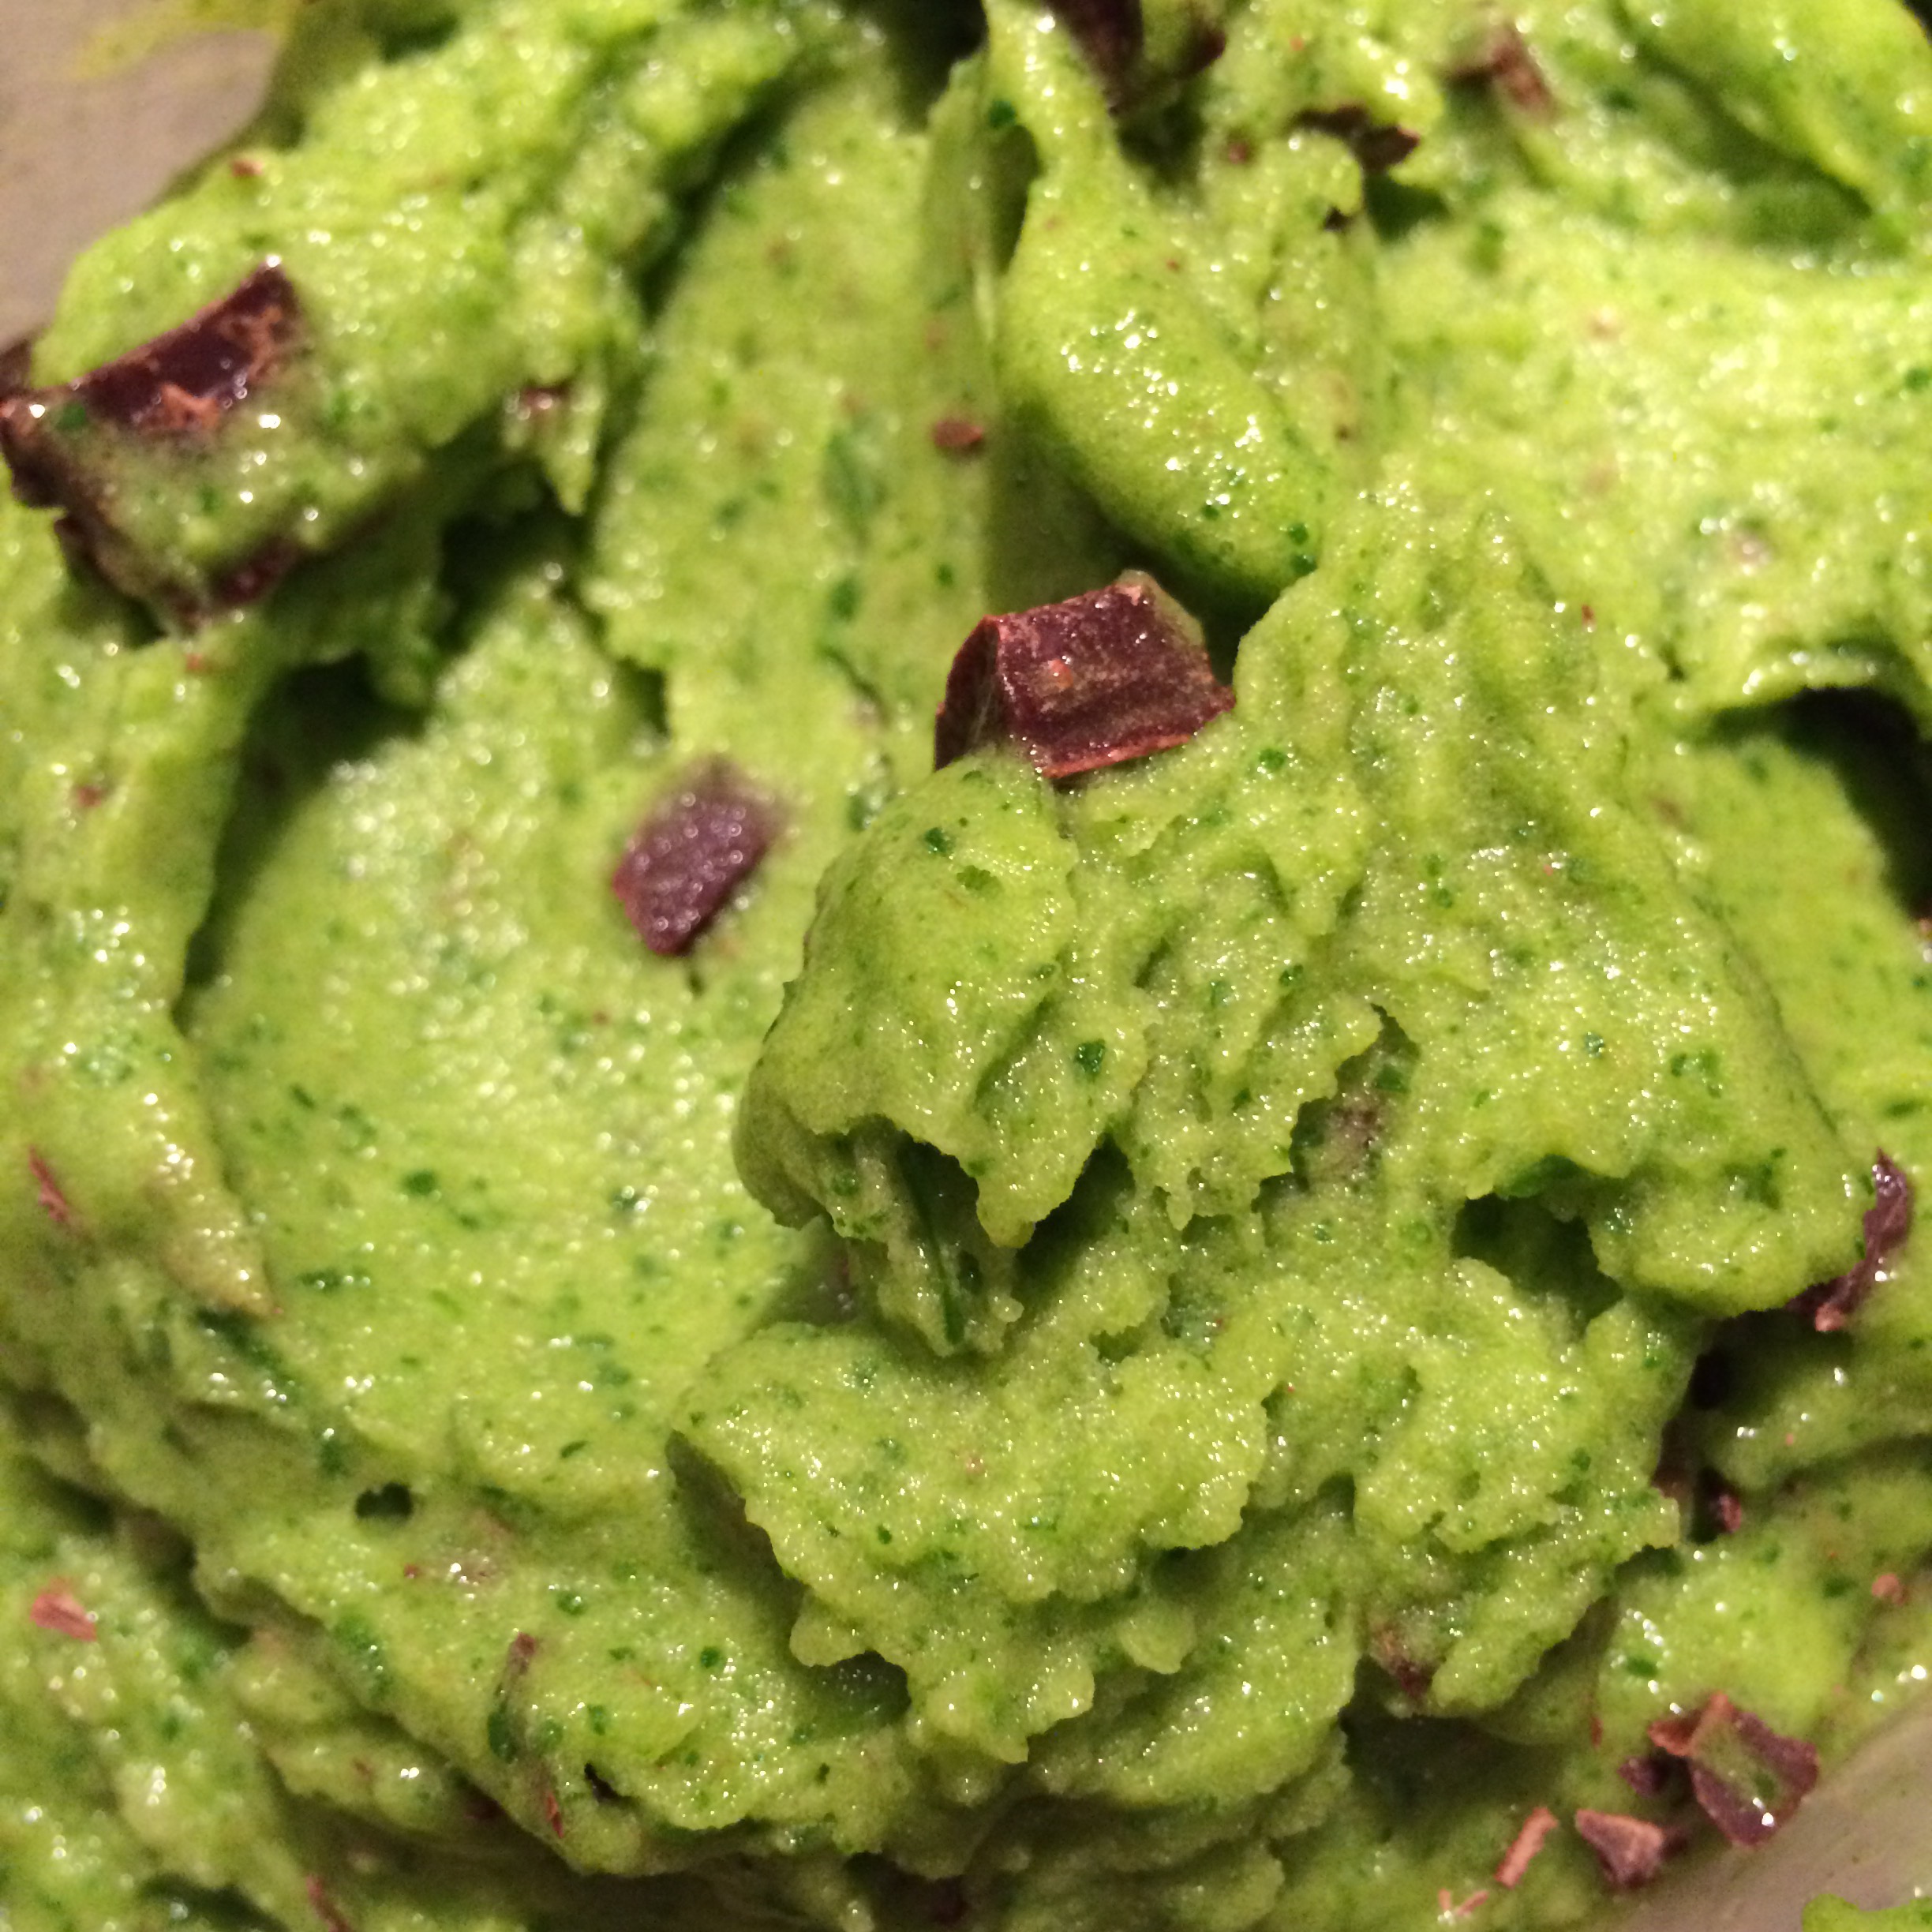
Frozen bananas – I used 4 medium bananas
Handful of spinach (adjust according to how green you want it!)
Couple of tbsp Cacao nibs (or you can use any dark chocolate – sugar free or not – your choice)
Natural peppermint extract (to taste) (or fresh mint leaves if you happen to have some)
Pop the bananas in to a high speed blender – I use my trusty vitamix but any blender that can handle ice will do, and blitz it to start to break up the bananas. Once they start to smoosh up (technical term 😉 ) add the spinach a little at a time. Then add a few drops of peppermint extract – the amount will depend on how minty you like it! You don’t want it tasting like mouthwash though so go easy to start with! Keep blitzing it and stirring it in until the spinach is combined and the colour you want. Remove from the blender and stir the cacao nibs/chopped chocolate through it.
It melts fast so if you’re making it just before you serve it then that’s fab, but if not then you can refreeze it – ideally refreeze in ice cube trays (or small portions) and then when are ready to put the dessert together pop the cubes in to the blender and give it a very quick blitz!
Assemble the pud
Add a layer of mousse, then a layer of n’ice cream and top with another layer of mousse in a glass, sundae dish or bowl. Top with a sprig of fresh mint and enjoy!