Guilt-free Chocolate cake (with beetroot!)


You can’t beat a good chocolate cake and this is definitely a good chocolate cake! It’s totally vegan and totally yummy! This was inspired by a delicious cake my friend Vicky made so I thought I’d have a go at veganising and gluten-freeing it! 🙂

2014-06-07 21.18.06-1

You will need:

250g cooked Beetroot

250g unrefined Raw sugar (coconut palm sugar etc)

190g self-raising gluten free Flour

60g raw Cacao powder

1 tsp Bicarbonate of soda

3 tbsp Chia seeds soaked in 9 tbsp water

180 ml Almond oil (or other non flavoured oil)

1 tsp Vanilla extract

1 tsp Chocolate extract (or extra Vanilla if you don’t have this)

2014-06-07 21.18.34

Preheat the oven to 170 C. Lightly grease a 23 cm diameter cake tine.

In a large mixing bowl, sift together the flour, cacoa and bicarbonate of soda. Then stir in the sugar.  Pop the cooked beetroot in to a food processor and blend until smooth. Place this in to a sieve over another bowl and push out any juices with the back of a spoon. You don’t need the juice for this recipe but don’t bin it – you can throw it in to a smoothie 🙂

Put the beetroot pulp back in to the processor and then turn on the motor and add the soaked chia seeds, vanilla and chocolate extract (if using) and then slowly pour in the oil.

Mix until well blended. Make a well in the centre of the flour mix and add the beetroot mixture. Gently fold together with a large spoon. Pour the mixture in to the cake tin and place in the oven for 35 -40 mins (or until a skewer comes out clean). Remove from oven and allow to cool for 5 – 10 mins in the tin, then remove and place on a wire rack to cool.

Then enjoy with a cup of tea (and maybe a cat)! 🙂

2014-06-07 21.22.39

Blueberry and Lemon Curd with a surprise ingredient – dairy and egg free!


My lemon curd recipe (here) has gone down a storm so I thought I’d have a little go at some more curd! I’ve had some blueberries in my freezer for the last few months waiting to be used for something so I decided a blueberry and lemon curd was the one to try!

2014-05-03 18.43.29

This curd is lovely! It’s especially yummy smothered on sourdough fruit toast 🙂

2014-05-04 13.31.44

What’s this surprise ingredient then? Well it’s certainly not something you’d expect to find in a fruit curd! The problem with blueberries in baking is that they do tend to lose their flavour and I didn’t want to overpower them with the lemon. After a bit of research I discovered a nifty little trick to enhance the blueberry flavour; the addition of coriander seeds! Trust me you will not taste the coriander at all but it does bring out the blueberry flavour. This is because they both contain a similar compound so adding the coriander gives the blueberry flavour a real boost!

So you will need:

approx 400g Blueberries (don’t worry if you have a few more or less – it’s not critical)

1/2 cup Water

12 Coriander seeds ground (or a 1/4 tsp ready ground coriander)

Up to 1 cup of Lemon juice (see below) – I used 4 very large lemons

3/4 cup of unrefined raw Sugar (but adjust to taste)

10 tbsp Cornflour

zest of 2 – 3 Lemons

4 tbsp Dairy-free margarine

12 tbsp Coconut milk (or other non dairy milk – almond milk or soya milk will also work)

Pop the blueberries in to a saucepan with the water and heat gently until the blueberries are softened.

While the blueberries are softening you can juice and zest your lemons. You only need the zest from 2 – 3 lemons but it’s worth zesting all of them and keeping the remaining zest in the freezer to use in other recipes later.

Once the blueberries have softened add the ground coriander seed, stir well and heat for a further 2 minutes. Remove from the heat and pass the blueberries through a sieve. Use a wooden spoon to push as much through the sieve as you can. You will be left with a small amount of skin and pulp. Save this and use it in a smoothie! 🙂

Measure your blueberry juice out  – you need a total amount of liquid of 3 cups. The blueberry juice will be about 2 cups or so,  so make it up to 3 cups with the lemon juice. Place it all in to a cold saucepan. Add the cornstarch and whisk to dissolve. Add half the sugar and turn on the heat. Continue to whisk as you bring the mixture to a boil slowly. Taste as you go and add more sugar until you get to a sweetness that suits you. Once boiling allow it to boil gently for one minute without stirring.

2014-05-03 18.26.18


Add the rest of the ingredients, whisking the whole time, and cook for 3 minutes. Remove from the heat, pour into a bowl or jars and allow to cool. Place in the fridge once cooled. Then enjoy! 🙂

Lemon curd thumb biscuits!


Having made a big batch of lemon curd (recipe is here). I thought I’d better find some yummy ways to use it!

photo 5

Now I could just eat it straight from the jar (and actually I do!), or with yoghurt and fruit for brekkie….

photo 1

… but… it’s also pretty delicious combined with almonds in these divine little biscuits.

photo 4

They are super easy to make and take less than 30 mins.

To make about 12 biscuits you will need:

130g Ground almonds

1/4 tsp Baking powder

1/4 tsp Himalayan rock salt

1 tsp Vanilla extract

Zest from 1 – 2 lemons (you can use any left over zest that you froze after making the lemon curd)

2 1/2 tbsp Coconut oil

2 tbsp Maple syrup

1 tbsp Lemon juice (or 1/4 tsp Lemon extract)

1 – 2 tbsp Lemon curd (recipe here)

a handful of Dried cherries

Preheat the oven to 180 C

Place the ground almonds, baking powder, salt and lemon zest in a bowl and mix well. Add the vanilla extract, maple syrup and coconut oil and use your hands to mix into a dough.

Take tablespoon-sized portions of the dough and place on a greased baking sheet. Pat down and then use your thumb to make an indent in the center.

photo 1 (2)

Place the tray in the oven and bake for 10 – 12 minutes. After 5 minutes check them and if the indents are starting to close just gently use your thumb to re-shape them. Bake until they are brown. If you like your biscuits a bit crunchier then bake a little longer.

Remove from the oven but leave the oven on. Fill the indents with lemon curd and place a dried cherry in the middle. Pop them back in the oven for 2 – 3 minutes.

Allow to cool.

They will be lovely and crunchy if eaten straight away. If left for the next day they become soft and macaroon-like – which is simply yummy! You can always pop them back in the oven to re-crisp if you fancy it 🙂

photo 2


Oh My – Homemade Lemon Meringue Pie! Easy and dairy and gluten free! (vegan)


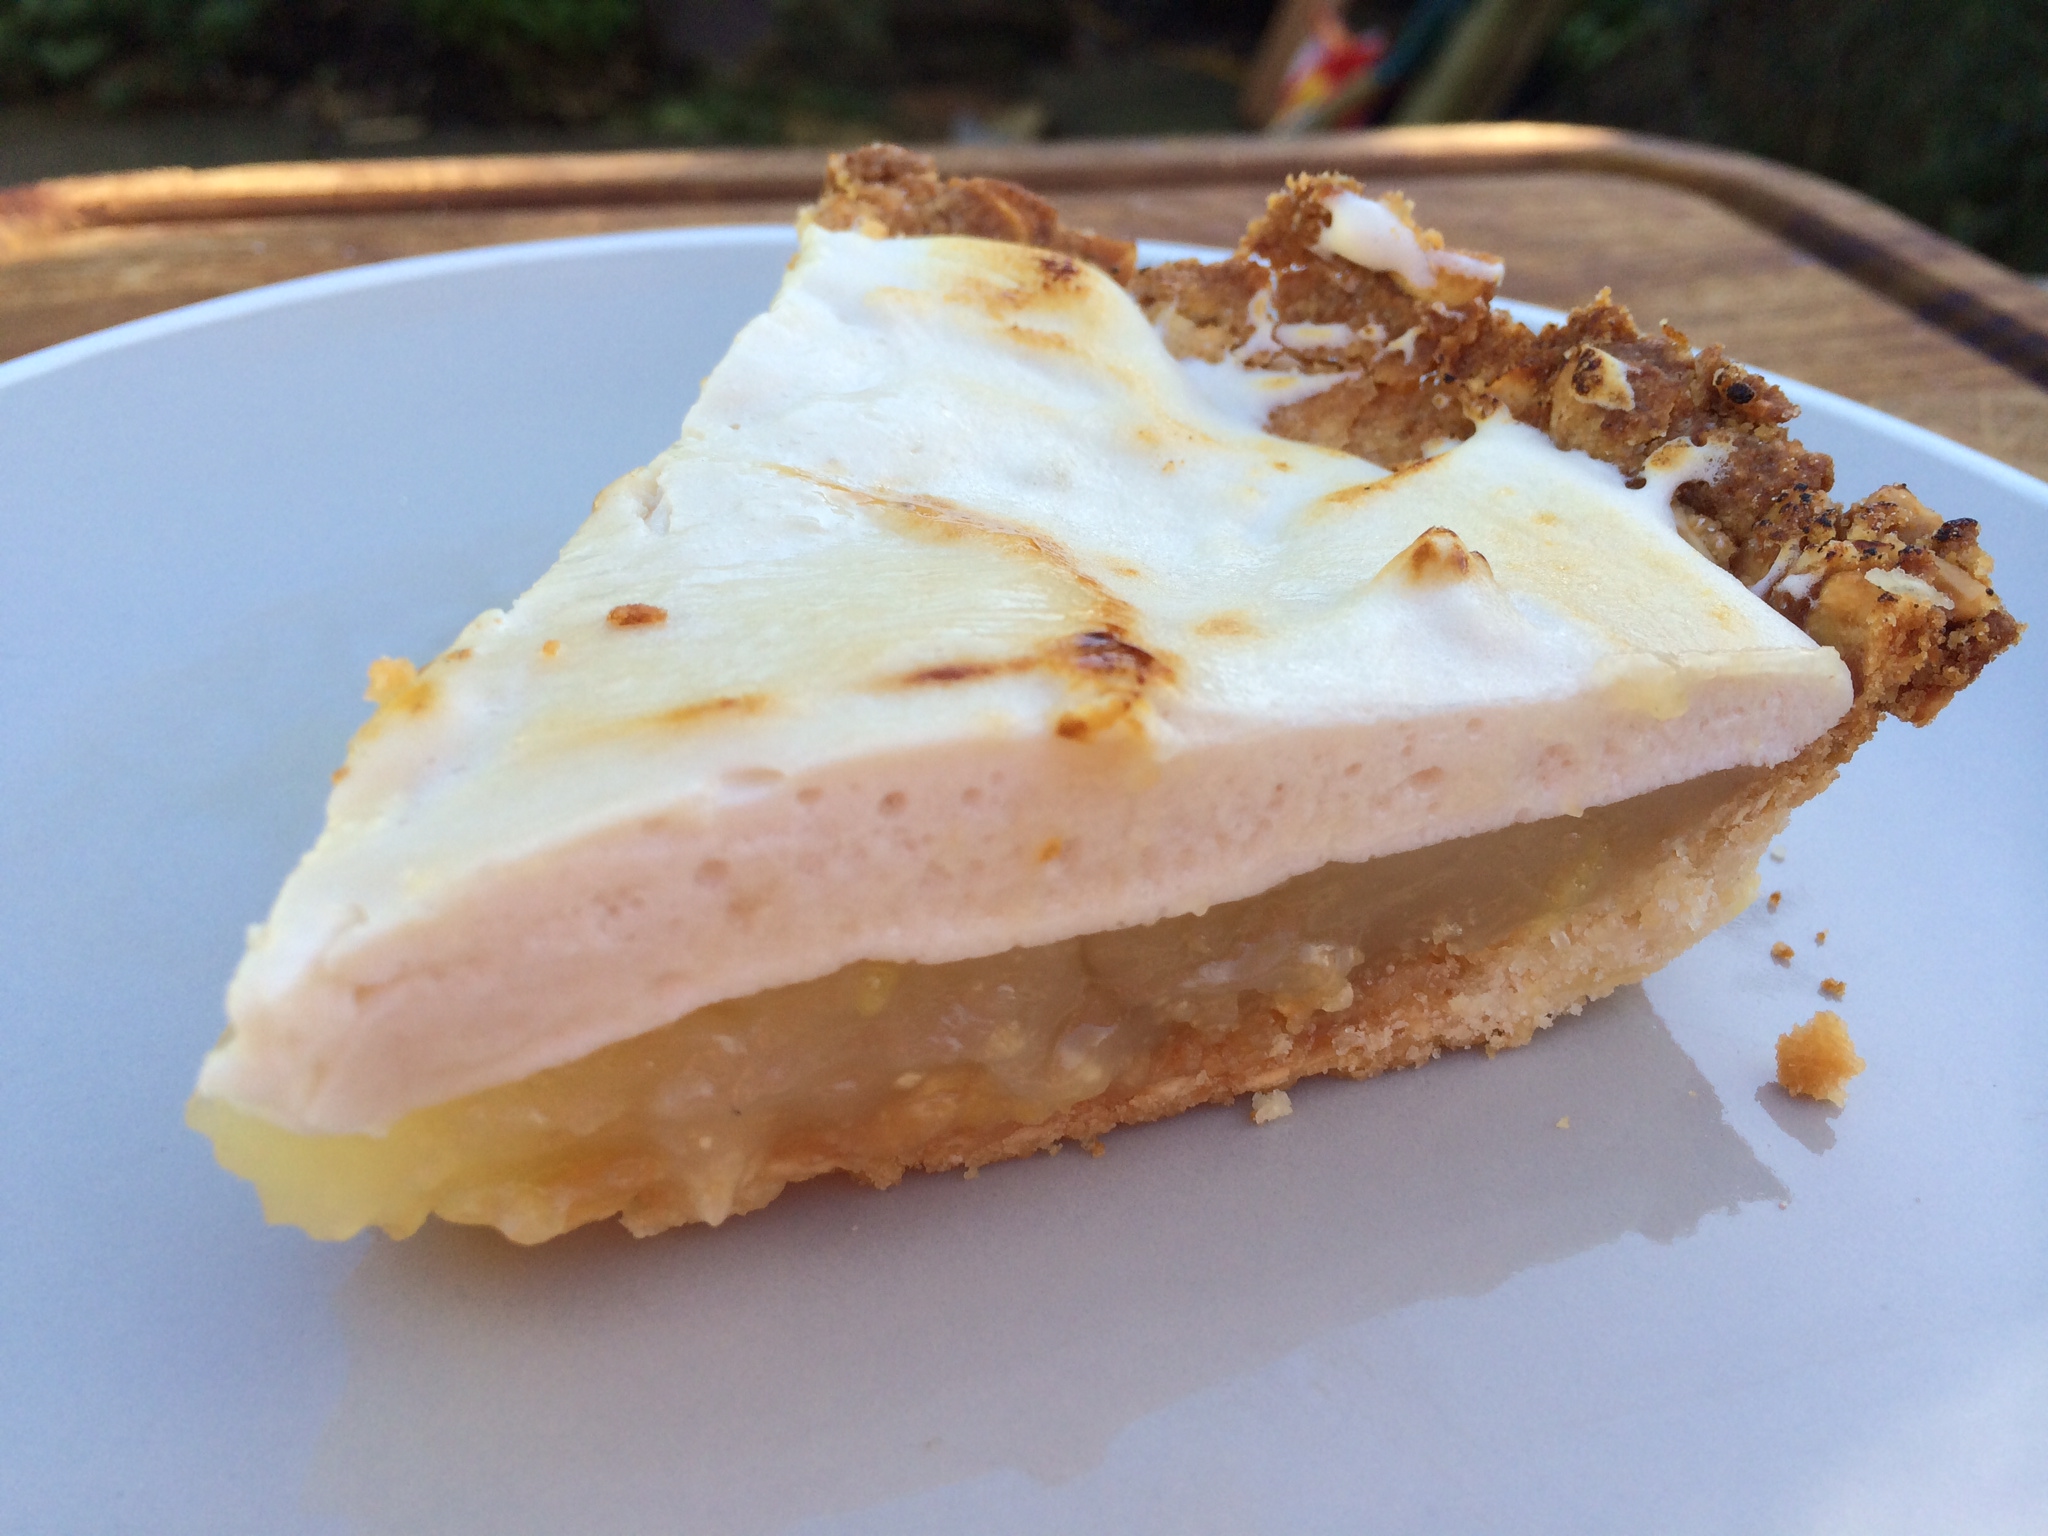
Yes, you read that right – this is a completely dairy and gluten free lemon meringue pie! Can you believe it? I’m not sure I can but I am ridiculously excited about it!

014d13ecabaf9280ca815a3ce17e6ba6f9f712e53e

I’ve been obsessing about lemon meringue pie lately but really wanted to avoid the traditional gluten and dairy-filled pie recipes. I wasn’t sure I’d be able to pull this off but… oh my word – I definitely have! This is so yummy and really pretty easy too.

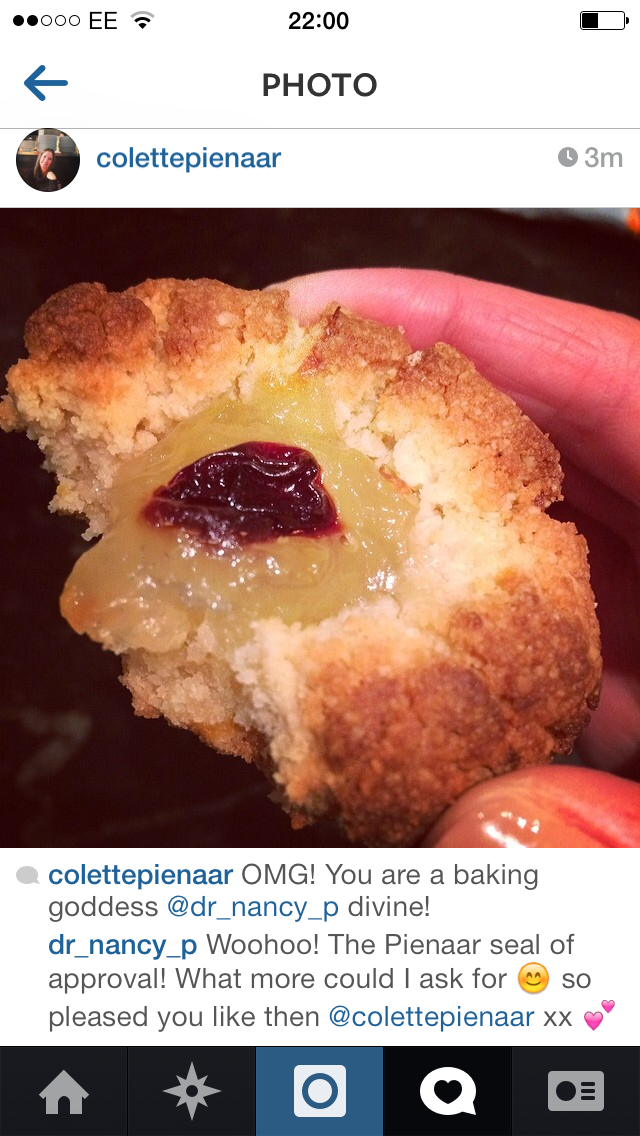
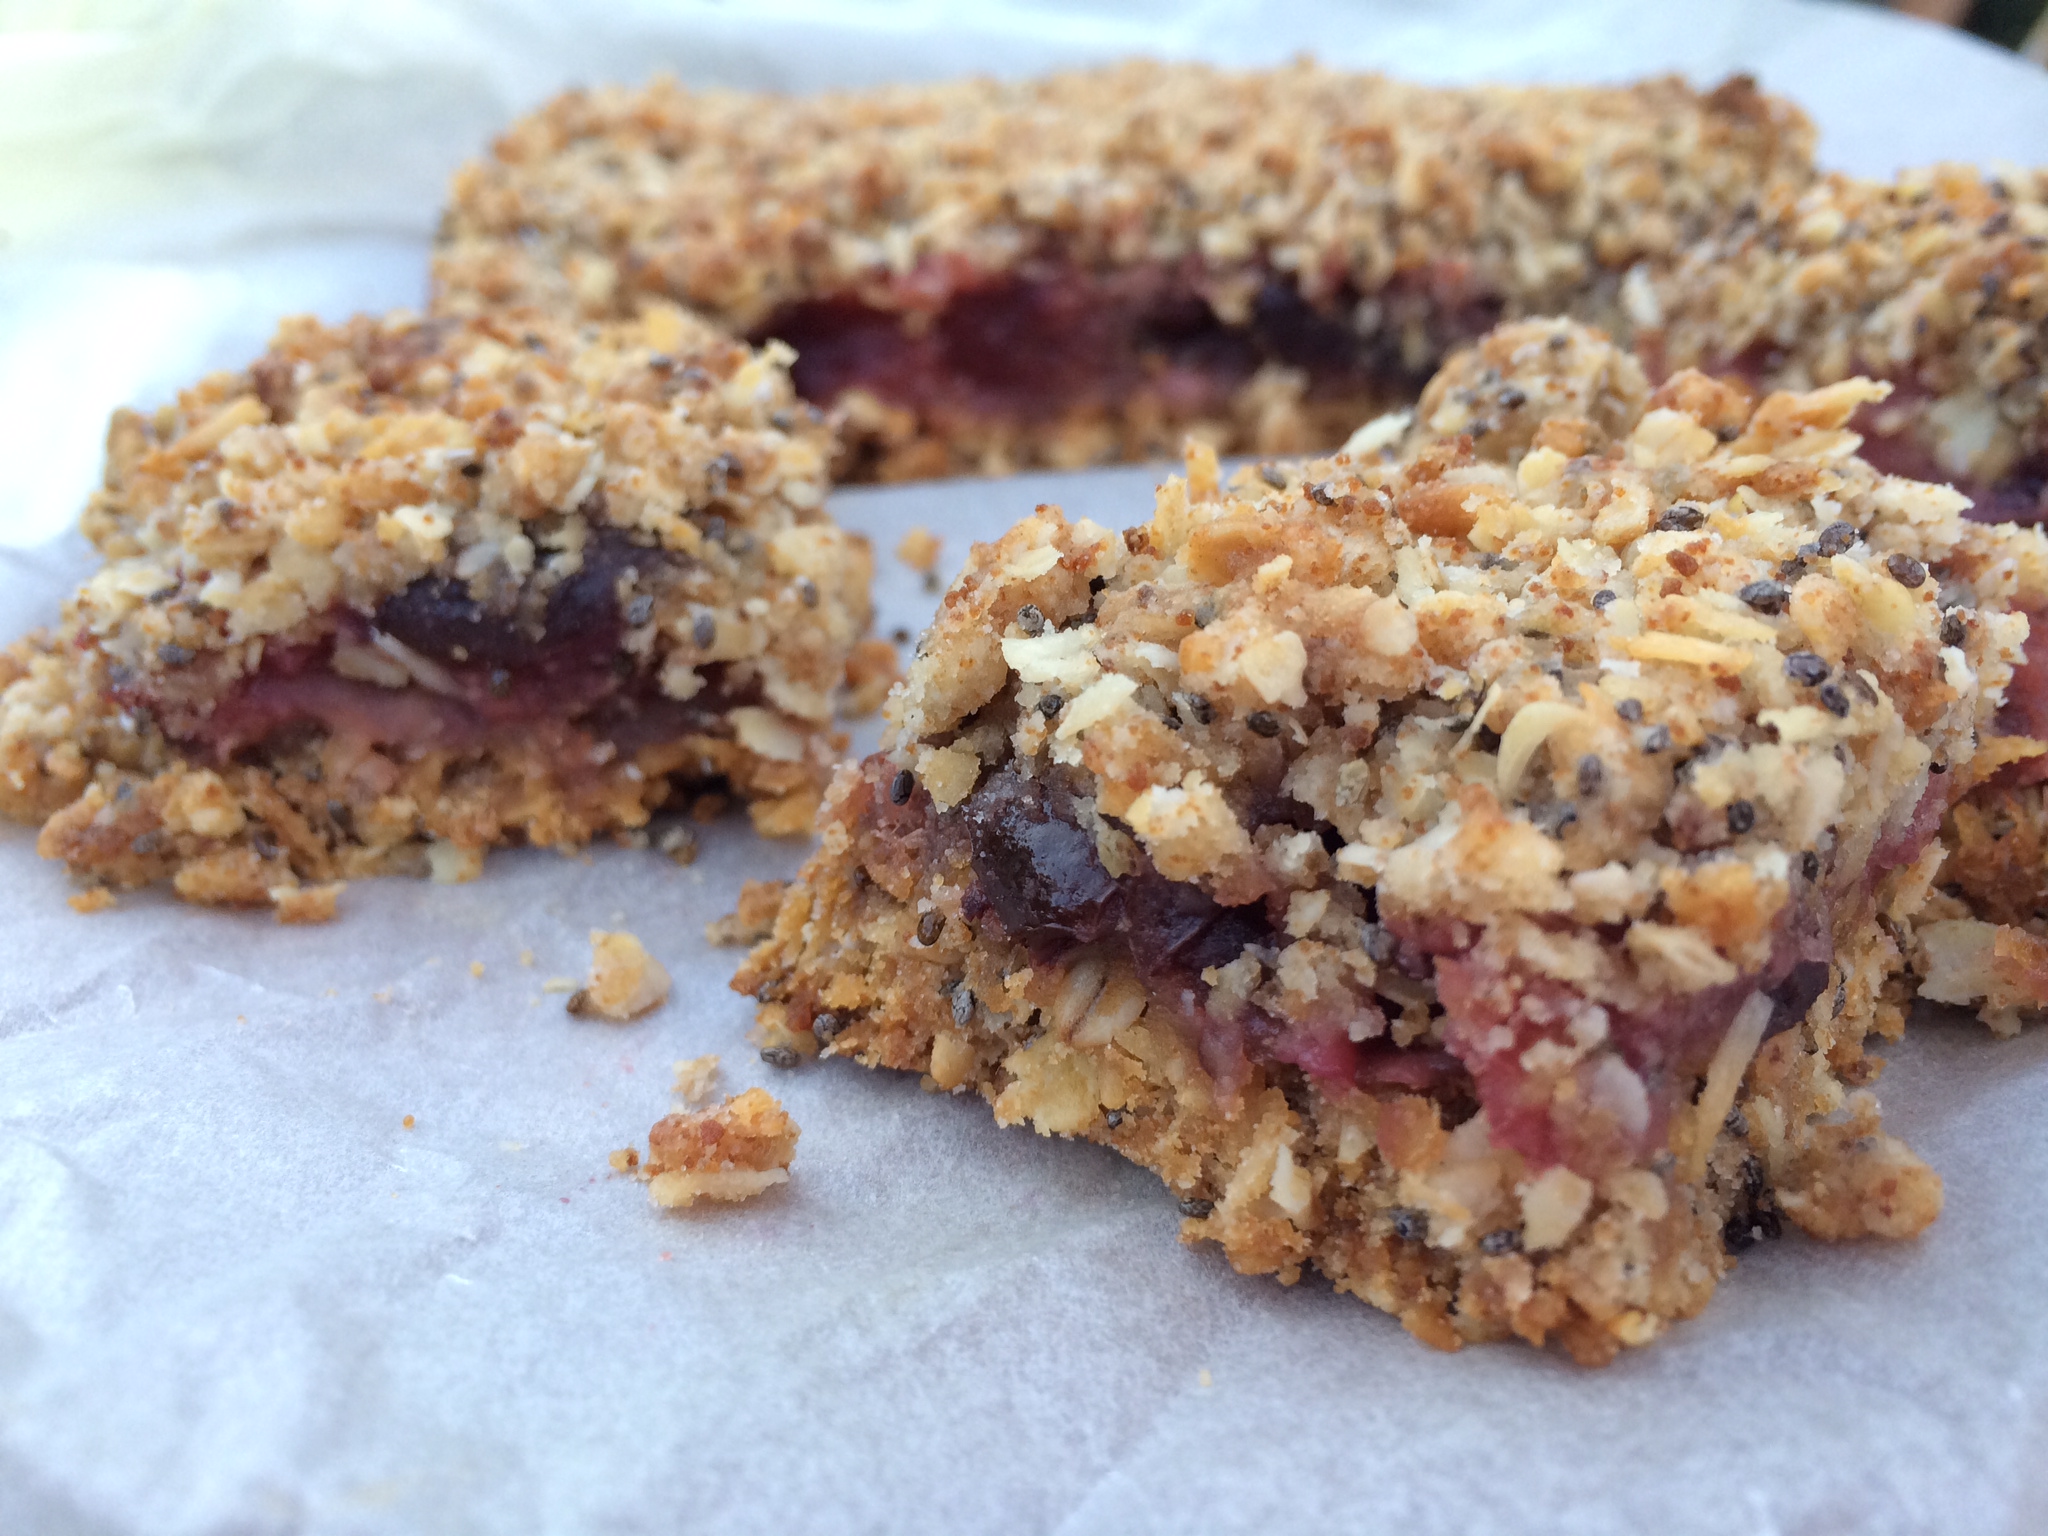
I gave a piece to my top taster and this was the result after only a few minutes… so I’m pretty sure she liked it too 😉

0123c48c69e9f638785b1c2de94516648e536e1263

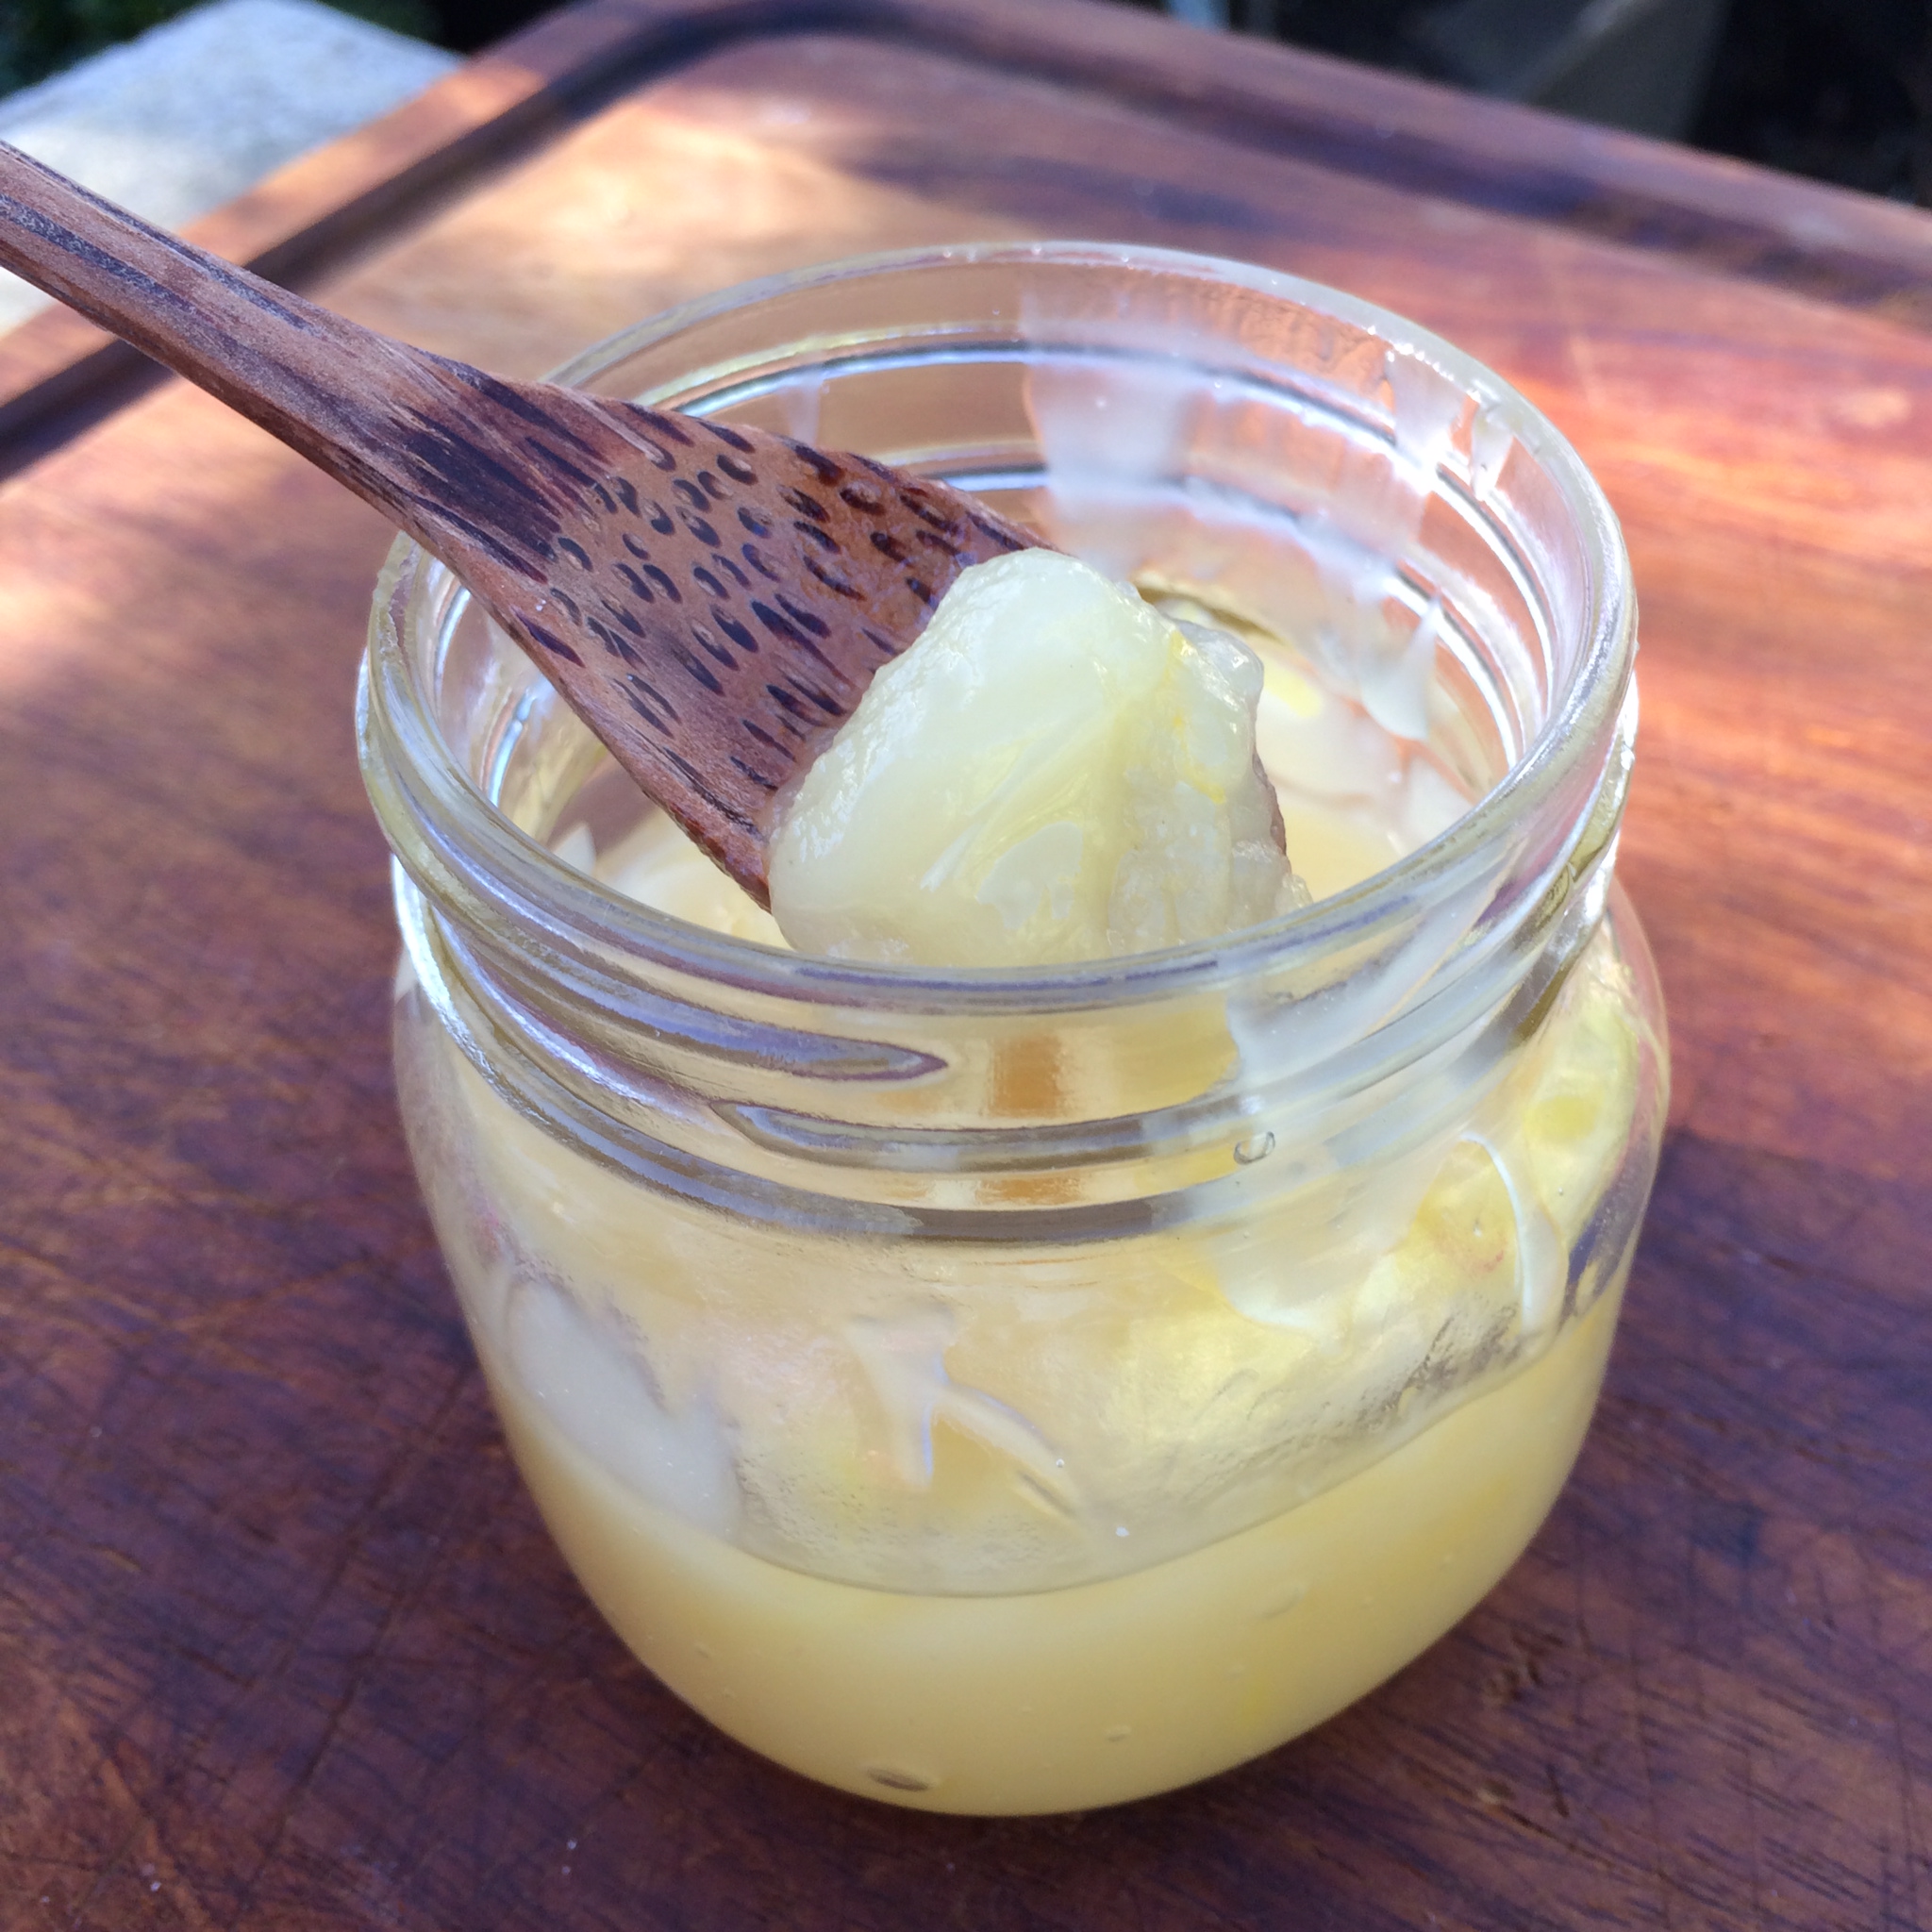
This recipe is in 3 parts – the pastry shell, the curd filling and the meringue. The curd is super easy and the recipe has been posted separately (here) but I’ll re-post it here for ease. The curd recipe will give you more than you need but that’s ok – you can save it for later (or make some extra mini pies too!). If you want a thicker meringue then simply double the meringue ingredients.

01424b95c39f738c4c4c0904d2ca30f36de1d6b616

For the pastry:

100g Ground almonds
100g Flaked almonds
75g Rice flour(or other gluten free flour)
25g Golden raw Caster sugar (or other unrefined sugar)
50ml Almond oil
3 -4 tbsp cold almond or other non dairy milk
Pinch of Himalayan rock salt

For the filling:

1 1/4 cups of Lemon juice (I used 6 very large lemons)
Zest of half of the lemons used (freeze the rest of the zest for use later)
1/2 cup of Cold water
1 3/4 cups unrefined raw Sugar (adjust to taste)
5 tbsp Cornflour (corn starch)
2 tbsp non-dairy margarine
6 tbsp Almond milk (you could also use soya or coconut milk)

For the meringue:

6 tbsp Egg replacer (I used Orgran No-egg)
1/2 cup and 2 tbsp ice cold Water
1/2 cup unrefined raw Sugar (smaller granules work better)

Make your curd filling to start with (you can make the curd well in advance – it will keep for a few weeks in the fridge).

Juice and zest your lemons. You only need the zest from half of the lemons but it’s worth zesting them all and keeping the remaining zest in the freezer to use in other recipes later.

Place the lemon juice and water in a cold saucepan. Add the cornstarch and whisk to dissolve. Add the sugar and turn on the heat. Continue to whisk as you bring the mixture to a boil slowly. Once boiling allow it to boil gently for one minute without stirring.

Add the rest of the ingredients, whisking the whole time, and cook for 3 minutes. Have a little taste – if it’s not sweet enough for you then stir in some more sugar. Remove from the heat, pour into a bowl and allow to cool in the fridge. Place clingfilm over the bowl to avoid a skin forming.

01ee94feadf04b9e17985080d3392bb95254df01c3

While the curd cools you can make your pastry.

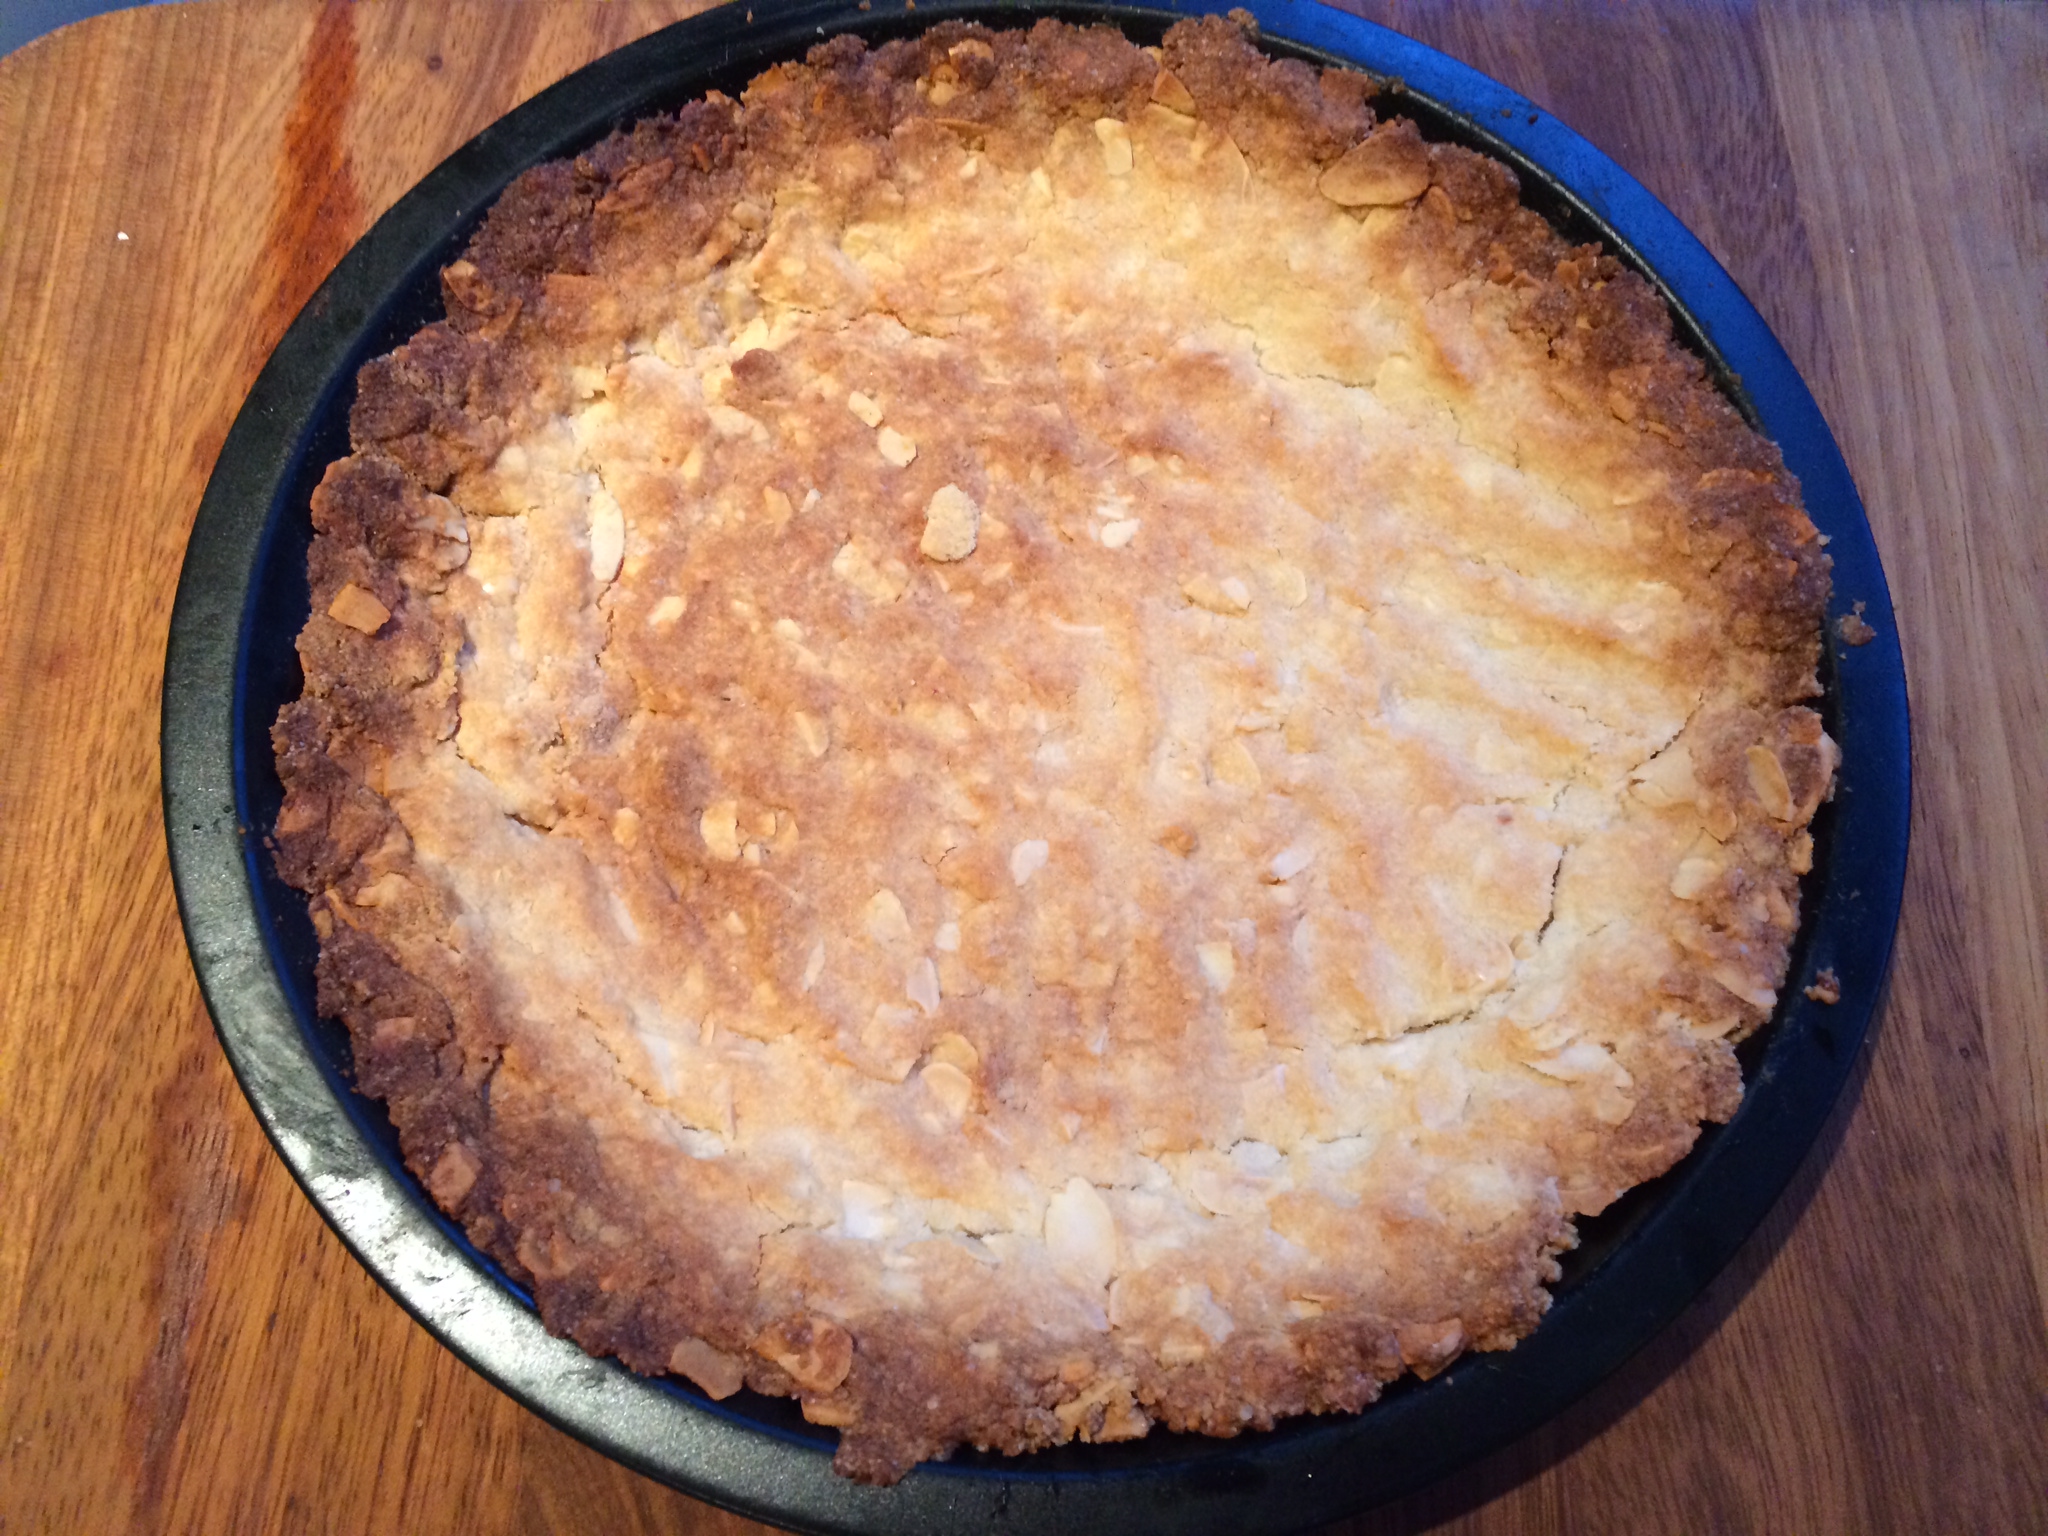
Preheat the oven to 180 C and grease a 20 cm flan or pie dish lightly with almond oil.

Put the ground and flaked almonds into a bowl with the flour and salt and stir to combine. Keep stirring and add in the olive oil gradually. Add 2 tablespoons of almond milk and keep stirring. The mixture should hold together when pressed, if it doesn’t then add some more almond milk, stirring all the time, until it does. At this point have a taste. If you want a sweeter pastry then add some more sugar until you get the desired flavour. Press in to the flan dish. You may well have some pastry left over – if so you can either make some mini-pies or you can create little flat biscuits with the leftovers (just bake until cooked!) .

Bake in the oven for 15 minutes or until set and barely golden. Remove from the oven and brush the pastry with a little almond oil and return to the oven for a few minutes to set then set aside to cool.

01004e4b4a33a35a0f405433bc0062f974d1bd0429

Once the pastry has cooled fill it with as much curd as you fancy and place in the fridge while you prepare the meringue.

Preheat the oven to 100 C.

Put the egg-replacer in to a large, clean, dry mixing bowl. Add a small amount of water and begin to whisk – ideally with an electric hand blender if you have one. It will form a sticky paste. Continue to mix and add a little water at a time, together with a little sugar. Whisk the whole time and add the water and sugar very gradually. You will see that the paste begins to rise. Whisk until you have stiff peaks and it is a marshmallowy consistency.

01fc5aaaa0724e5a77db70a83a62197d0f5c9c4852

Remove the filled pie from the fridge and spread the meringue over the top. Allow to sit for 10 – 15 minutes so it begins to set. Then place in the oven for 30 minutes. If you want a browned finish to the meringue you can use a cooks blow torch to add that effect.

Allow to cool (if you can wait – I confess, I couldn’t!) and then enjoy!

01bcc0641f72405da7a6ec1213e0d41661bcc2853a

Easy Lemon Curd – dairy and egg free (vegan)


I’ve been on a bit of a lemon obsession lately so decided I would have a go at making some homemade lemon curd. The curd you buy in the shops is full of refined sugars, dairy and eggs so this is a much healthier option. It was super easy to make too!

010b9fb8821b6cbee7feae8525ef841334295f5675

This is divine mixed with some natural soya yoghurt, or of course it will make the perfect filling for a lemon meringue pie (recipe here)!

You will need:

1 1/4 cups of Lemon juice (I used 6 very large lemons)

Zest of half of the lemons used (freeze the rest of the zest for use later)

1/2 cup of Cold water

1 3/4 cups unrefined raw Sugar (adjust to taste)

5 tbsp Cornflour (corn starch)

2 tbsp non-dairy margarine

6 tbsp Almond milk (you could also use soya or coconut milk)

Juice and zest your lemons. You only need the zest from half of the lemons but it’s worth zesting them all and keeping the remaining zest in the freezer to use in other recipes later.

Place the lemon juice and water in a cold saucepan. Add the cornstarch and whisk to dissolve. Add the sugar and turn on the heat. Continue to whisk as you bring the mixture to a boil slowly. Once boiling allow it to boil gently for one minute without stirring.

Add the rest of the ingredients, whisking the whole time, and cook for 3 minutes.  Have a little taste – if it’s not sweet enough for you then stir in some more sugar. Remove from the heat, pour into a bowl or jars and allow to cool. Place in the fridge once cooled. Then enjoy – right off the spoon! 🙂

0186a357b21a9c6cb37175d74c6d76cecb0813a872

Cherry and apple flapjack slice and a whole lot of love!


This oaty, fruity, flapjacky treat is simply lovely! You can make it with any fruit compote you choose and in any shape you choose! I was feeling the love so I whipped up one rectangular one and one in a little heart shape! 🙂

01562f15d522c203bd9b815a8a7c50d893d81b1194

This is SO much better for you than traditional flapjack slices – it’s full of wholefoods and the addition of the chia seeds gives an added Omega boost too! You could use store bought compote but they tend to be full of sugar so have a go at making your own if you can – it’s so easy!

017b1f523ad72ab56dec70c3541780d48e85f128a1

You will need:

1 cup Rice flour
1 cup Oats (or quinoa porridge flakes)
1/2 cup Desiccated coconut
1/4 cup Raw coconut sugar
1/4 cup Chia seeds
1 tsp ground Ginger
1/2 tsp Himalayan rock salt
110g Coconut oil (not melted)
3 Tbsp Maple syrup or Agave (or other liquid sweetener)
1 1/2 cup Cherry and apple compote

To make a quick cherry and apple compote take one punnet of cherries (pitted and roughly chopped in quarters) and approximately 3 – 4 Bramley apples (peeled, cored and chopped) and place in a bowl. Pop in the microwave and cook in short bursts until the apple has softened and the cherries are cooked through (can also be done in a saucepan on the hob). If required add a little unrefined sugar to sweeten (though I prefer it without sugar). Allow to cool.

Preheat oven to 175 C.

Add the flour, oats, coconut, sugar, chia seeds, ginger and salt to a large bowl and mix well. Add the coconut oil and rub it in to the dry mixture using your hands to create a breadcrumb consistency. Add the liquid sweetener and mix in to form a crumble-type mixture.

Line a rectangular or square (or heart shaped!) baking dish with baking paper (ensure the baking paper comes up the sides so you can easily remove the flapjack from the tin later). Take just over half of the mixture and place in to a lined baking tin and flatten well. Bake in the oven for 20 – 25 minutes until it starts to brown.

Remove from the oven and spread the compote over the base. Put the remaining crumble mix over the top and lightly press down. Bake in the oven again for 20 – 25 mins or until it browns.

Take it out the oven and let it cool in the tin (or if you can’t wait for it to cool completely wait at least 15 mins!). Then remove, cut up and enjoy 🙂

01e9d34eae728d135b839b20146d22b6be8b23d7d8

0139b6fe964f8c96235a89ef11755f891a1cb75913

Malt loaf muffins! Dairy and Gluten free!


After seeing a post of some delicious looking malt loaf muffins my friend Vicky made I decided I simply had to have a go at gluten and dairy-freeing them! I love the spicy richness of malt loaf so was sure these would be divine. These also super easy to make and make a great grab and go brekkie if you’re on the run. Thank you for the inspiration Vicky! 🙂

photo 2 (2)

You will need:

1 2/3 cups gluten-free Oat bran (if you don’t need to go gluten free then go with wheat bran)

1 cup and 4 tsp Coconut sugar (or other raw, unrefined sugar)

2 tsp Rice malt syrup (or Agave)

2 cups Raisins and currants

2 tsp ground Cinnamon

2 tsp Allspice

1/8 tsp ground Cloves

1/8 tsp ground Nutmeg

pinch of Himalayan rock salt

2 cups of Almond or other non-dairy milk

2 cups of Gluten free flour (or Spelt flour)

2 tsp Baking powder

This mixture will make approx 12 medium sized muffins and 6 mini ones.

Pop all the ingredients apart from the flour and baking powder in to a large bowl and mix well. Allow to soak for a couple of hours so the bran absorbs the milk and forms a wet mush!

Preheat the oven to 180 C.

Mix the flour and baking powder together really well and then add to the wet ingredients. Combine thoroughly and then pop in to muffin cases, sprinkle some coconut sugar over the top and bake for 20 – 25 mins, or until a skewer comes out clean.

These are delicious straight out the oven while still warm or will keep for a few days in an airtight container. You can also freeze them to eat later.

photo 2 (3)


Chocolate, Nut and Chia Cookies – dairy and gluten free


Do you love chocolate? I do! rather too much sadly! So I’m always on the look out for chocolate goodies that will hit the chocolate spot but are a little bit better for me! These cookies are awesome – they’re chocolatey, they’re healthy and they’re full of omega-3’s and good protein and fat. They’re also dairy, gluten and unrefined sugar free! Whoop!

photo 1

You will need:

1/2 cup Buckwheat flour (you can also use quinoa or rice flour)
1 cup Almonds
1 cup Hazelnuts
1/4 cup Medjool dates (approx 2 – 3 chopped)
1/3 cup Maple syrup
2 tbsp Coconut oil (melted)
3 tbsp Raw cacao powder
3 tbsp Chia seeds
1/4 cup Water
Cinnamon chocolate chilli sugar – for dusting

For the cinnamon chocolate chilli sugar you can buy pre-mixed sugar, but I prefer to make my own. It’s easy! Just mix 100g coconut sugar with 10g of cocoa powder, 2 tsp cinnamon and 1 tsp chilli powder (or more if you want it hotter!). Adjust the amounts depending how much you need but keep them in those ratios. Make up a batch and keep it in an airtight jar. Just shake before use as the sugar tends to sink to the bottom, leaving the lighter cocoa etc at the top.

Preheat the oven to 180 C.

First pop the nuts into a food processor and blend until they are really well ground (almost to a flour). Add in all the other ingredients and process again. It will form a sticky dough.

Take a tablespoon of the mixture and roll it into a ball. Then place on a lined baking tray and flatten until very thin.Sprinkle with the cinnamon chocolate chilli sugar and then pop in the oven. Bake for 12 – 15 mins until firm and starting to brown. Remove from the oven and allow to cool.

Then eat! 🙂

photo 5

Apple, Date and Coconut Granola – sugar-free!


Why waste your money on nasty, sugar-filled shop-bought granola when you can make your own! This is divine and uses only fruit sugars so there’s no added sugar of any type at all!

If you are a cinnamon fan I highly recommend adding a generous few teaspoons in to this mix as well! Nom nom nom! 🙂

015be19ffb427a64a26814cfa1bac83ebaf86cbfd2

2 cups Spelt porridge oats (or normal oats if you prefer)

1 cup Almonds

1/2 cup Pumpkin seeds

1/2 cup Sunflower seeds

1/4 cup Chia seeds

1/4 cup Flax seeds (Linseed)

1/2 cup Desiccated coconut

1/2 cup dried Fruit (I used a mix of different raisins)

1 cup chopped Dates

1 cup Apple purée (recipe here)

Preheat the oven to 200 C

Add all the ingredients except the apple purée to a large bowl and mix well together. Add the apple purée and make sure everything is well coated. Then transfer to a large roasting dish and pop in the oven.

01fa452a3e9dc432dd5a5f8fb4f1b360f251879629


Check after 10 minutes and turn. Keep checking after that every 5 minutes and ensure it isn’t burning. The apple purée makes this quite moist so you need to let it roast for as long as possible. Once the oats and nuts have browned turn the oven off and leave the granola in there while the oven cools to further dry it out. Make sure it is completely dry before you remove (if not just roast a bit longer!).

Store in an airtight container and it will last for weeks (unless you’re like me in which case it will last days as you won’t be able to stop eating it! 🙂 )

Then enjoy with some soya yoghurt and compote for brekkie! 🙂

015e4b9135e321a2ef75b0fa804019eeaebc66a241


Fight that grump! Chocolate, Cherry and Chilli Biscuit balls! Dairy and Gluten free


We all get a little grumpy sometimes don’t we? When I’m feeling the grump I usually reach for the chocolate (Willie’s Cacao is my chocolate of choice!) but I thought this week I’d try something a little different! It’s still chocolate but with a kick, and I guarantee this little beauties will cheer up even the biggest grump!

photo 2

This a modified version of my great balls of biscuit recipe but I’ve made these bigger – cos you need a bit more biscuit to fight that grump 😉

photo 5

To make about 16 biscuit balls you will need:

260g Ground almonds

4 tbsp Raw cacao powder (or cocoa powder)

30g Dark, dairy-free chocolate (I use the Willie’s Cacao Drops but any dark chocolate chopped up small will be fine)

30g Dried cherries

5 tablespoons Coconut oil (melted)

1/2 tsp Baking powder

1/2 tsp Himalayan rock salt

1/4 – 1/2 tsp Cayenne pepper (adjust to taste)

1/4 – 1/2 tsp hot chilli powder (adjust to taste)

1 tsp Vanilla extract

4 tbsp Maple syrup (or other liquid sweetener such as agave or honey)

Preheat the oven to 170 C.

Put the dry ingredients in to a mixing bowl and combine thoroughly. Start with a small amount of cayenne and chilli powder at this stage (unless you are confident in how hot you want it 🙂 ). Then chop the chocolate and cherries into small pieces and add them in to the mixture. Add the coconut oil, maple syrup and vanilla extract and mix together. Have a little taste and add more of the cayenne and chilli is required. I like it pretty hot so I added quite a bit! Mix it in well if you’re adding more at this stage. You should find the mixture will stick together when you squeeze it between your fingers.

Take tablespoon sized portions of the mixture and form in to a ball. Pop on a greased baking tray and flatten a little. Place in the oven for 10 – 15 minutes (start checking at 10 minutes). Remove when they are starting to brown. They will feel very soft when you take them from the oven but just leave them to cool on the tray and they will harden.

Enjoy with a nice cuppa and feel that grump melt away! 🙂

photo 3