A host of Valentine’s treats! Dairy-free shortbread biccies with natural pink raspberry icing


I got a little over-excited in the biscuit-cutter section of the cake shop and end up with a loast of new valentine’s cutters! So here, for you, is a feast of valentine’s biccies for the one you love (in my case, that’s me! ha ha!) 🙂

IMG_0163

All the biscuits are based on the same biscuit recipe which I’ve posted before – here but here it is again for ease. This makes LOADS of biscuits so you may want to halve the amount to start with.

4 cups Spelt flour or gluten-free flour mix

2 cups Unrefined Icing sugar

12 oz Dairy-free margarine (get the best quality you can)

Pre-heat the oven to 180 C. Put the margarine in a large mixing bowl, sieve the flour and icing sugar in and cream it together. Try not to over mix but make sure the margarine is properly mixed with the dry ingredients. Once it’s formed a dough wrap in cling film and chill for 30 mins. If you find the dough is too sticky then add some more flour.  Once chilled, roll out and use a biscuit cutter to cut whatever shape you have. Sprinkle with a little raw sugar if you like and place on a greased baking tray and bake for 8 – 10 mins, or until golden. Remove from the oven and allow to cool on the tray.

Cutting and Decorating!

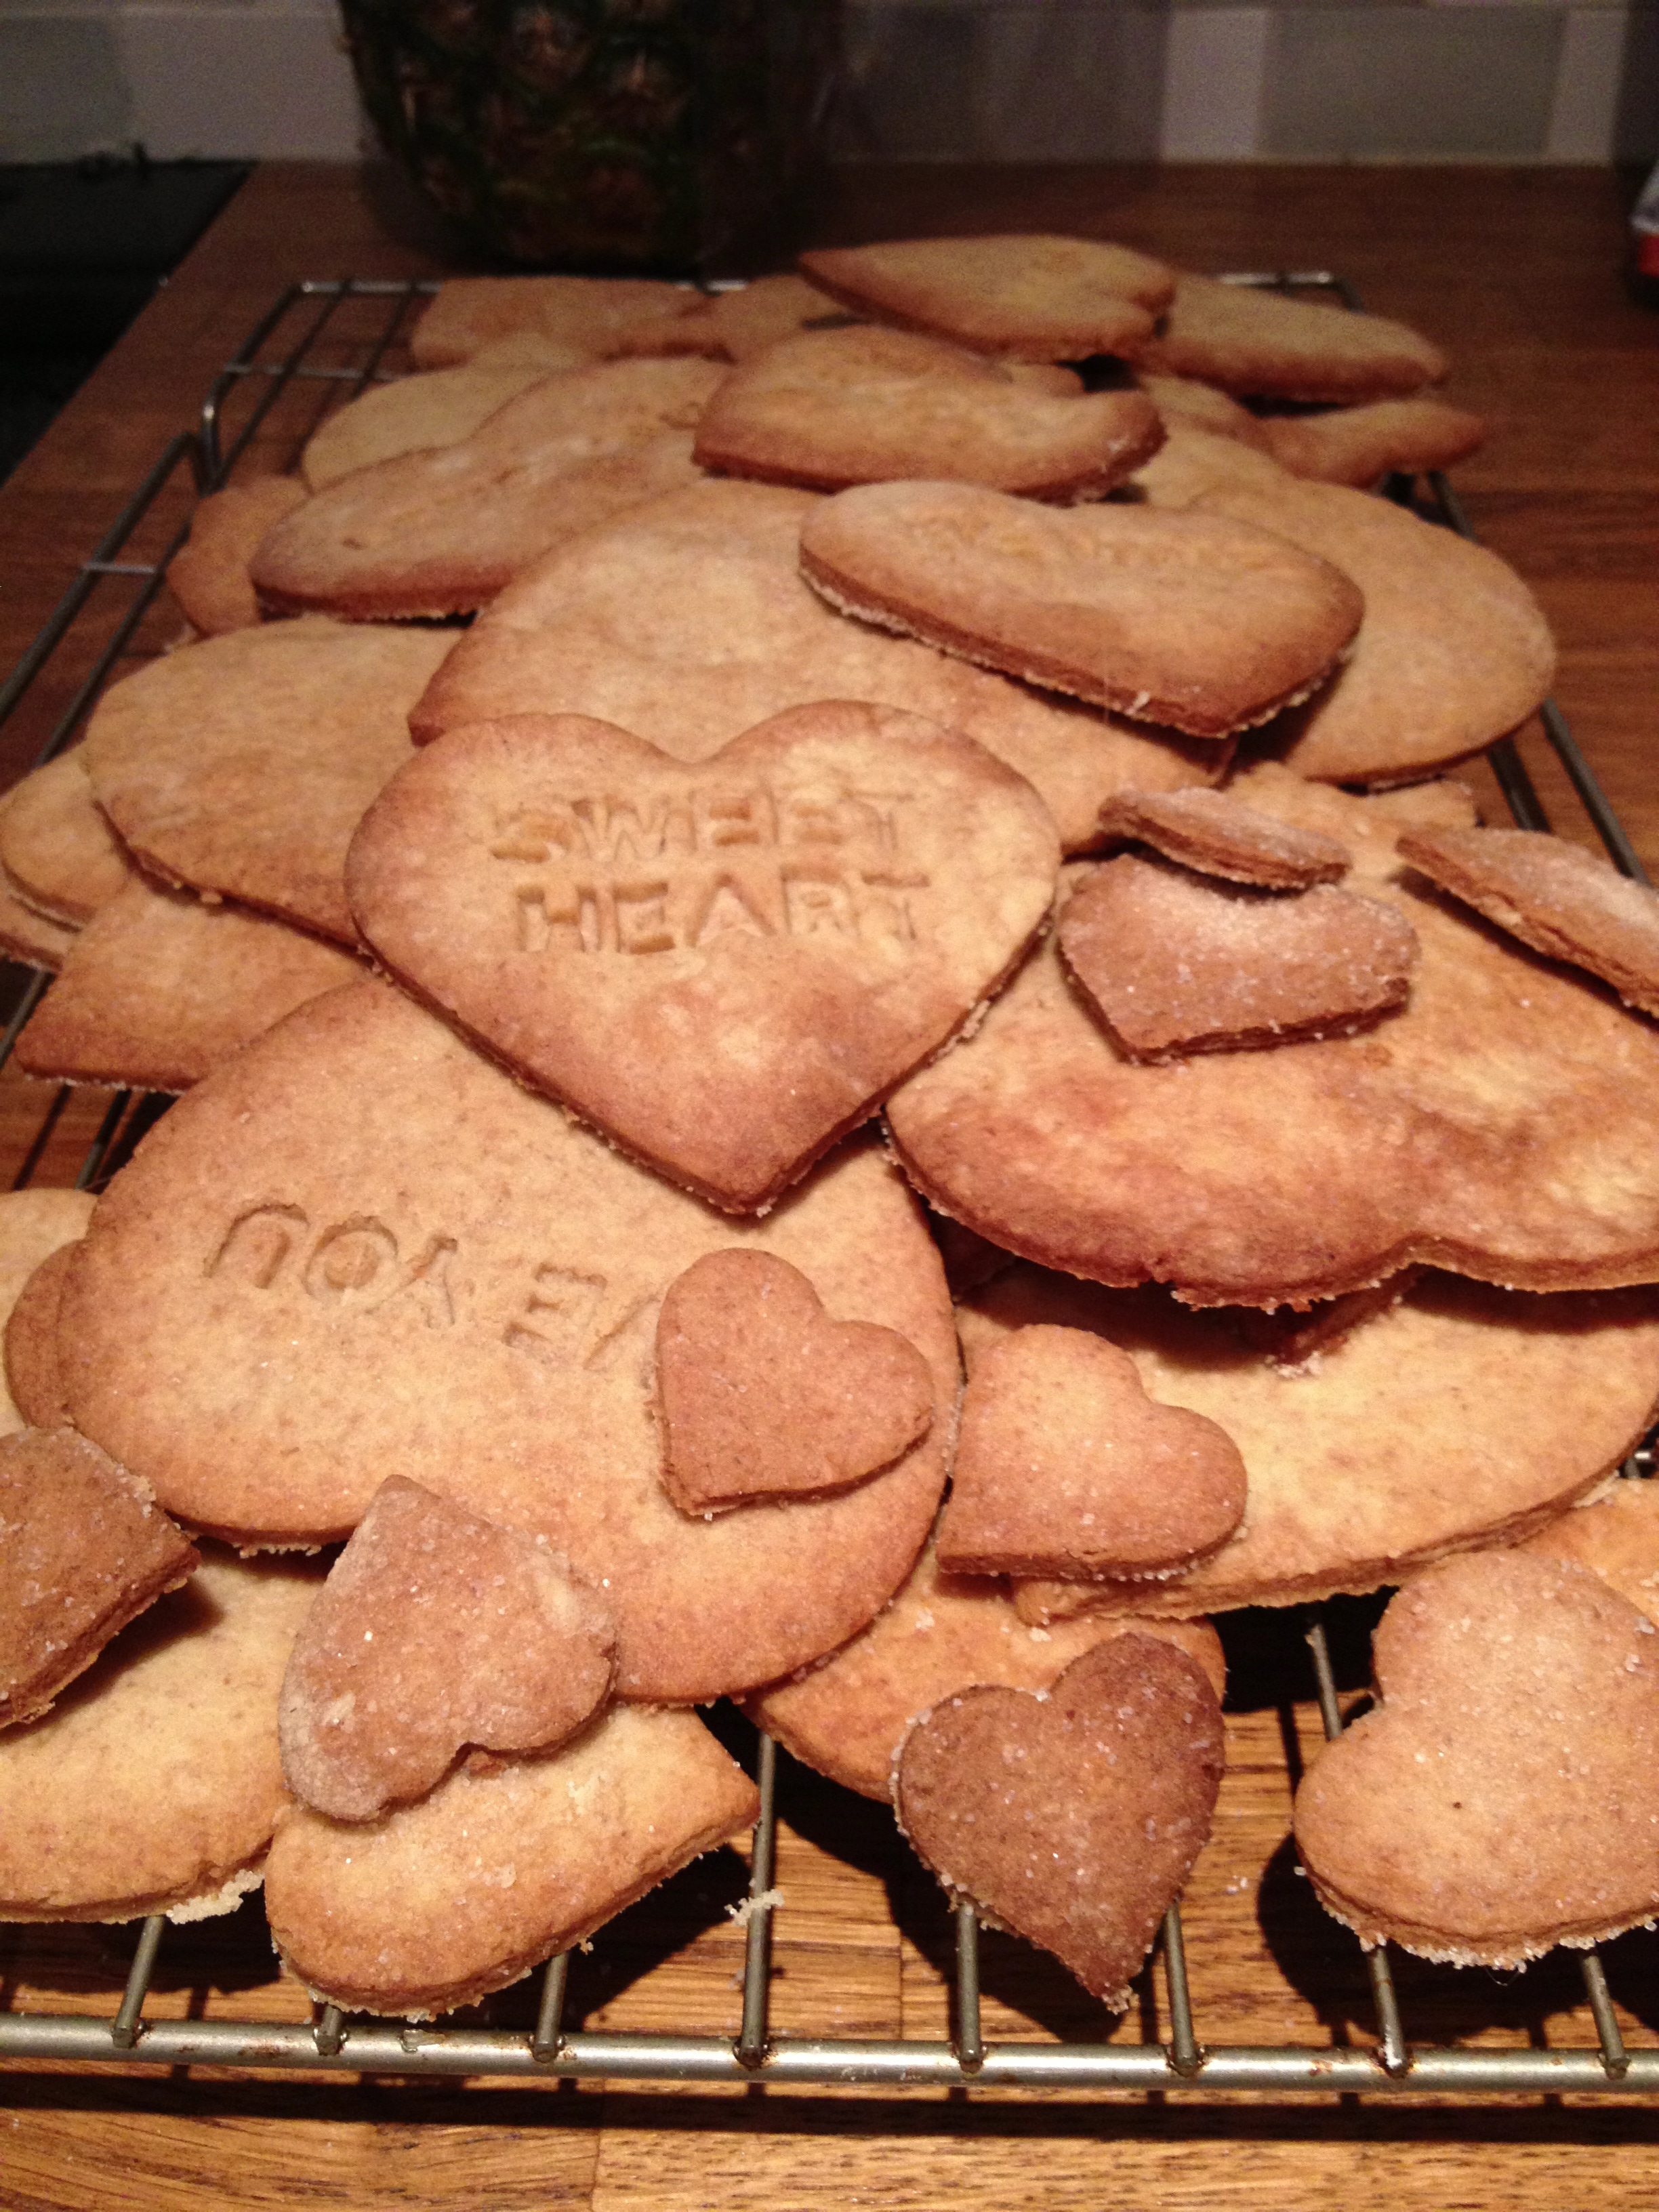
You can use any cutters you like but I had the pleasure of trying out all my new valentine’s ones! It was such fun! For most of the biccies I just sprinkled with raw sugar. I had a wonderful set of hearts that decrease in size so I had a lot of fun with those.

IMG_0179 _MG_8051

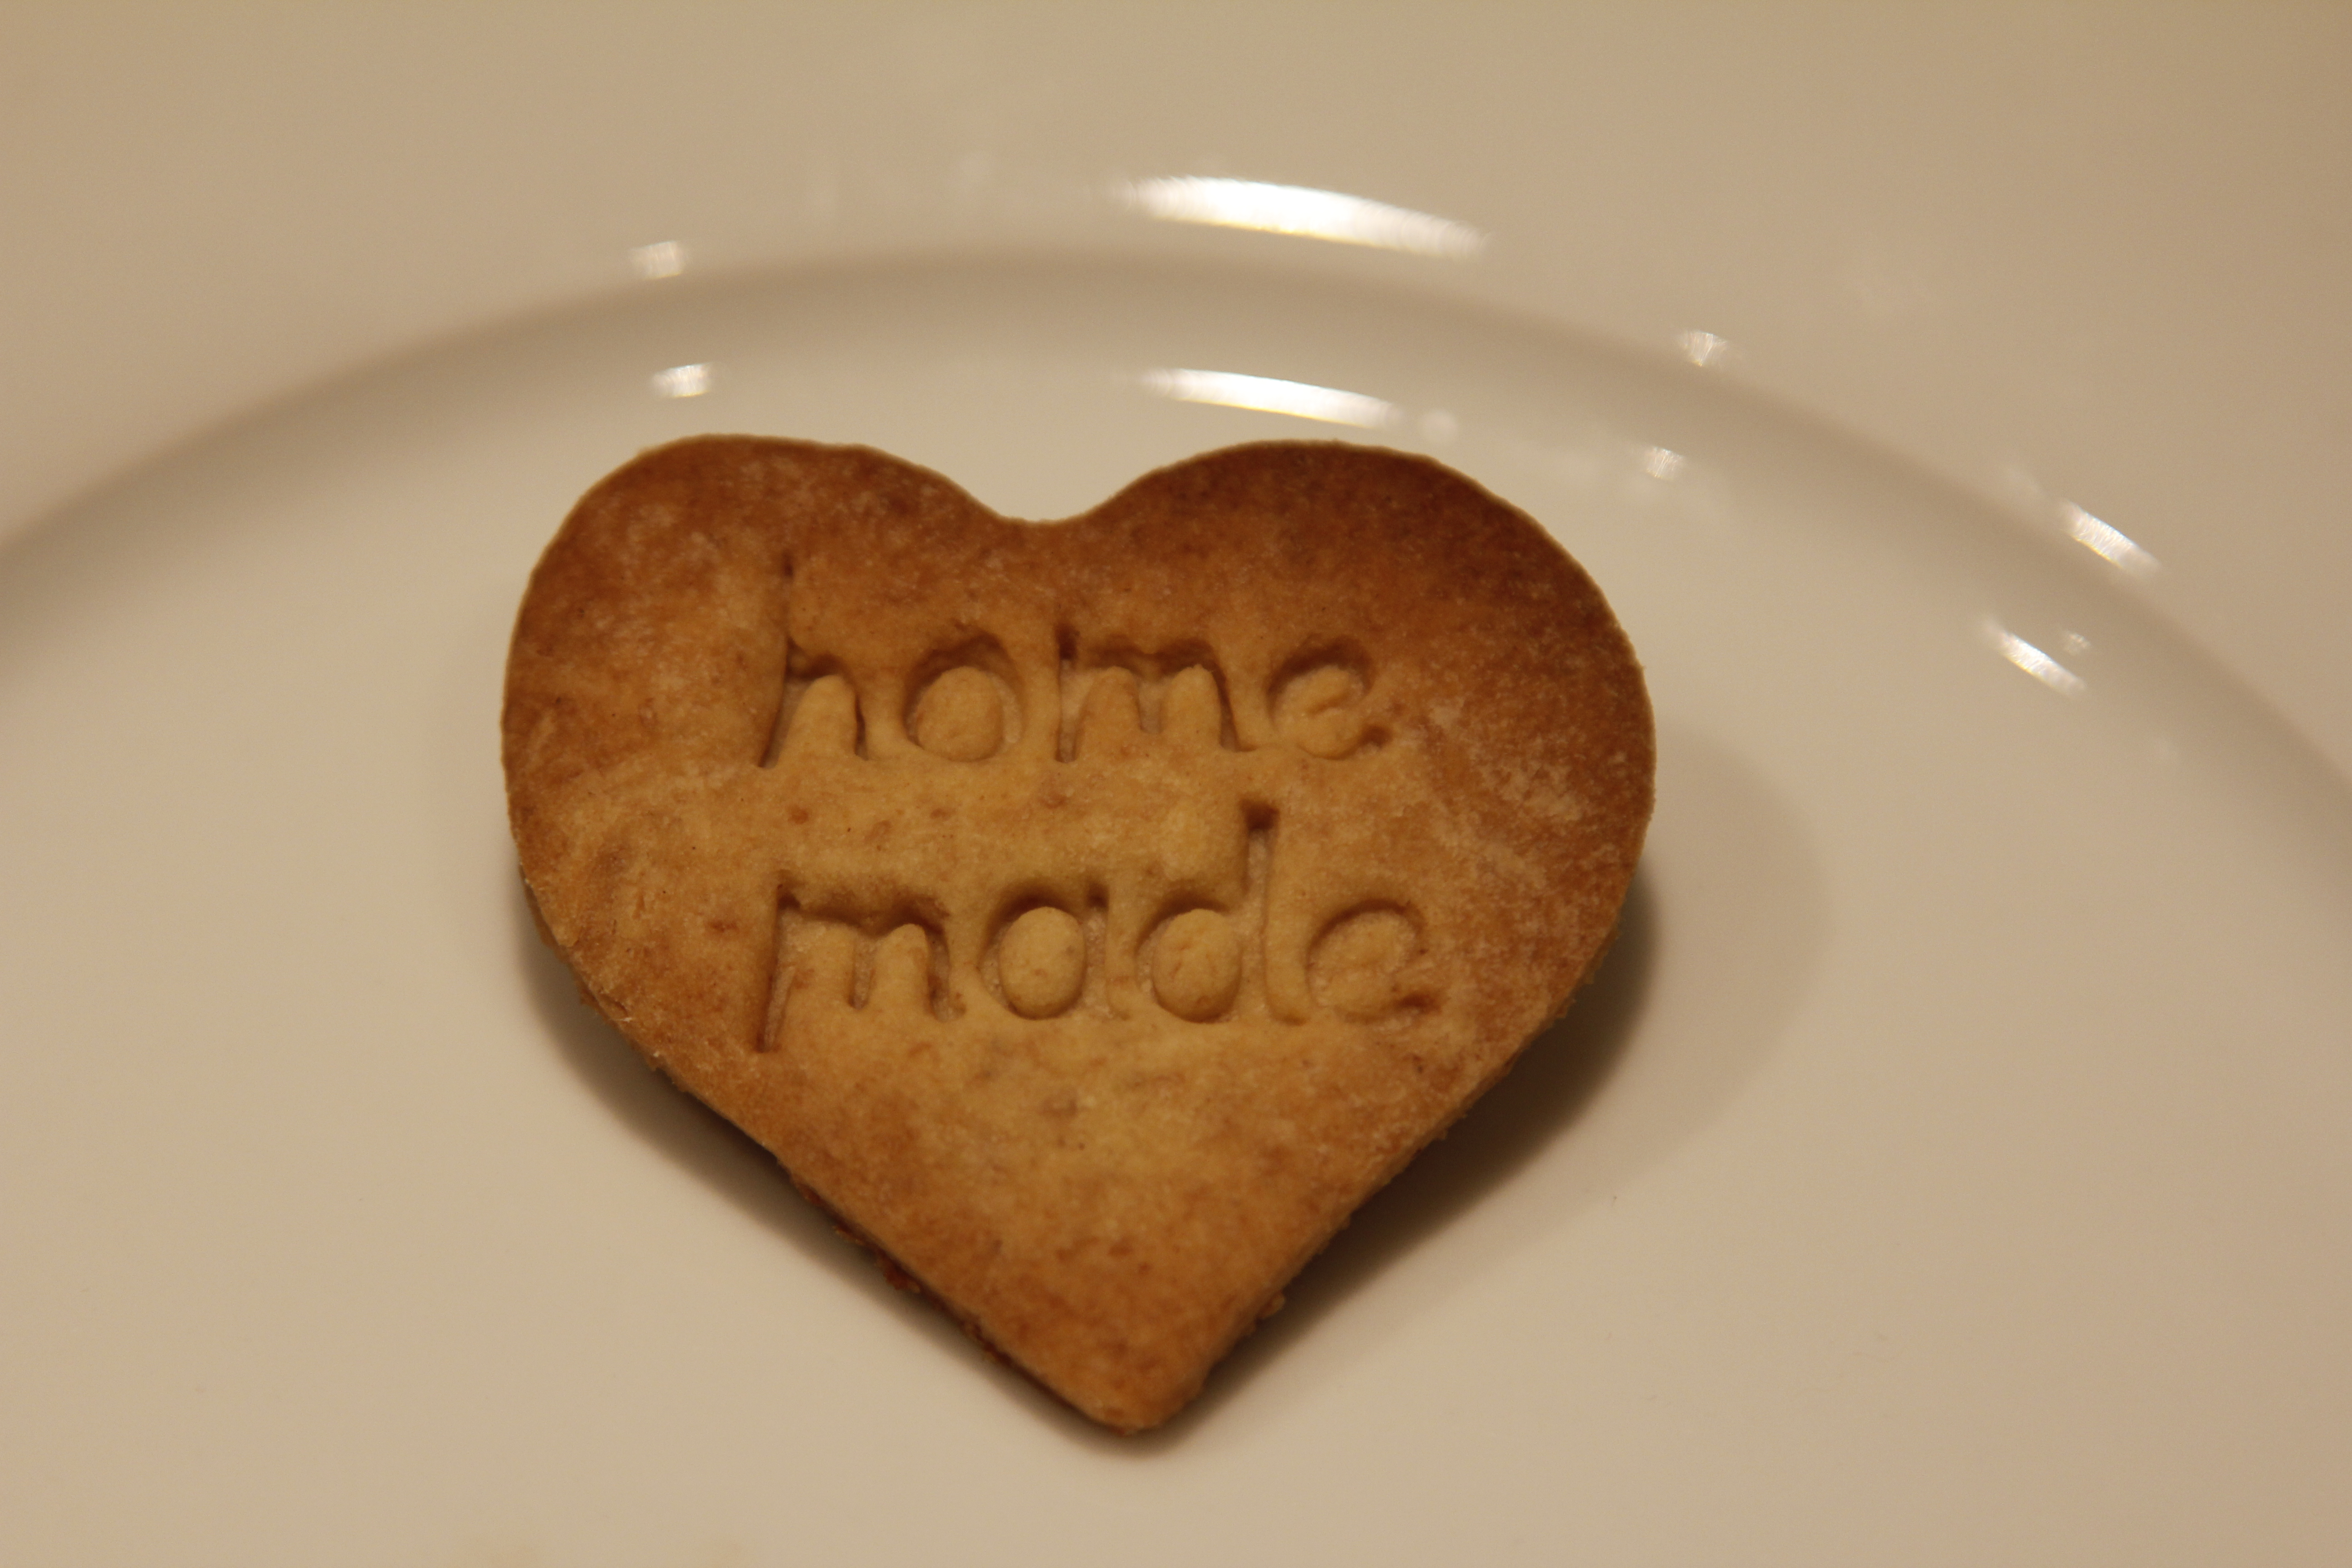
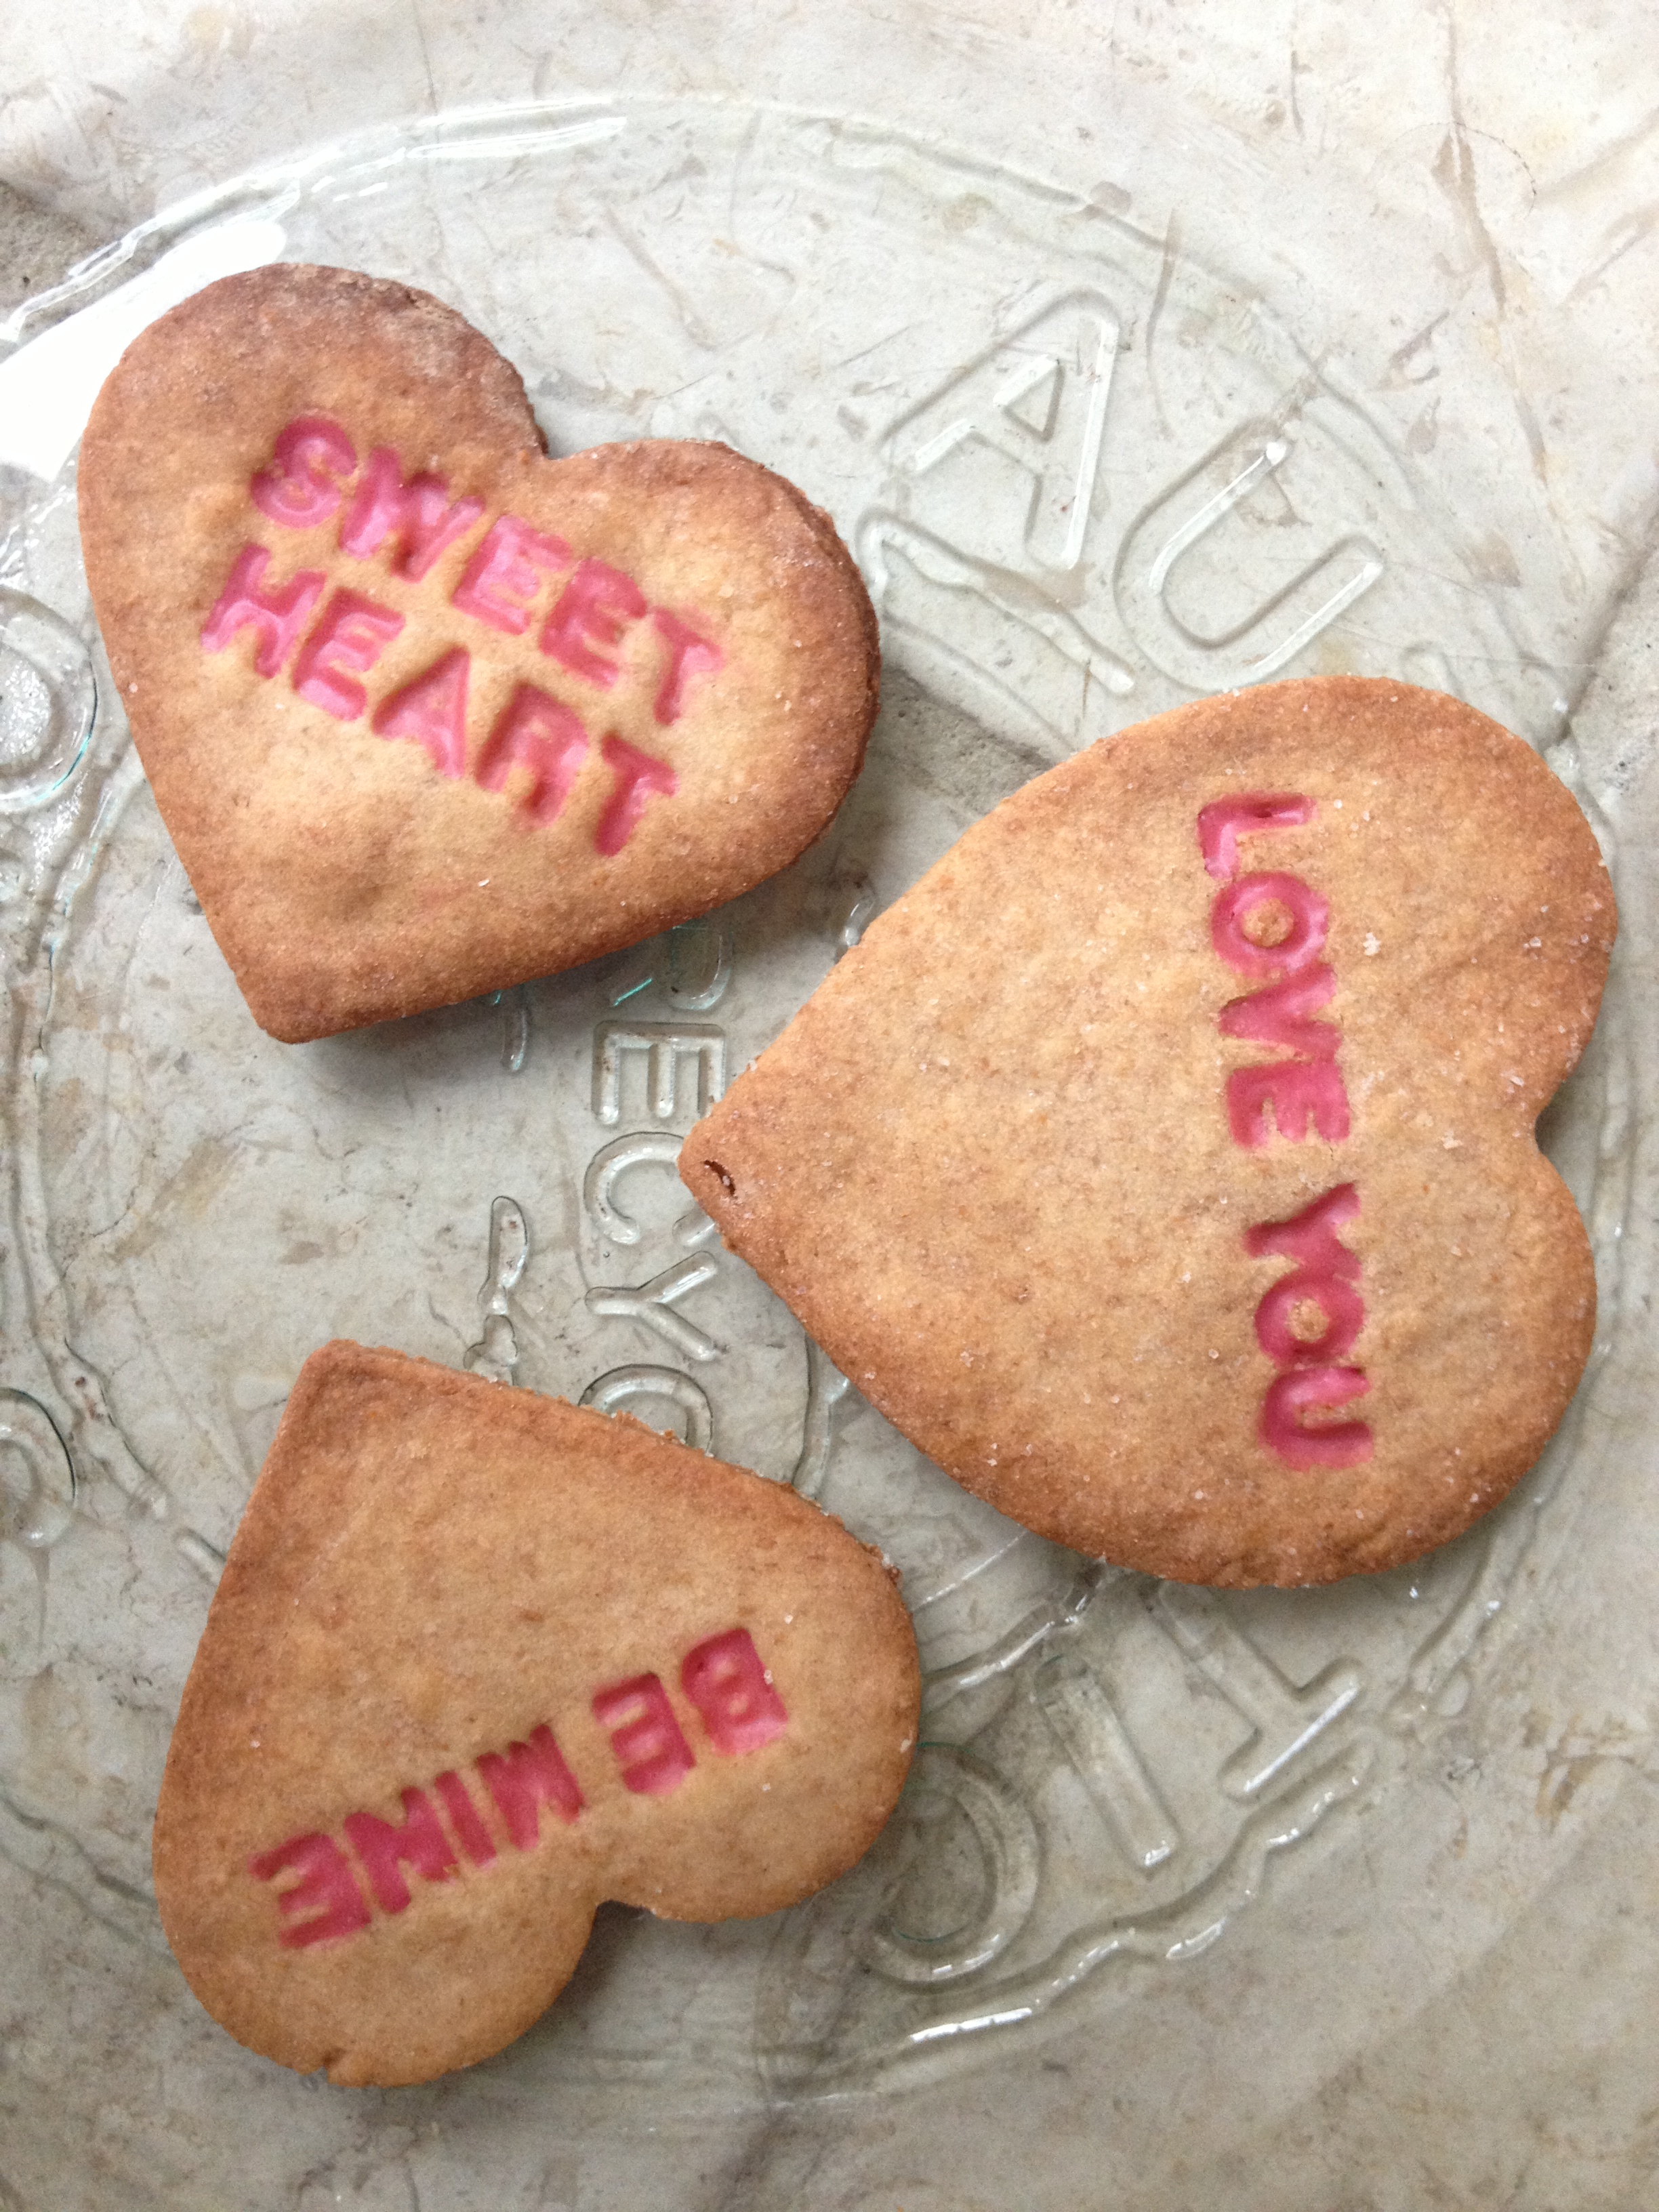
Then I also had some with lovely little messages stamped in them.

IMG_0191

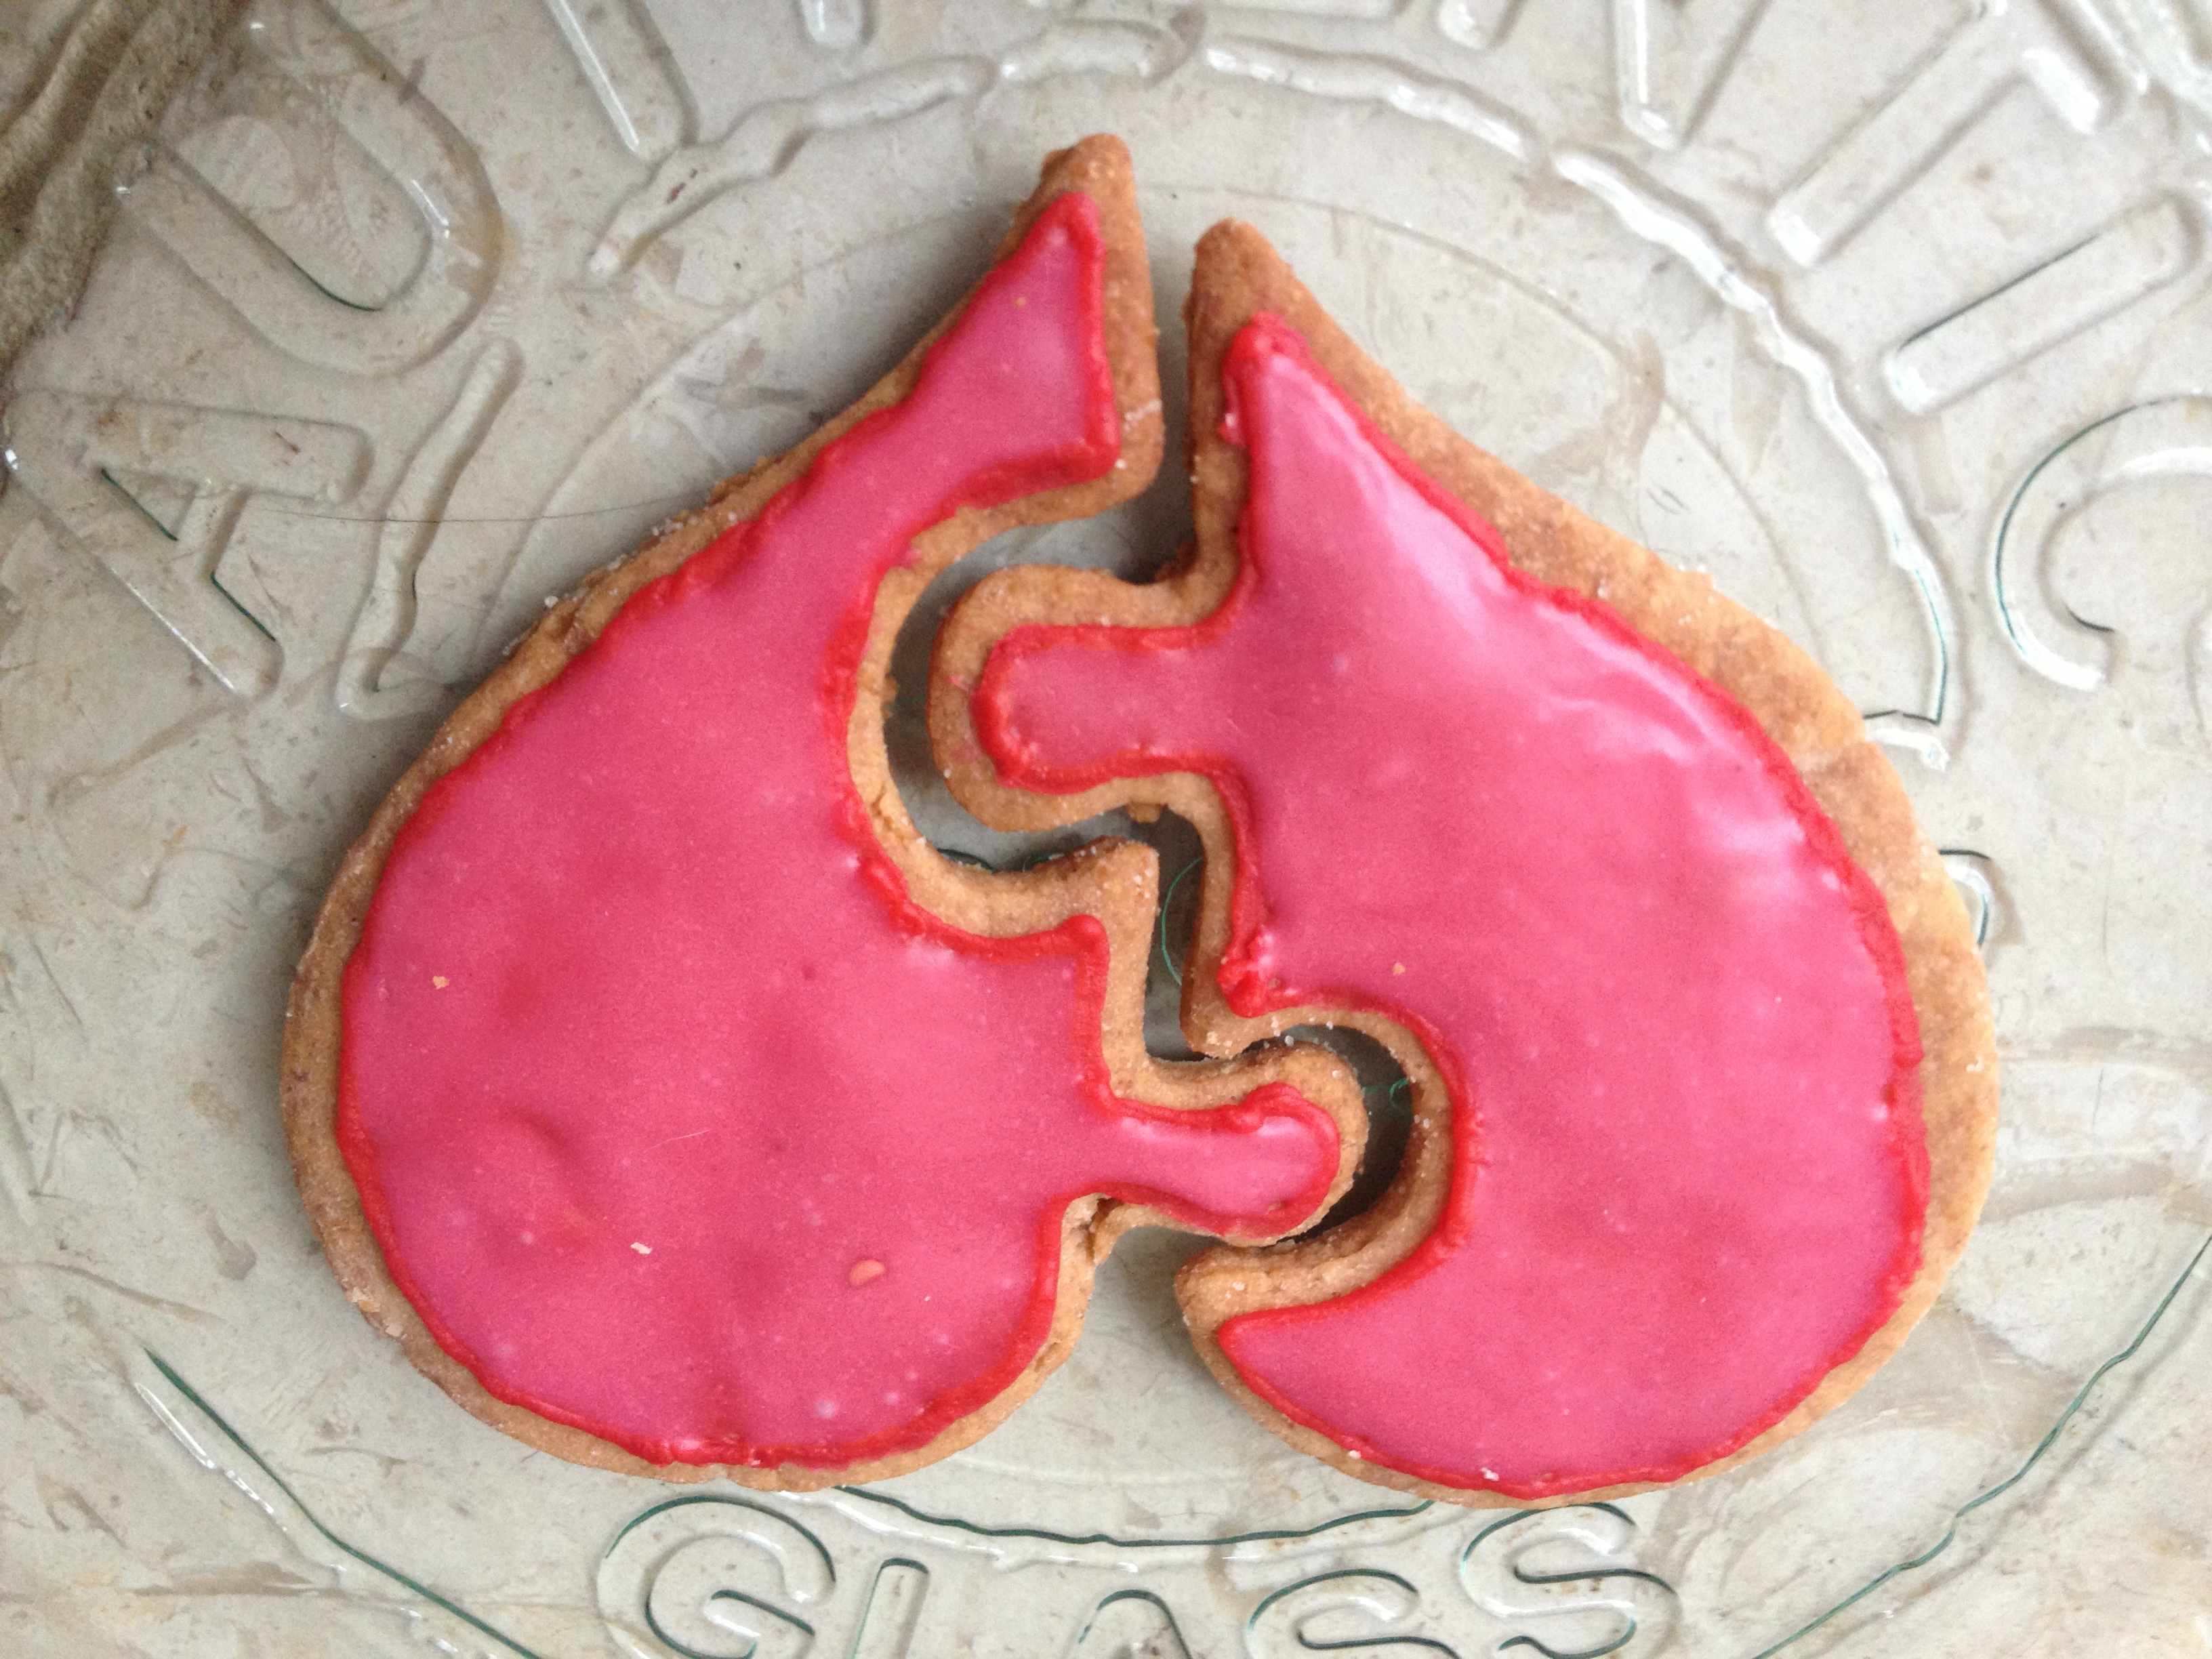
Those were all plain, but for other’s however I made some pink icing using raw icing sugar and raspberries. Simply pop a handful of raspberries into a fine mesh sieve and using the back of a spoon crush them through the sieve. You will end up with a lovely raspberry puree. Don’t throw away the seeds and pulp left in the sieve, you can whack this in to your next smoothie! 🙂 Use this, instead of water, to make your icing. I simply used raw icing sugar (you can use normal icing sugar if you prefer) and the raspberry puree. I added a little at a time until I had the consistency I wanted. If you want it runnier, add a little water, if you want it less pink then add more icing sugar and water down the puree a little and just experiment!

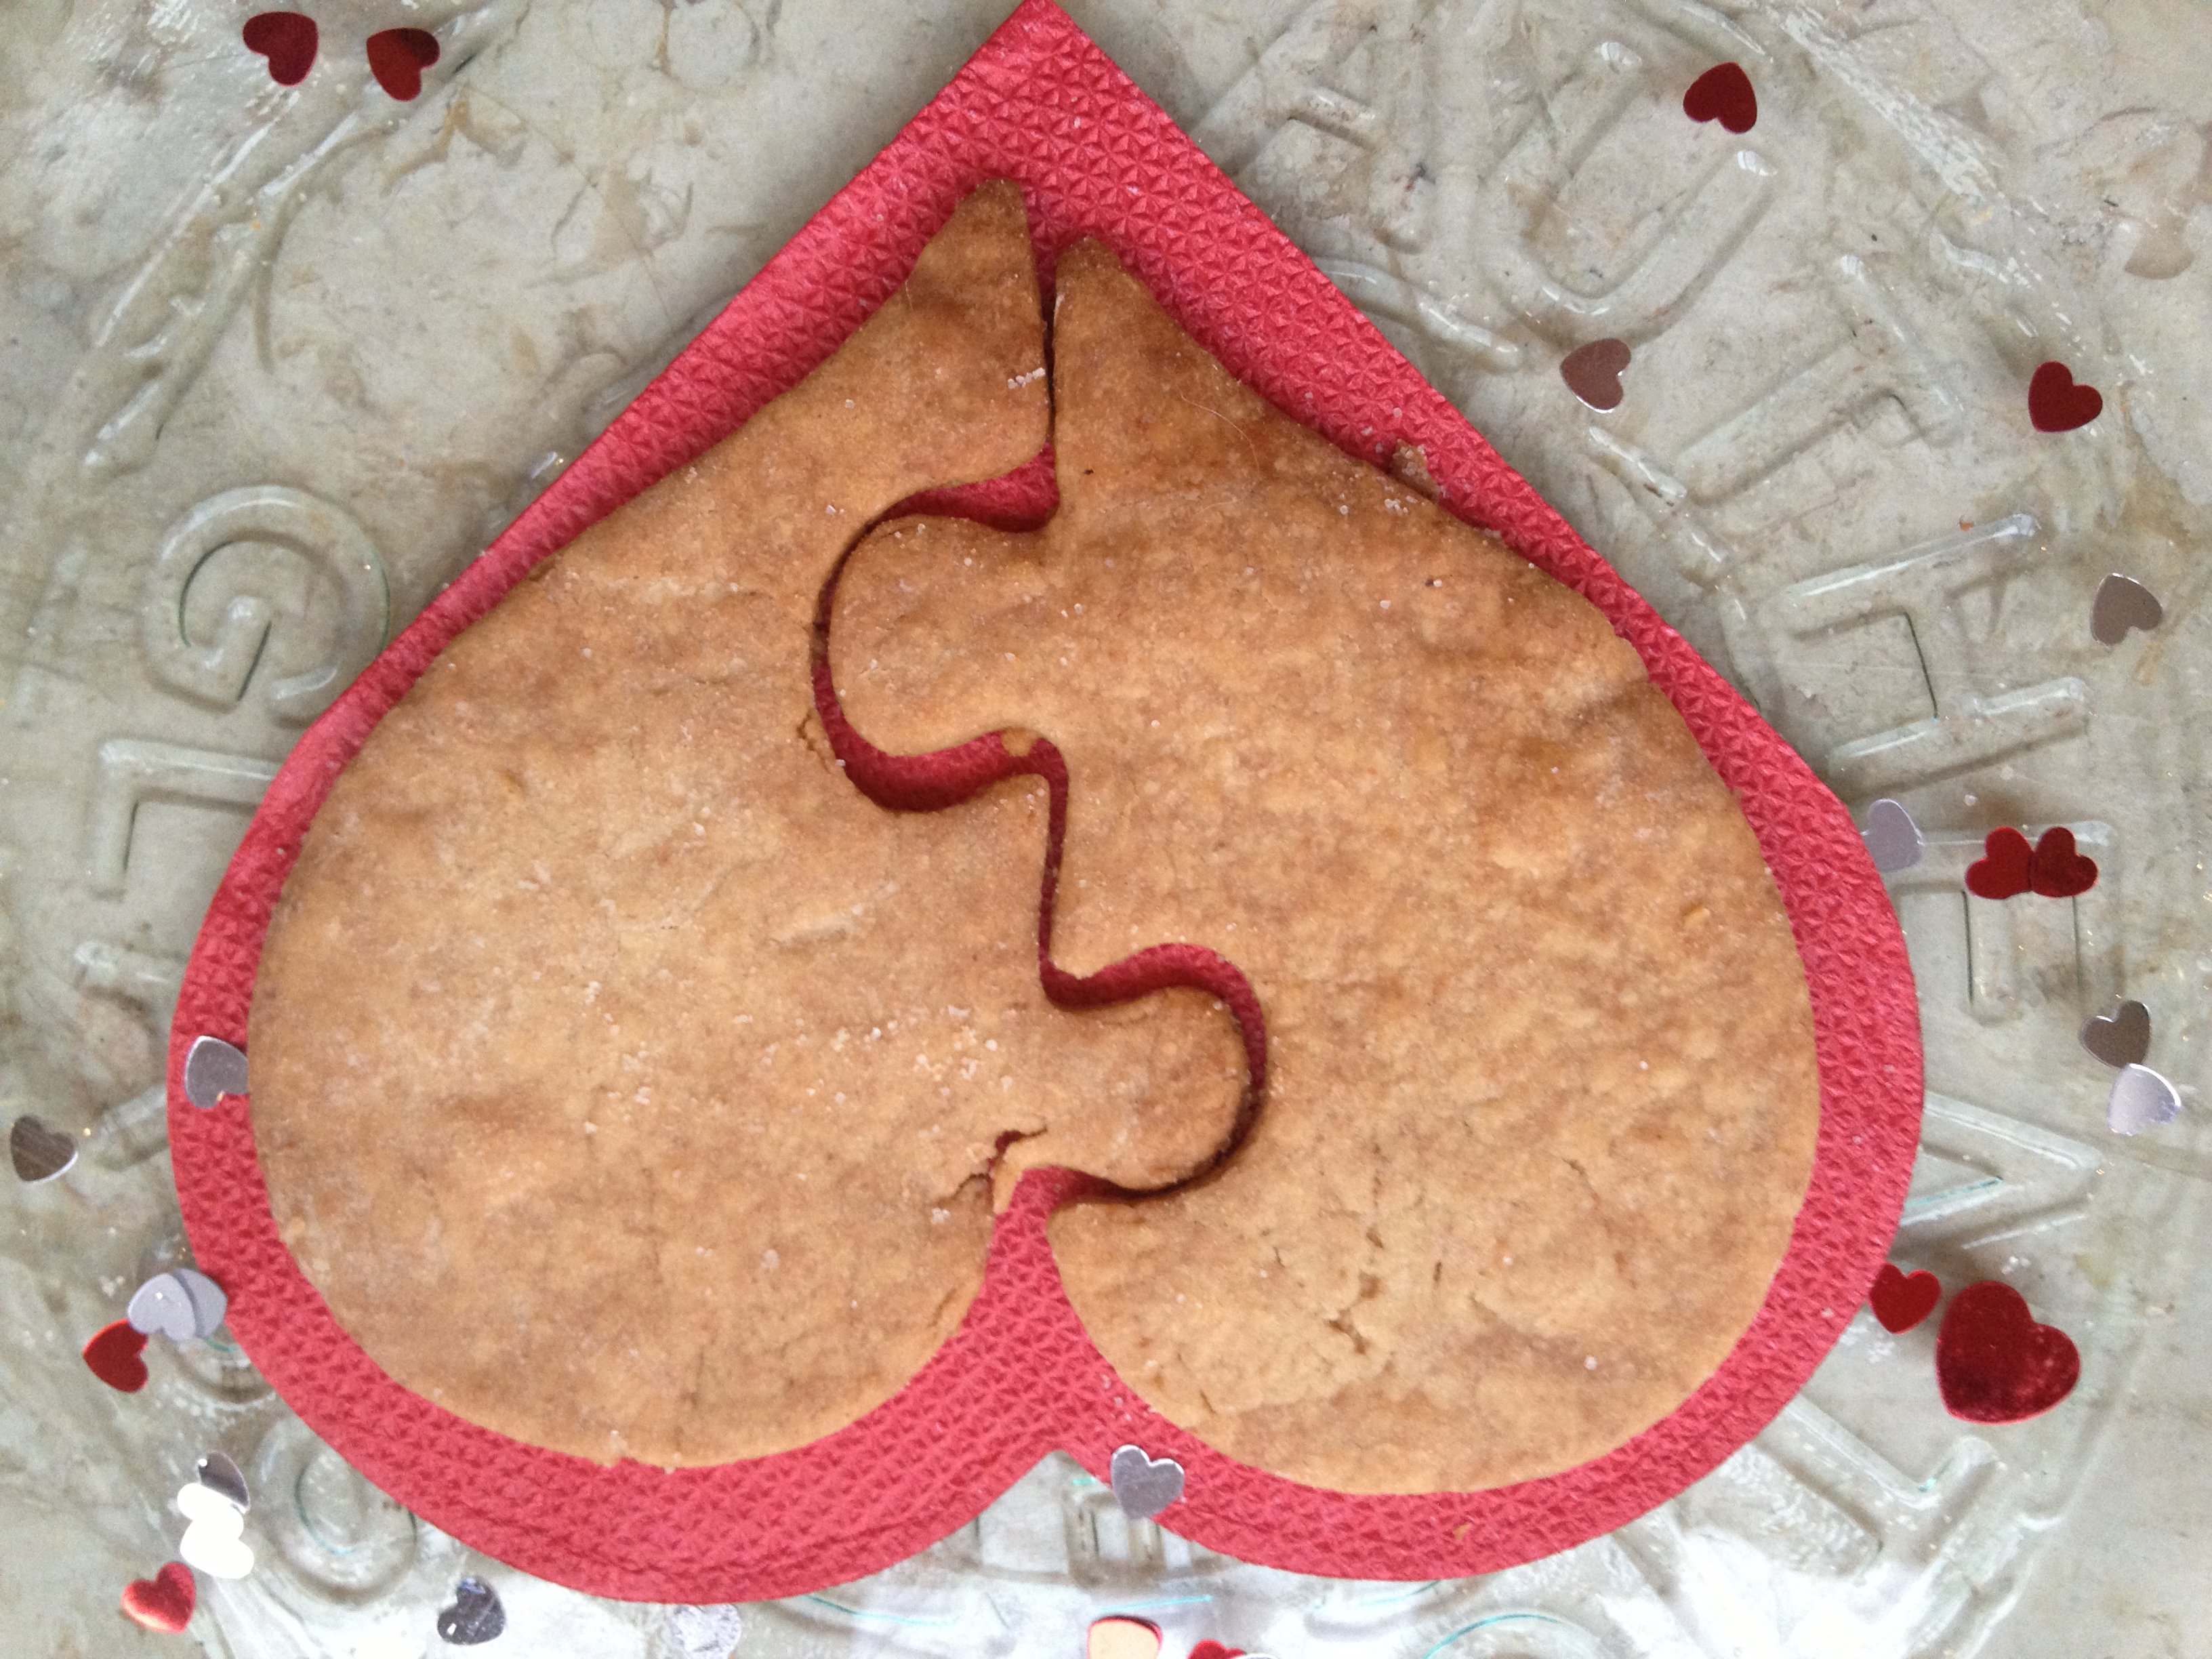
For these adorable ‘his and hers’ jigsaw hearts I used a piping bag to pipe a thin line of slightly darker icing around the edges and then filled the middle! You could use white icing to pipe names on each half. Allow to set and then share with the one you love 🙂

IMG_0192 IMG_0248

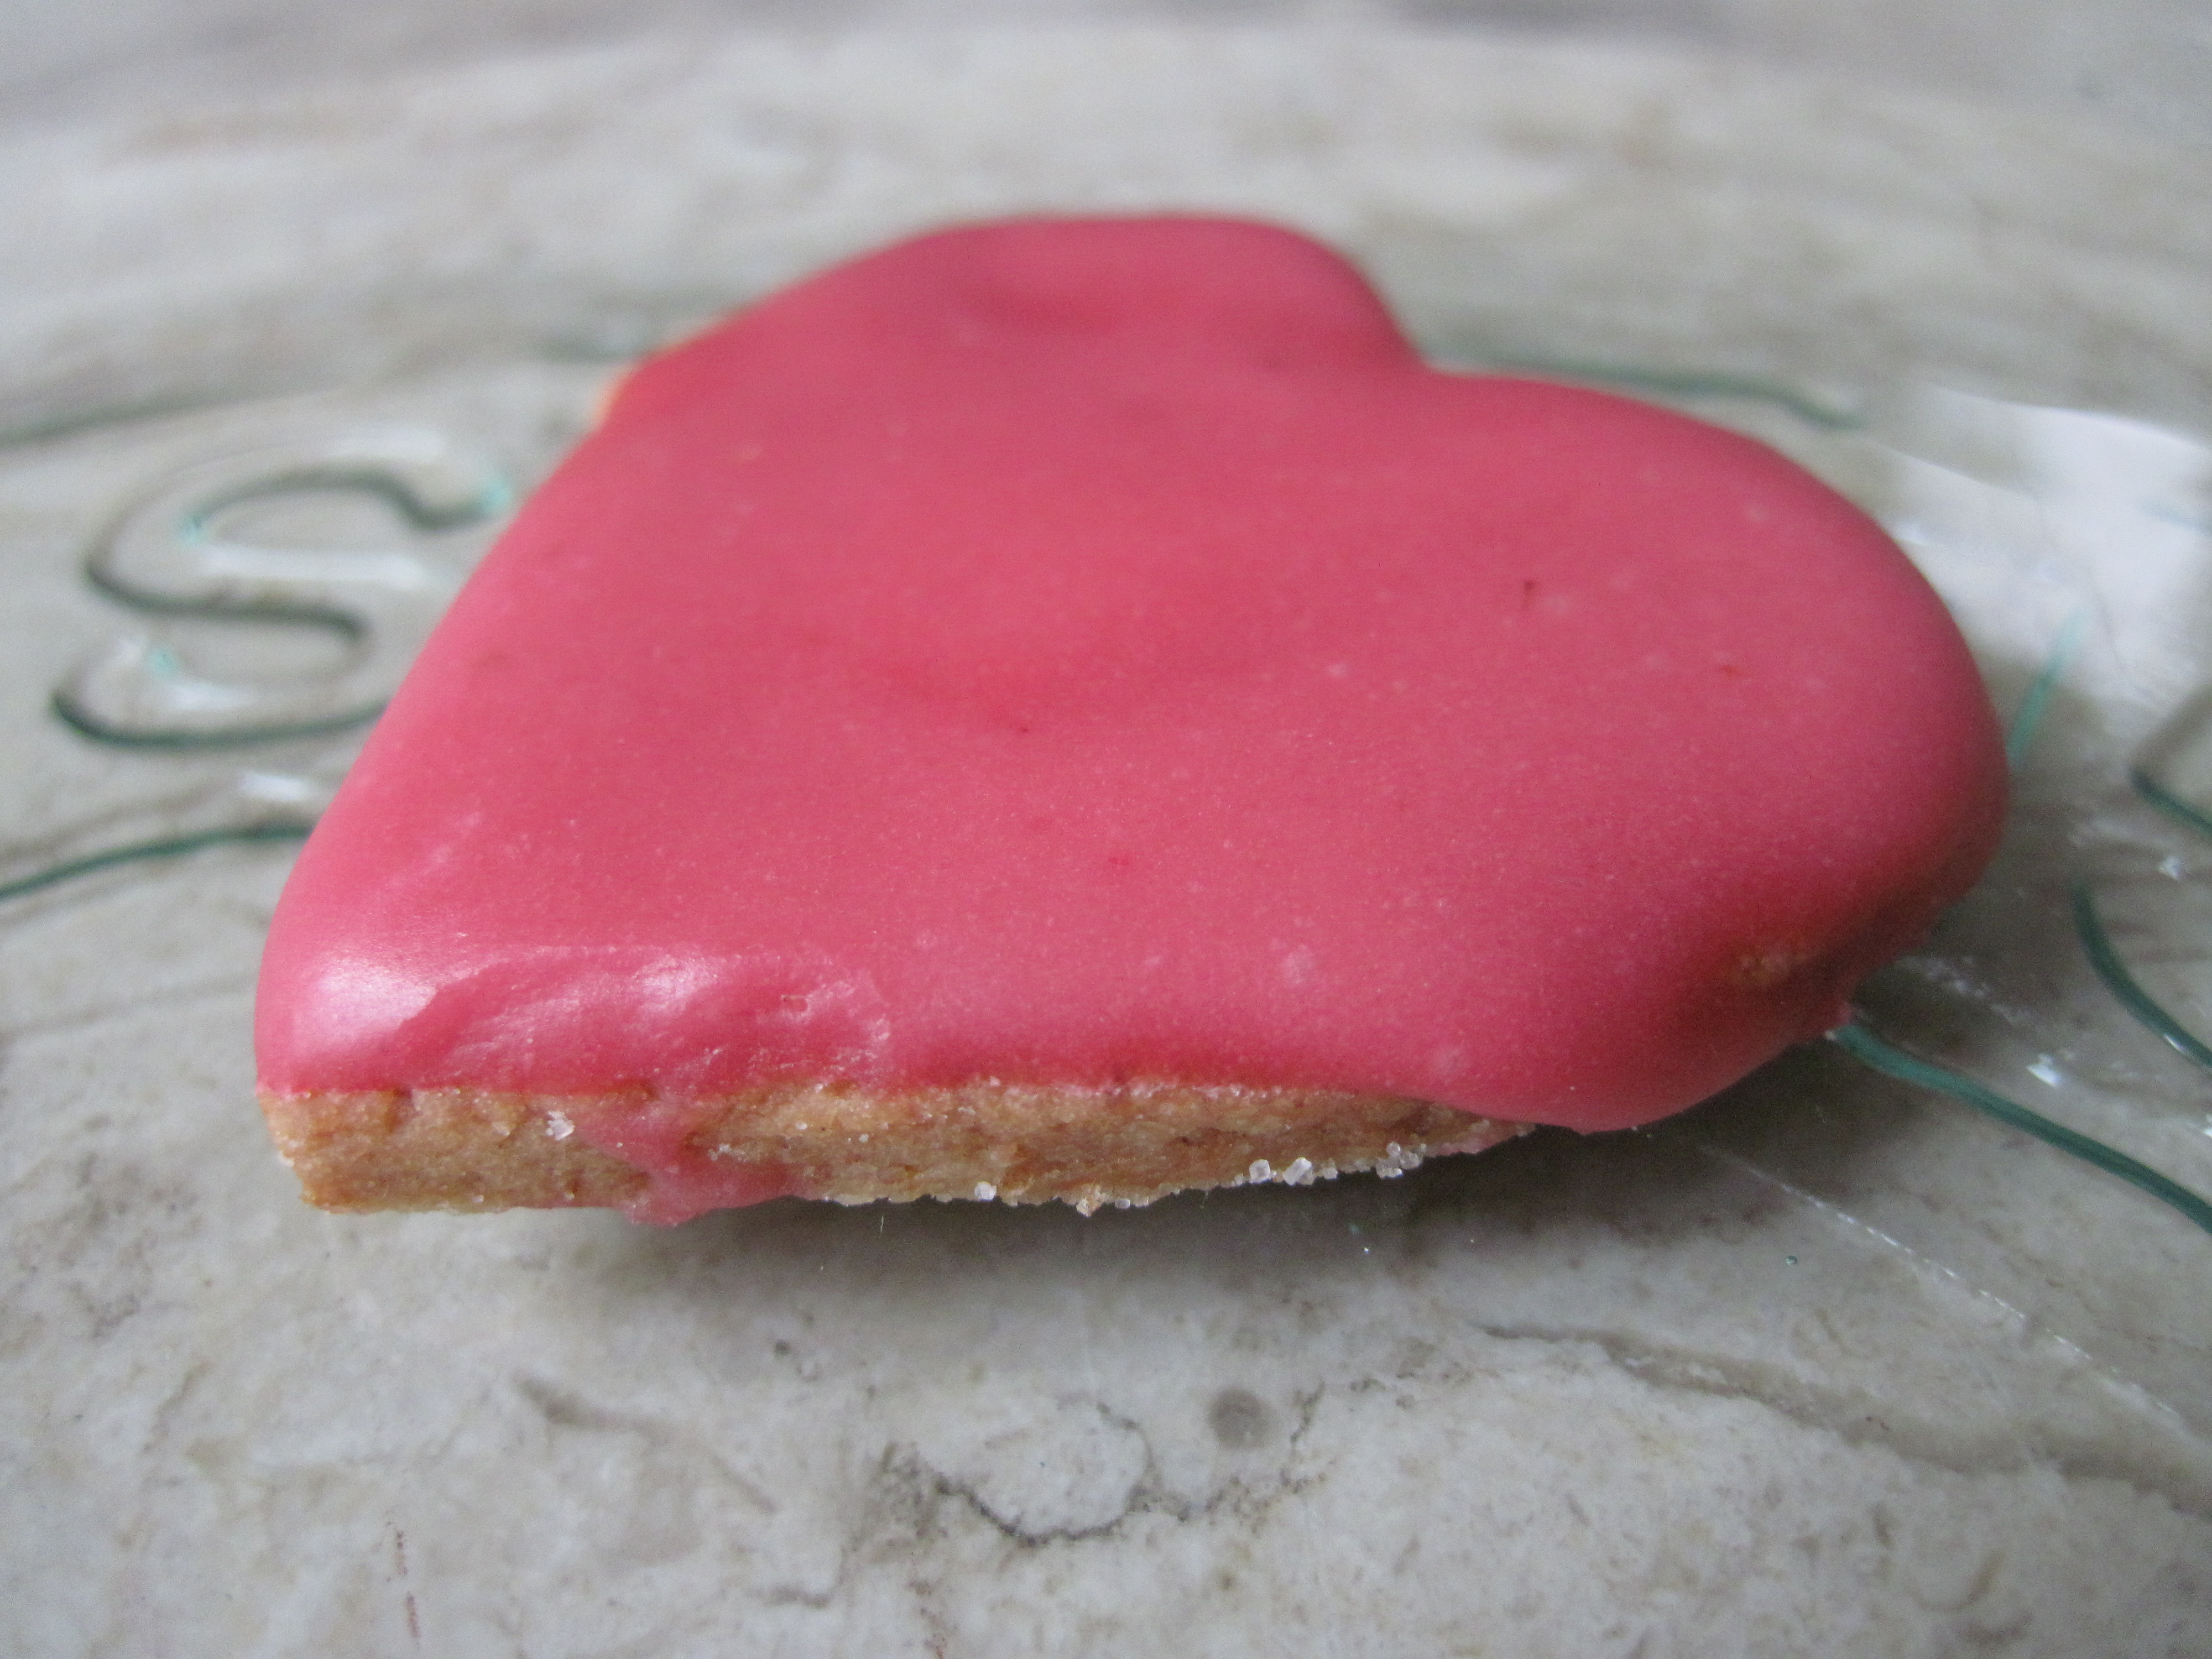
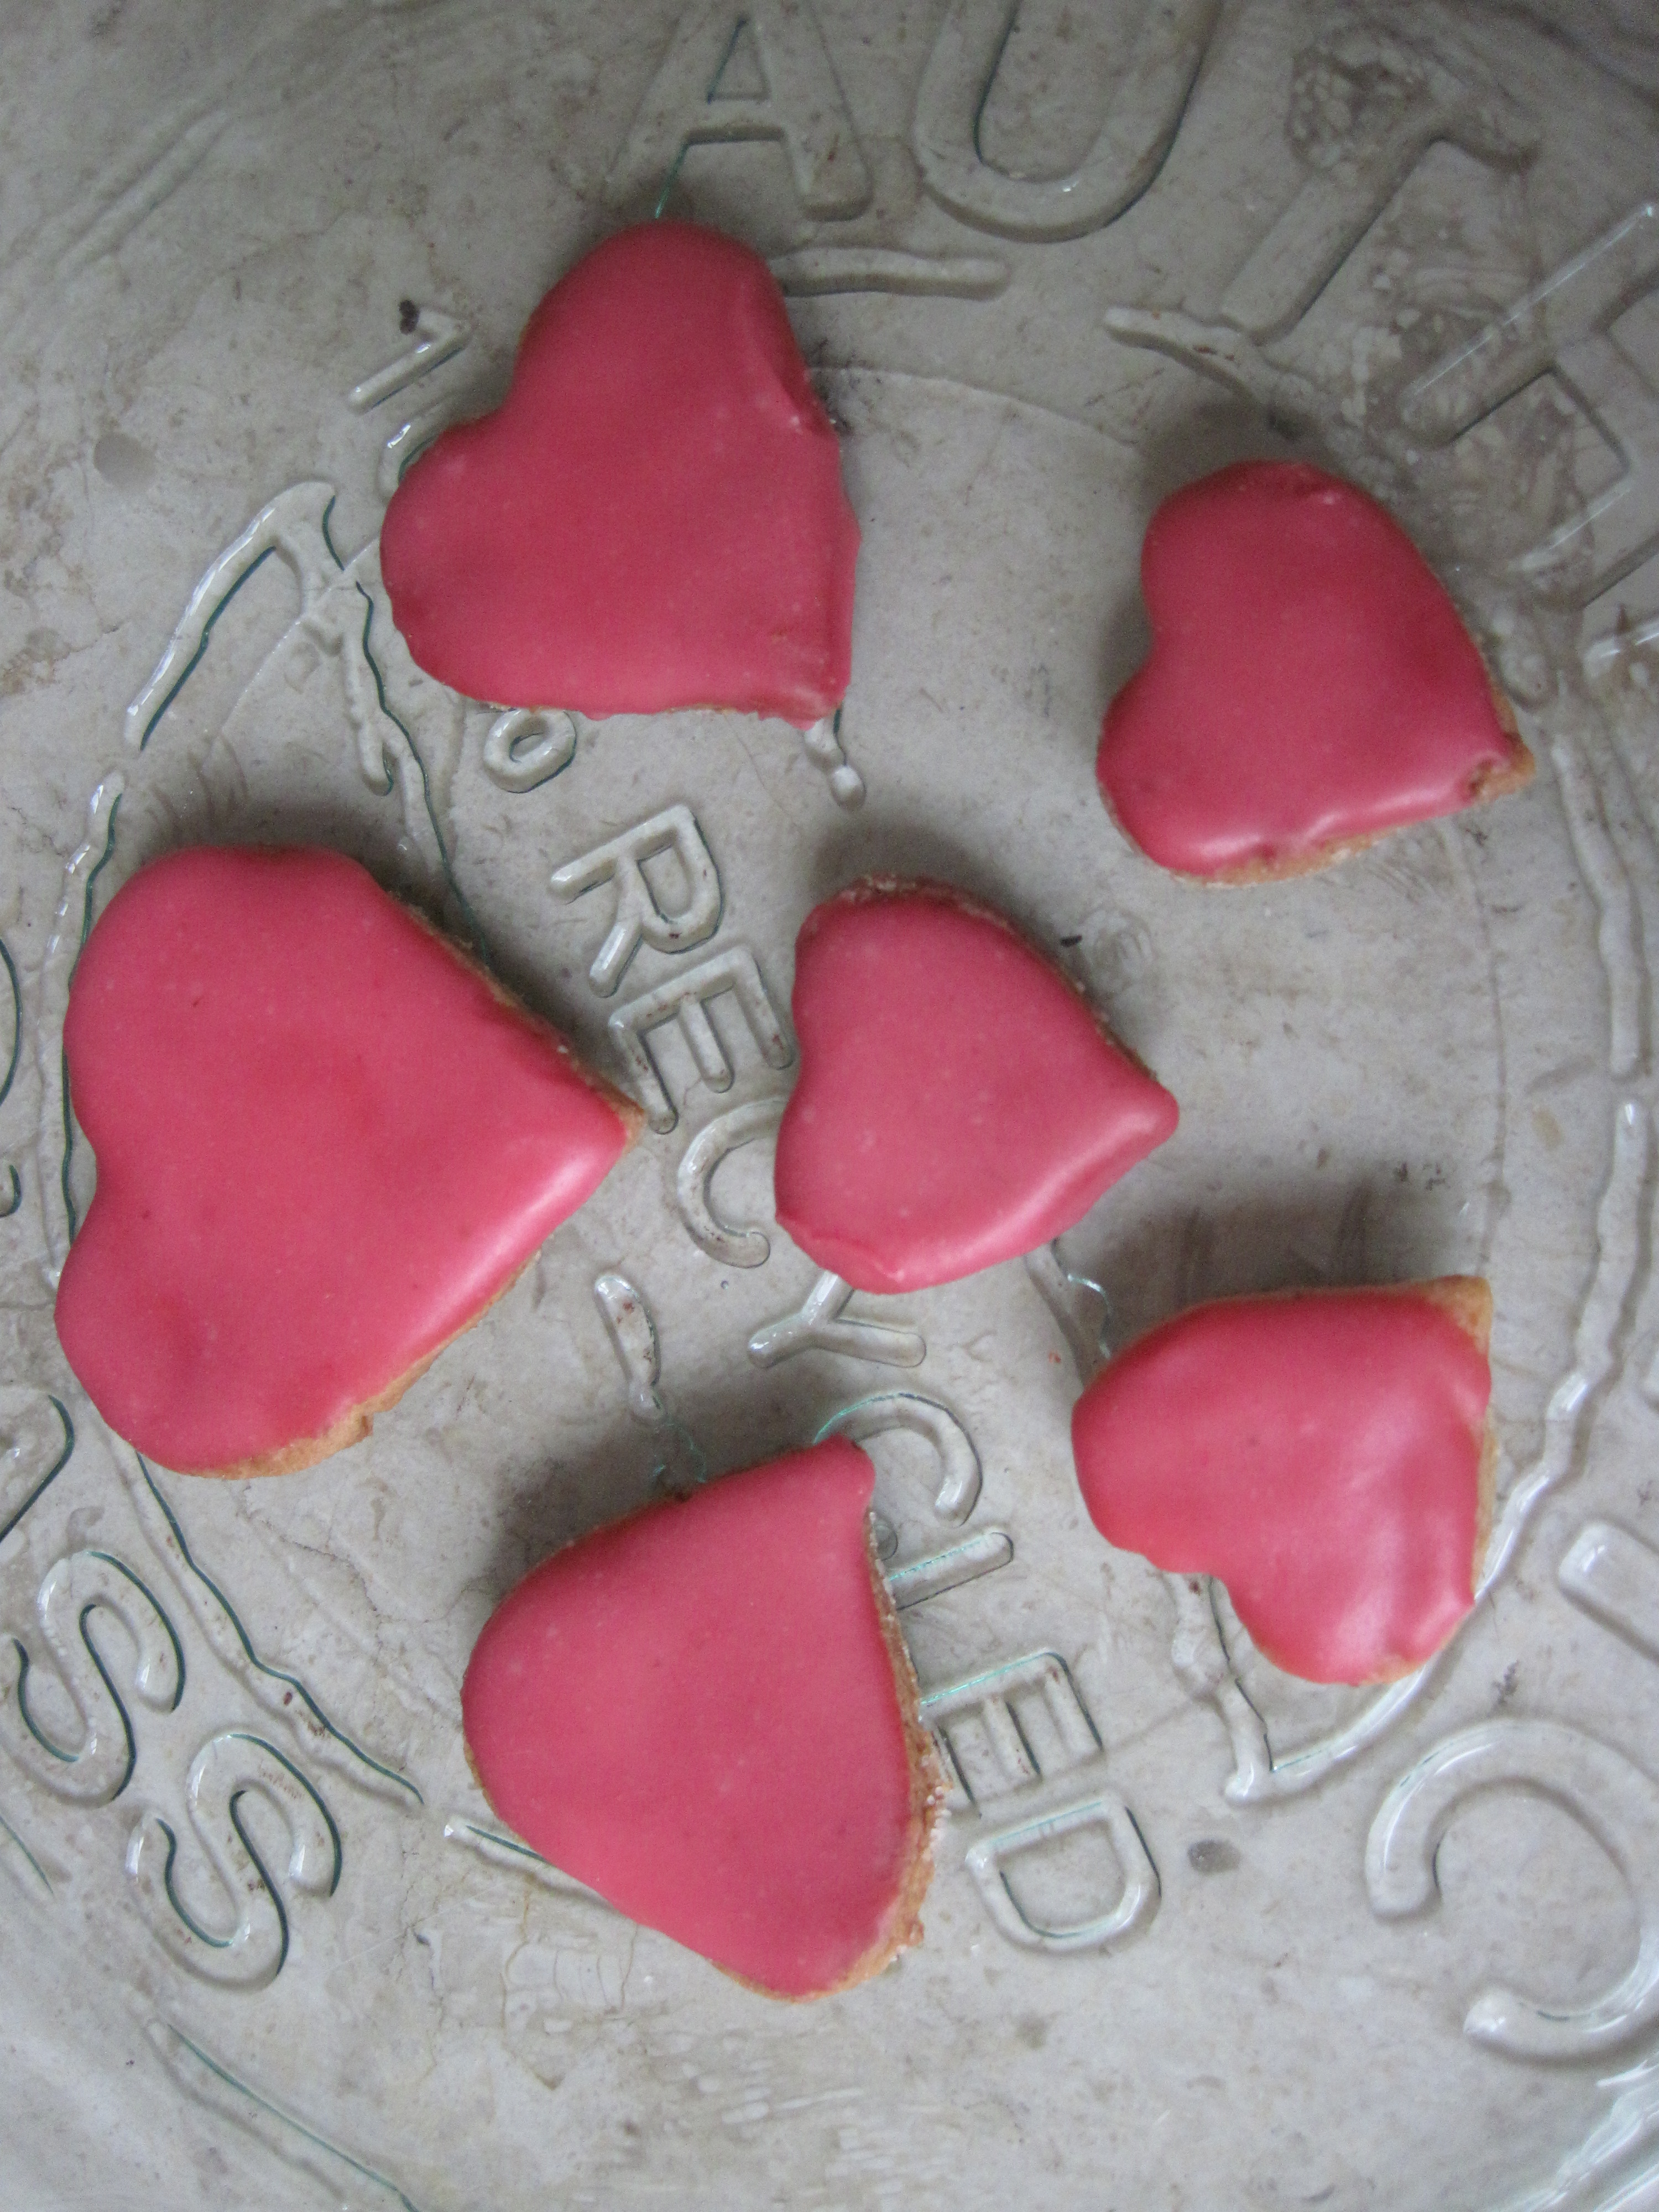
I then had a go at just smothering the little hearts in icing – yum!

IMG_0567 IMG_0560

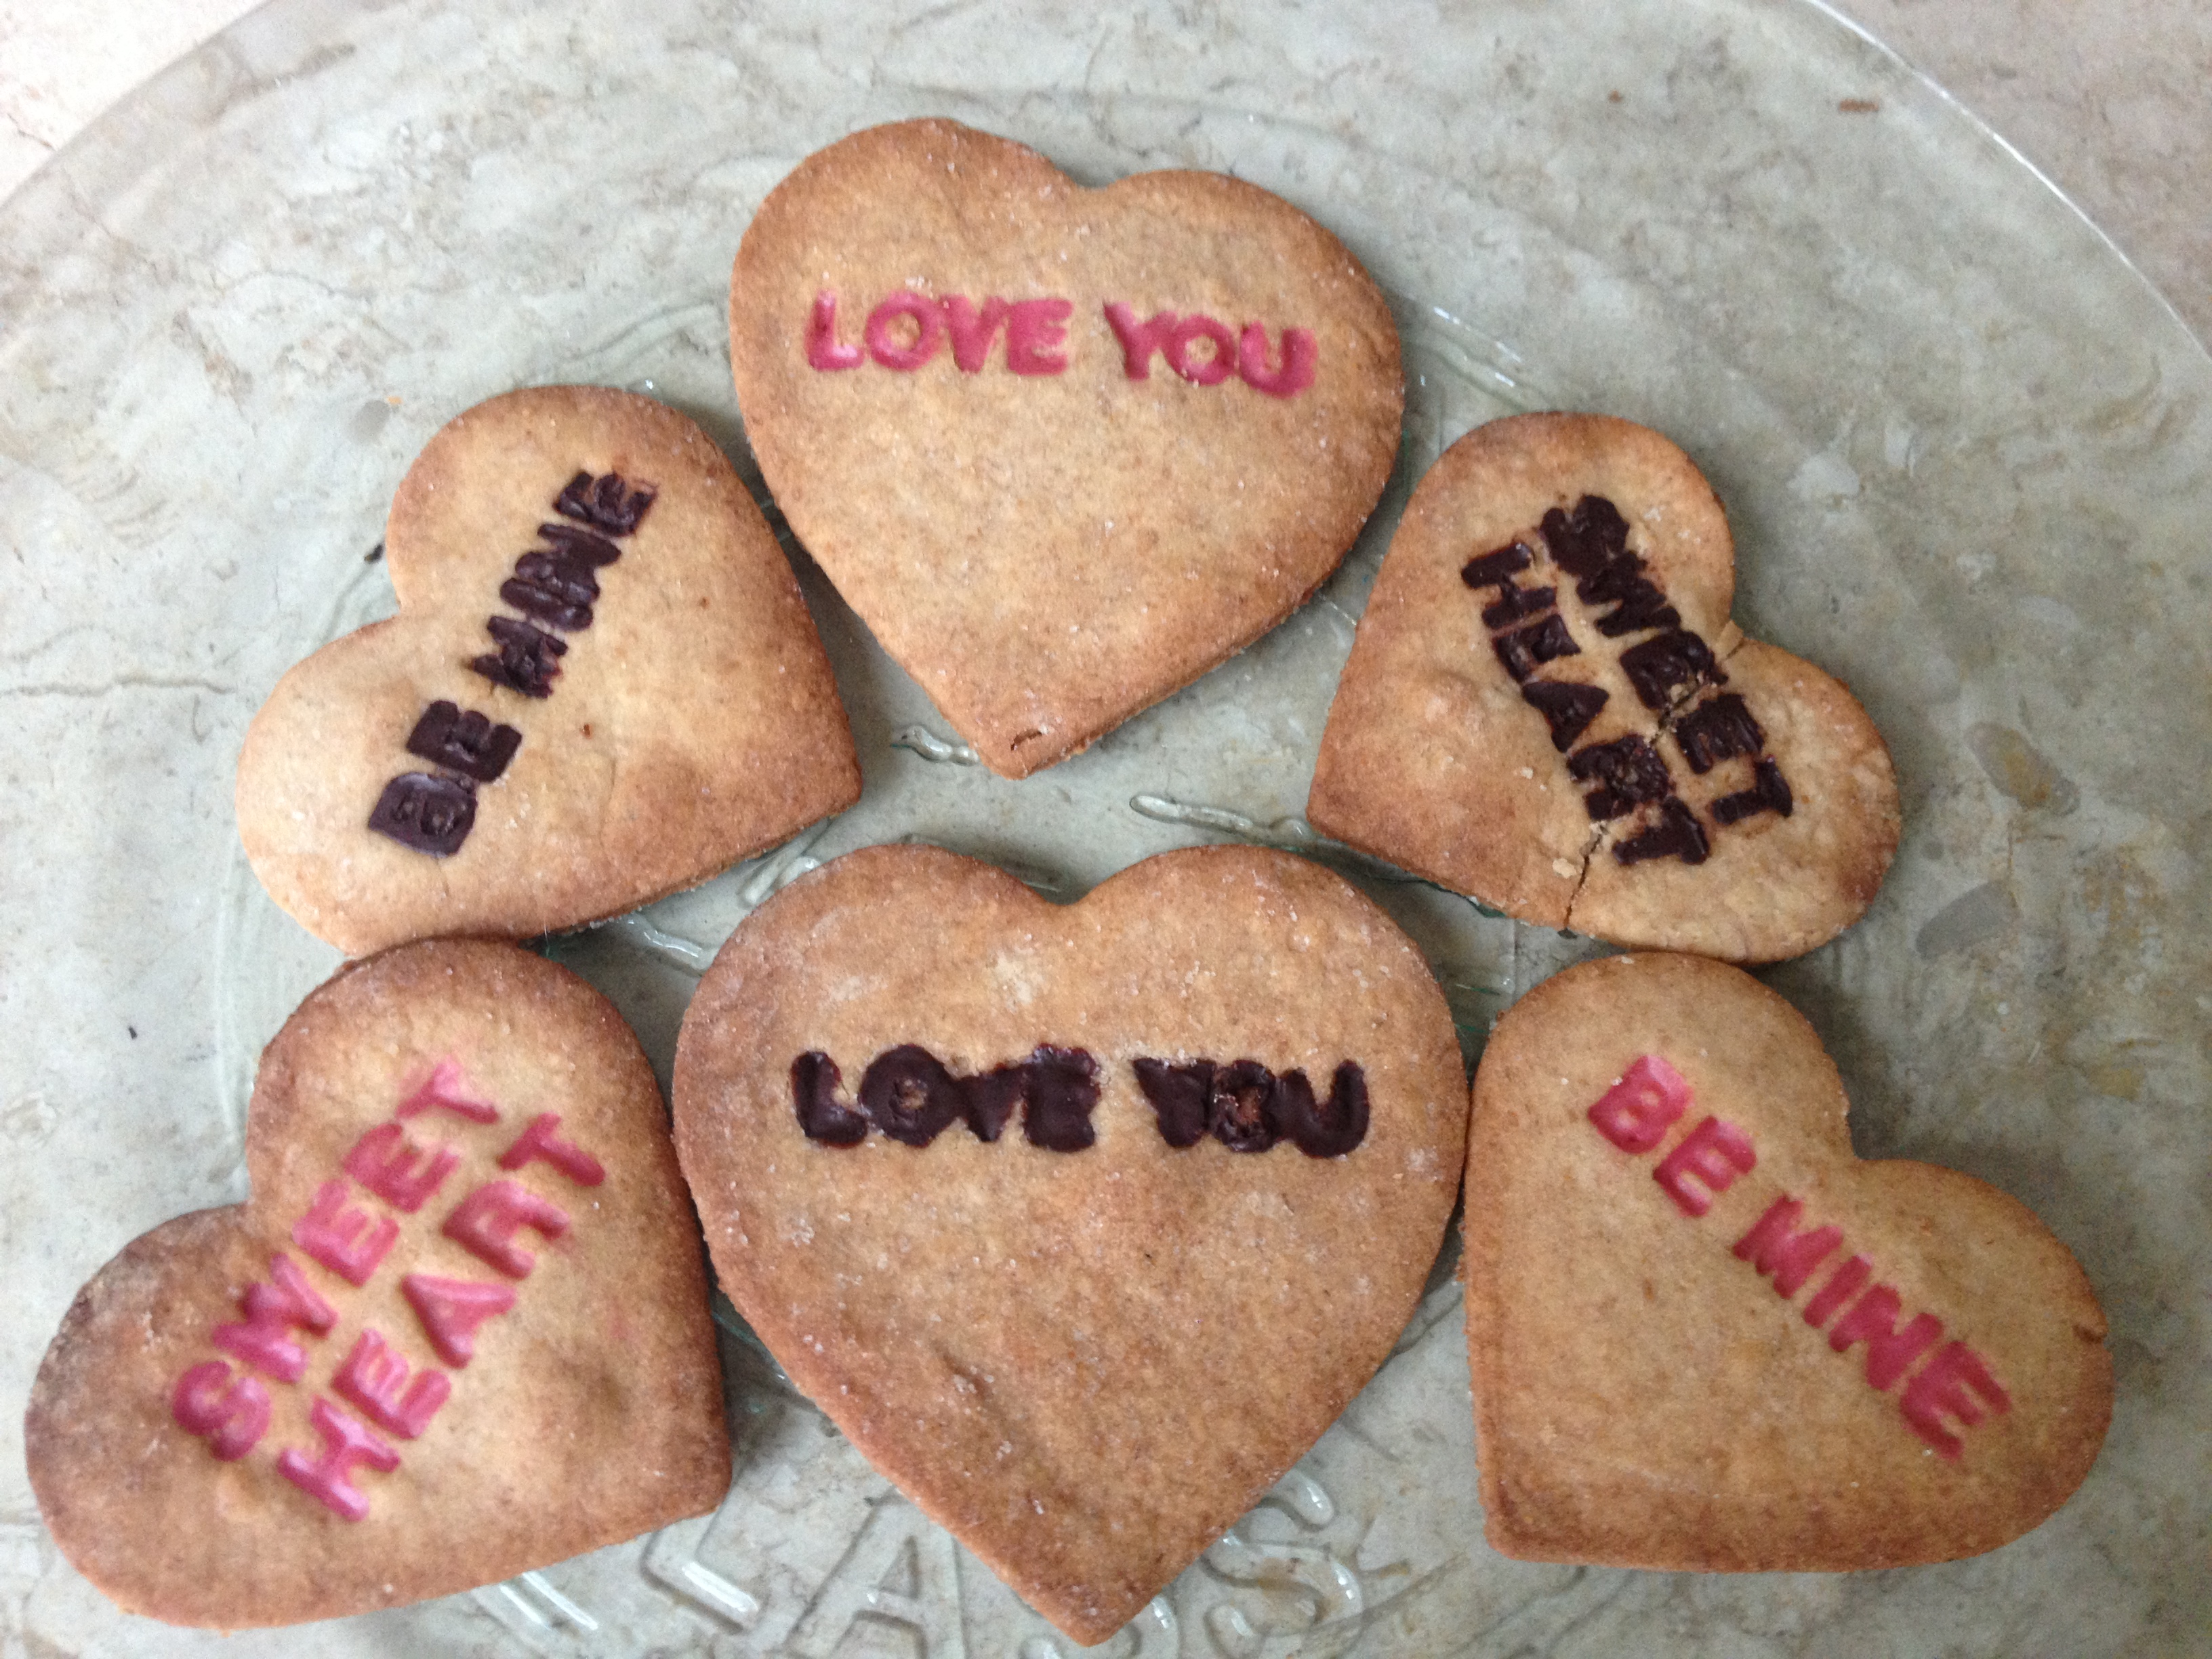
And finally (for the icing fun) I had a go at filling in the messages on the shortbreads. This was super fiddly but I think it looks fab! I used a cake skewer dipped in the icing to fill the letters!

IMG_0250 IMG_0263 IMG_0206

Valentine’s day wouldn’t be valentine’s day without a bit of chocolate! So I had a go with that too! I just melted some high quality, dairy free chocolate and filled the letters with it in the same way as the icing. This was messy and didn’t work out quite so well but I think with a bit of practice it will! 🙂

IMG_0259

Finally I made some little double hearts. Once again I piped an icing border around them and then I filled the centre with chocolate.

IMG_0568

Scrummy Cinnamon Quinoa Porridge Recipe – Comfort brekkie :)


I fancied something a bit different for brekkie this morning as I’ve been slightly overdosing on the homemade granola lately! I’ve had a real hankering for quinoa too so I thought I’d sort out both issues in one fell swoop and make some yummy quinoa porridge. It’s very simple and very delicious! If you don’t like cinnamon just leave it out 🙂

_MG_7852

1/2 cup Quinoa

1 cup coconut/almond/soya milk (I used coconut milk today because I happened to have it!)

1/2 tsp coconut oil (not essential but adds a nice smoothness)

1 tbsp nut butter (again, not essential but adds flavour and smoothness) – I used almond butter today

1 tso Cinnamon

Toppings of your choice (I used nuts, dried fruit, coconut and apple compote)

Drizzle of date syrup / sweet freedom if desired

_MG_7860

Put the quinoa and milk into a saucepan and bring to the boil. Add in the cinnamon and put a lid on it and simmer gently for 10 – 15 minutes (until the quinoa has absorbed the liquid and is tender – add more milk if necessary). Half way through stir in the coconut oil and nut butter. Once the quinoa is tender spoon into a bowl. This amount will do one large portion or two small ones. It keeps in the fridge for a few days so you can save some if you want ( I confess, I ate it all!).

Add your desired toppings. I added a dollop of apple compote, toasted almonds and pistachios, dessicated coconut and some dried mixed berries (goji, blueberry, cranberry and golden raisins). Finally add a drizzle of date syrup if you like. Then enjoy! 🙂 This will definitely set you up for the day! Healthy and filling and absolutely scrummy 🙂

_MG_7856

Bananarama! Banana bread recipes :)


A glut of over-ripe bananas led to a bit of banana bread making so I thought I would re-post these two recipes. I’ve had a bit of fun with banana bread recently and a very good friend and I have done a blind banana bread tasting – 4 banana breads (hers and mine) so I’ll be posting the results of that soon! In the meantime though here are my two recipes 🙂

The first recipe is a dairy free, low gluten (spelt) banana bread and the second one is a modification of my  friend Colette’s mum’s recipe (modified to replace butter with oil and a few other little additions of my own) which does contain eggs (but these could be substituted out for apple puree).  Either of these recipes could have nuts added to them – walnuts would work particularly well, and if you’re feeling naughty you could throw in some dark chocolate chunks too!

Dairy free Banana Bread:

2 cups wholemeal spelt flour
1 cup coconut palm (or any unrefined) sugar
1/4 cup and 2 tbsps almond oil or olive oil
3 ripe bananas, mashed
1/4 cup soya milk mixed with 1 tsp apple cider vinegar
1/2 tsp baking soda
1 tsp vanilla extract
1 tsp cinnamon
1/4 tsp allspice
1/2 tsp himalayan rock salt

Preheat oven to 350 F / 175 C. Line and grease a small loaf tin (approximately 8 inches x 4 inches).

Mix the flour, baking soda, cinnamon, allspice and salt together in a large bowl. In a separate bowl mix the oil and sugar together until well combined. Add the mashed bananas and the soya milk (to which vinegar has been added) and the vanilla extract. Add this mix to the flour mixture and stir well. Pour into the loaf tin and place in the oven for an hour, or until a skewer inserted in the middle comes out clean. Once cooked remove from the oven and allow to cool in the tin for 5 mins then transfer to a wire rack to cool.

Colette’s mum’s modified banana bread:

2 cups white spelt flour
1 cup coconut palm (or any unrefined) sugar
1/4 cup and 2 tbsps almond oil or olive oil
4 ripe bananas, mashed
2 large eggs
1 tsp baking soda                                                                                                                      1 tsp bicarbonate of soda
1/2 tsp vanilla extract
1/2 tsp cinnamon
1/4 tsp allspice
1 tsp himalayan rock salt

Preheat oven to 350 F / 175 C. Line and grease a small loaf tin (approximately 8 inches x 4 inches).

In a large bowl mix the oil and sugar together until well combined, then add the mashed bananas and vanila extract. In a separate bowl mix the flour, baking soda, cinnamon, allspice and salt together.  Add half of this mix to the wet ingredients and mix well. Then add one egg and mix until combined. Add the rest of the flour mixture, stir well and add the final egg. Mix until well combined. Mix the bicarbonate of soda in 1/4 cup of hot water and stir in to the mixture. Pour into the loaf tin, sprinkle some unrefined coconut sugar over the top and place in the oven for an hour, or until a skewer inserted in the middle comes out clean. Once cooked remove from the oven and allow to cool in the tin for 5 mins then transfer to a wire rack to cool.


Crunchy Granola Bars


I’ve been needing a mid-afternoon pick me up lately and as I’m off the ‘Willies’ (chocolate, that is! :)) I thought I’d have a go at creating a crunchy, granola snack bar. My first attempt ended up as a chewy breakfast kinda bar (and although I don’t like it as much I will post the recipe as some of my tasters loved it even if I didn’t!). So I went back to the baking tray and came up with this little beauty 🙂 Totally detox friendly! 🙂

_MG_7771

500g Spelt porridge oats (the whole ones, not flakes) or Jumbo porridge oats

350g mixed nuts of your choice (I used almonds, pistachios and cashews)

100g Pumpkin seeds

100g Sunflower seeds

50g Chia seeds

50g Linseeds

200g dried fruit (I used blueberries, cranberries and banana chips this time)

1 tso cinnamon

250 – 350g Sweet Freedom (light or dark)

Preheat the oven to 150 C. Start by placing the spelt flakes in a baking tray and put in the oven to toast for approx 20 mins, until brown. Place the nuts in a dry frying pan and toast over a medium heat until they start to turn brown. Once the spelt and nuts are toasted add to a large bowl. Add in all the other ingredients, except the sweet freedom. Mix well and then start to drizzle in the sweet freedom. Keep going until you have a sticky mixture. It needs to start to hold together, but be careful not to add too much. Keep stirring well.

Turn the oven up to 200 C. Spread the sticky mixture out on to a baking tray covered in baking parchment. Arrange the mixture to the thickness you want for your bars, 1 – 2cm works well. Compress it down as much as you can. Place in the oven for up to 10 mins until it goes a lovely golden brown. Keep an eye on it as it can burn. As you take it out use the back of a spoon to compress the mixture again and leave to start to cool. It will not hold together at this point so don’t try to cut it! Keep an eye on it as it cools, once it starts to hold together you can divide it in to bars. It should be cool enough to snap. Peel it away from the baking parchment and put it upside down on a wire rack to cool. Keep an eye on it and move the pieces regularly or they will stick! Once totally cool it should be hard and crunchy. Pop it in an airtight tin and it will keep for ages! 🙂


Fruit and Nut Cookies – gluten, dairy, fat and sugar free! omg!


I’m now mid week in to the first week of this amazing detox from Pure Form Fitness. I’ve done this programme before and I just love the energy it gives me and the results it achieves without leaving me feeling deprived or hungry. I also love the way it inspires me to create detox-friendly things to keep any rogue cravings at bay! These liitle cookies just sum up all of that! Fun and easy to make, delicious to eat and 100% detox friendly – just perfect with my afternoon cup of rooibos tea 🙂

_MG_7660-2

You can use any nuts and fruits you like but these are the ones I had in my cupboard and they seem to work well. If you substitute the fruit go for large, juice dried fruits like figs and dates, not things like blueberries etc.

_MG_7671-2

125g Almonds

75g Brazil nuts

40g Dried coconut flakes

85g Dried Prunes (or dates)

45g Dried apricots

20g Pumpkin seeds

15g Sunflower seeds

zest of 1/2 Lemon

1 tbsp freshly pressed Apple juice (or prune juice)

Preheat the oven to 150 C and line a baking tray with baking parchment.

Place everything in a food processor and pulse until the nuts and fruit are finely chopped and the mixture starts to come together. Add a little more juice if you find it’s too dry. You can either make small balls of the mixture and then flatten them on to a baking tray, or if you want pretty little shapes like my flower-shaped biccies then line a baking tray with baking parchment and tip the mixture in to it. Flatten the mixture down. I found the easiest way was to use a piece of baking parchment and then apply pressure with a palette knife or my hands. You want it to be about 5mm thick and well compressed. Use a biscuit cutter to cut out shapes and carefully transfer to another lined baking tray.

Bake in the oven for 15 minutes, or until firm, then cool on a wire rack. They will be a little pliable when removed, but as they cool they will harden.

Eat with a lovely cup of tea! 🙂

If you’re feeling decandent you can also add a layer of peanut butter and make a cookie sandwich! omg! 🙂

_MG_7687

Brownie Love Bites


I was asked recently if I had a recipe for vegan brownies… well I do… and so I thought I’d re-post it to make it a little easier to find! 🙂 These were originally made for Valentine’s day, hence the heart shapes, but I kinda like them like this anyway! 🙂

Enjoy!

Brownie love bites


165g Silken tofu

100g white spelt flour

65g Whole-wheat spelt flour

70g Cocoa powder

6 tbsp Water

8 tbsp Agave syrup  AND 2 tbsp Date syrup

200g unrefined raw sugar/ coconut palm sugar

A handful of chopped pecans and dried cherries

2 tsp Vanilla extract

1/2 tbsp Ground brown linseed

1.5 tbsp Hot water

1/4 tsp Baking powder

1/4 tsp Salt

Mix the ground linseeds with the 1 1/2 tablespoons of hot water and set aside to thicken.  Preheat the oven to 180 C  and then line an 8-inch x 8-inch x 2-inch baking tin with greaseproof paper and lightly oil.

Blend the tofu, water, agave syrup, date syrup, cocoa powder, linseed mixture, and vanilla extract until completely smooth. Place the remaining ingredients, except the pecans and cherries, in a mixing bowl and stir until they are well combined. Then pour the wet mixture into the dry ingredients, and stir well. Finally, gently fold in the pecans and cherries.  Pour the mix into the tin and place in the oven for 30 mins, or until a skewer inserted in the centre comes out clean. Leave to cool in the tin for 5 mins, then cool on a wire rack. Whilst still warm use a small heart cutter (2 – 3 cm) to cut out heart shaped brownie bites. You should get 12 – 15 out of one tray of brownie (and you get to eat all the little off cuts!) :)

Nothing says homemade like…. homemade dairy free shortbread hearts!


Home is where the heart is and it’s certainly where these little hearts are going to stay!

A very dear and thoughtful friend gave me some lovely biscuit cutters for christmas and I’ve been dying to try them out so I thought I’d have a go at a shortbread-type of biccie. My dairy free, spelt shortbread won’t work for this as it’s not “rollable” so I’ve had to come up with something else. I usually try to avoid dairy-free margarine but in this case I’ve compromised and used it… just this once! 🙂 These are not too sweet so if you have a very sweet tooth then you may want to add a bit more sugar, but I like them just as they are 🙂

_MG_7606-2

This makes LOADS so you may want to halve the recipe!

4 cups Spelt flour or gluten-free flour mix

2 cups Unrefined Icing sugar

12 oz Dairy-free Margarine (get the best quality you can)

Pre-heat the oven to 180 C. Put the margarine in a large mixing bowl, sieve the flour and icing sugar in and cream it together. Try not to over mix but make sure the margarine is properly mixed with the dry ingredients. Once it’s formed a dough wrap in cling film and chill for 30 mins. If you find the dough is too sticky then add some more flour.  Once chilled, roll out and use a biscuit cutter to cut whatever shape you have. Place on a greased baking tray and bake for 8 – 10 mins, or until golden. Remove from the oven and allow to cool on the tray.  Enjoy!

Raw chocolate covered marzipan snowballs!


I had some left over marzipan and wanted to create a little treat for after dinner on christmas day so I thought I’d make some raw choc covered marzipan snowballs 🙂

IMG_9996

I used this marzipan recipe from my christmas cake post and for the chocolate you need:

35g Cacao butter

25g Raw Cacao powder

Sweet freedom to sweeten (up to 1/2 tbsp)

Extra raw cacao powder and dessicated coconut for decoration. Maybe some edible glitter too 🙂

IMG_9982

Grate the cacao butter into a small bowl and then place over a saucepan of water (bain marie). Heat the water gently and allow the butter to melt. Once melted whisk the cacao powder in with a small balloon whisk or fork. When thoroughly combined remove from the heat and stir in the sweet freedom. I like my chocolate quite bitter for this recipe so I only added a small squirt but add as much as you need 🙂

IMG_9978

Put some raw cacao powder in a small bowl and the dessicated coconut in another bowl.

IMG_9983

Roll the marzipan in to small balls and line up your bowls of chocolate, cacao powder and dessicated coconut. Drop the marzipan into the choc and used a fork to gently move around until covered. Then, if you’re using it, drop the ball into the bowl of cacao powder or dessicated coconut and gently shake it around to cover it. Remove and place on greaseproof paper. When they’re all covered pop in the fridge to set. This choc has a very low melting point so keep in the fridge until you want to serve. Enjoy! 🙂

IMG_9987


Cranberry and Apple Meringue pie! oh my!


Hands up if you love Lemon Meringue Pie! I do! And yes I know, meringue contains eggs, so I’m very sorry to my vegan friends (although you can use a commercial egg replacer for meringue so all is not lost!), but this festive meringue pie is gluten and dairy free 🙂 It’s a nice change to the usual festive fair!

_MG_6748

Pastry

100g Ground almonds
100g Flaked almonds
75g Spelt or Rice flour(or other gluten free flour)
25g Golden raw Caster sugar
50ml Almond oil
3 -4 tbsp cold almond or other non dairy milk
Pinch of Himalayan rock salt

Filling

4-5 Bramley apples, peeled, cored and thickly sliced
250g frozen or fresh Cranberries
juice of 1 clementine
75g Dried cranberries
1 tablespoon Corn flour
Raw unrefined sugar (if required)

Meringue

3 Large egg whites (or egg replacer)
150g Golden raw Caster sugar

Preheat the oven to 180 C. Put the ground and almonds into a bowl with the flour and salt and stir to combine. Keep stirring and add in the olive oil gradually. Add 2 tablespoons of almond milk and keep stirring. The mixture should hold together when pressed, if it doesn’t then add some more almond milk, stirring all the time, until it does. At this point have a taste. If you want a sweeter pastry then add some more sugar until you get the desired flavour. Press it into a 20 cm pie or fluted flan dish. Bake in the oven for 15 minutes or until set and barely golden.
Remove from the oven and brush the almond pastry with a little almond oil and return to the oven for a few minutes to set then set aside to cool.

Now for the filling! First you need to cook the cranberries. Place the frozen or fresh cranberries in a pan with the juice of 1 clementine (or half an orange if that’s easier!). Cook for 5 mins until the cranberries start to soften and burst. Taste – if too tart for you then add a little raw sugar. Put the apples, cooked cranberries and dried cranberries in a saucepan with 75ml water and bring to the boil. Simmer, partially covered, for 10 minutes.

Mix the corn flour with a tbsp of cold water till smooth then stir into fruit mixture. Boil for 1 minute then pour into the pastry case.

If using them then whisk the egg whites until stiff, then beat in the sugar, a third at a time, to form a thick meringue. Spoon over the fruit and bake 20-25 minutes until golden.
Leave to cool for a few minutes then transfer to a plate to cool.

_MG_6755

Mini Christmas cake – gluten free, dairy free cake, marzipan and fondant icing!


A little while ago I posted a recipe for a gluten and dairy free christmas cake. I said I’d have a go at creating some marzipan and icing to go with it and I’ve managed it! Now, I know my icing skills are pretty poor so just over look that! I’m certain you guys can do a better job at laying the icing but this is my first attempt and I was going more for taste than looks….! 🙂

_MG_7471

I’ve used a rollable fondant icing and a royal icing for the decoration. Read the instructions for the fondant icing before you start as once the sugar is boiling you can’t really leave it to check the instructions! 🙂

The recipe for the cake is here.

For the marzipan (this will cover 4 small cakes – approx 3 inches cubed) – :

200g Ground Almonds
100g Raw icing Sugar
1 tbsp  Lemon Juice
2 tbsp Maple Syrup
1 tbsp Cold Water
1 tsp Almond extract

Put the ground almonds and icing sugar in a bowl and mix well. Make a well in the centre and add the liquid ingredients. Mix thoroughly. You should end up with a pastry-like dough. If it is too dry add a drop of lemon juice but be careful you don’t make it too moist. Wrap in clingfilm and put in the fridge for at least an hour.

For the fondant icing.

5 tbps water
1 tsp agar-agar powder or “gelatine” substitute (kosher gelatine is often non-animal based so can be used)
225g Raw icing sugar
1 tbsp glucose syrup
1 tsp glycerine (optional)

Put the agar-agar powder or gelatine substitute in a small bowl and add 1 tbsp of water and leave to soak. In a heavy-based saucepan, put the icing sugar, 4 tbsp water and the glucose syrup. Heat over a medium heat until sugar has dissolved, stirring gently all the time.

When the sugar mixture comes to the boil, boil for 2 to 3 minutes, or until the syrup has reached soft-ball stage. Now if you’re like me you don’t know what that means! It’s actually quite straight forward – it’s the point at which if you take a spoonful of the mixture and drop it in a bowl of very cold water that you can form a ball with the syrup using your fingers (once it’s in the water!). At this stage it will easily form a ball in the water and will flatten when you remove it. For me it was almost eactly 3 minutes of boiling so you could just go by that. If you happen to have a sugar thermometer it’s when it reaches 112 degrees C.

While the sugar is boiling warm the bowl that the the soaked agar-agar or “gelatine” is in (over a saucepan of simmering water is easiest) until it dissolves.

When the sugar has finished cooking, remove from heat and dip the saucepan’s base in cold water to stop it from cooking. Leave to cool for a few seconds and then add the agar-agar/”gelatine” and glycerine and mix well.

IF you have a marble slab or suitable work surface then grease it and pour the mixture out onto the marble slab, and begin turning and mixing with a palette knife until it becomes a paste and clay-like. If, like me, you don’t then you can leave the mixture in the saucepan and just keep turning and stirring it in the pan using a wooden spoon (you need to mix vigorously!).

At first, the fondant will be very fluid, but it will gradually harden. After 5 – 10 minutes of  mixing, the fondant will become very stiff, crumbly and hard to manipulate. At this point, lightly grease your hands, and knead the fondant into a ball. The fondant will begin to come together and become softer and smoother. Stop kneading when it is smooth.

Wrap in clingfilm and place in the fridge for at least an hour.

For the royal icing:

125g icing sugar
2 tsp soya milk (or other non-dairy milk)
1 tsp glucose syrup mixed with 1/2 tsp boiling water

Mix the icing sugar with the milk and stir until smooth. Add the glucose syrup and mix well. If it’s too runny add more icing sugar, if too dry add a little more milk.

Now to put it all together!

Roll out the marzipan on a greased board. Lay it over your cake. Roll out the fondant icing and lay that over the marzipan making sure you press it down firmly. Finally decorate using the royal icing. You can use a fork to create a “snow-like” appearance. Add silver balls, edible glitter or whatever you like to finish it off. Then place in the fridge to set! Enjoy! 🙂

_MG_7450