Cinnamon Glazed Pumpkin Cookie Cake Gingerbread Yumminess! Gluten and Dairy Free


Sometimes the best bakes are created by accident! This is one of those bakes!

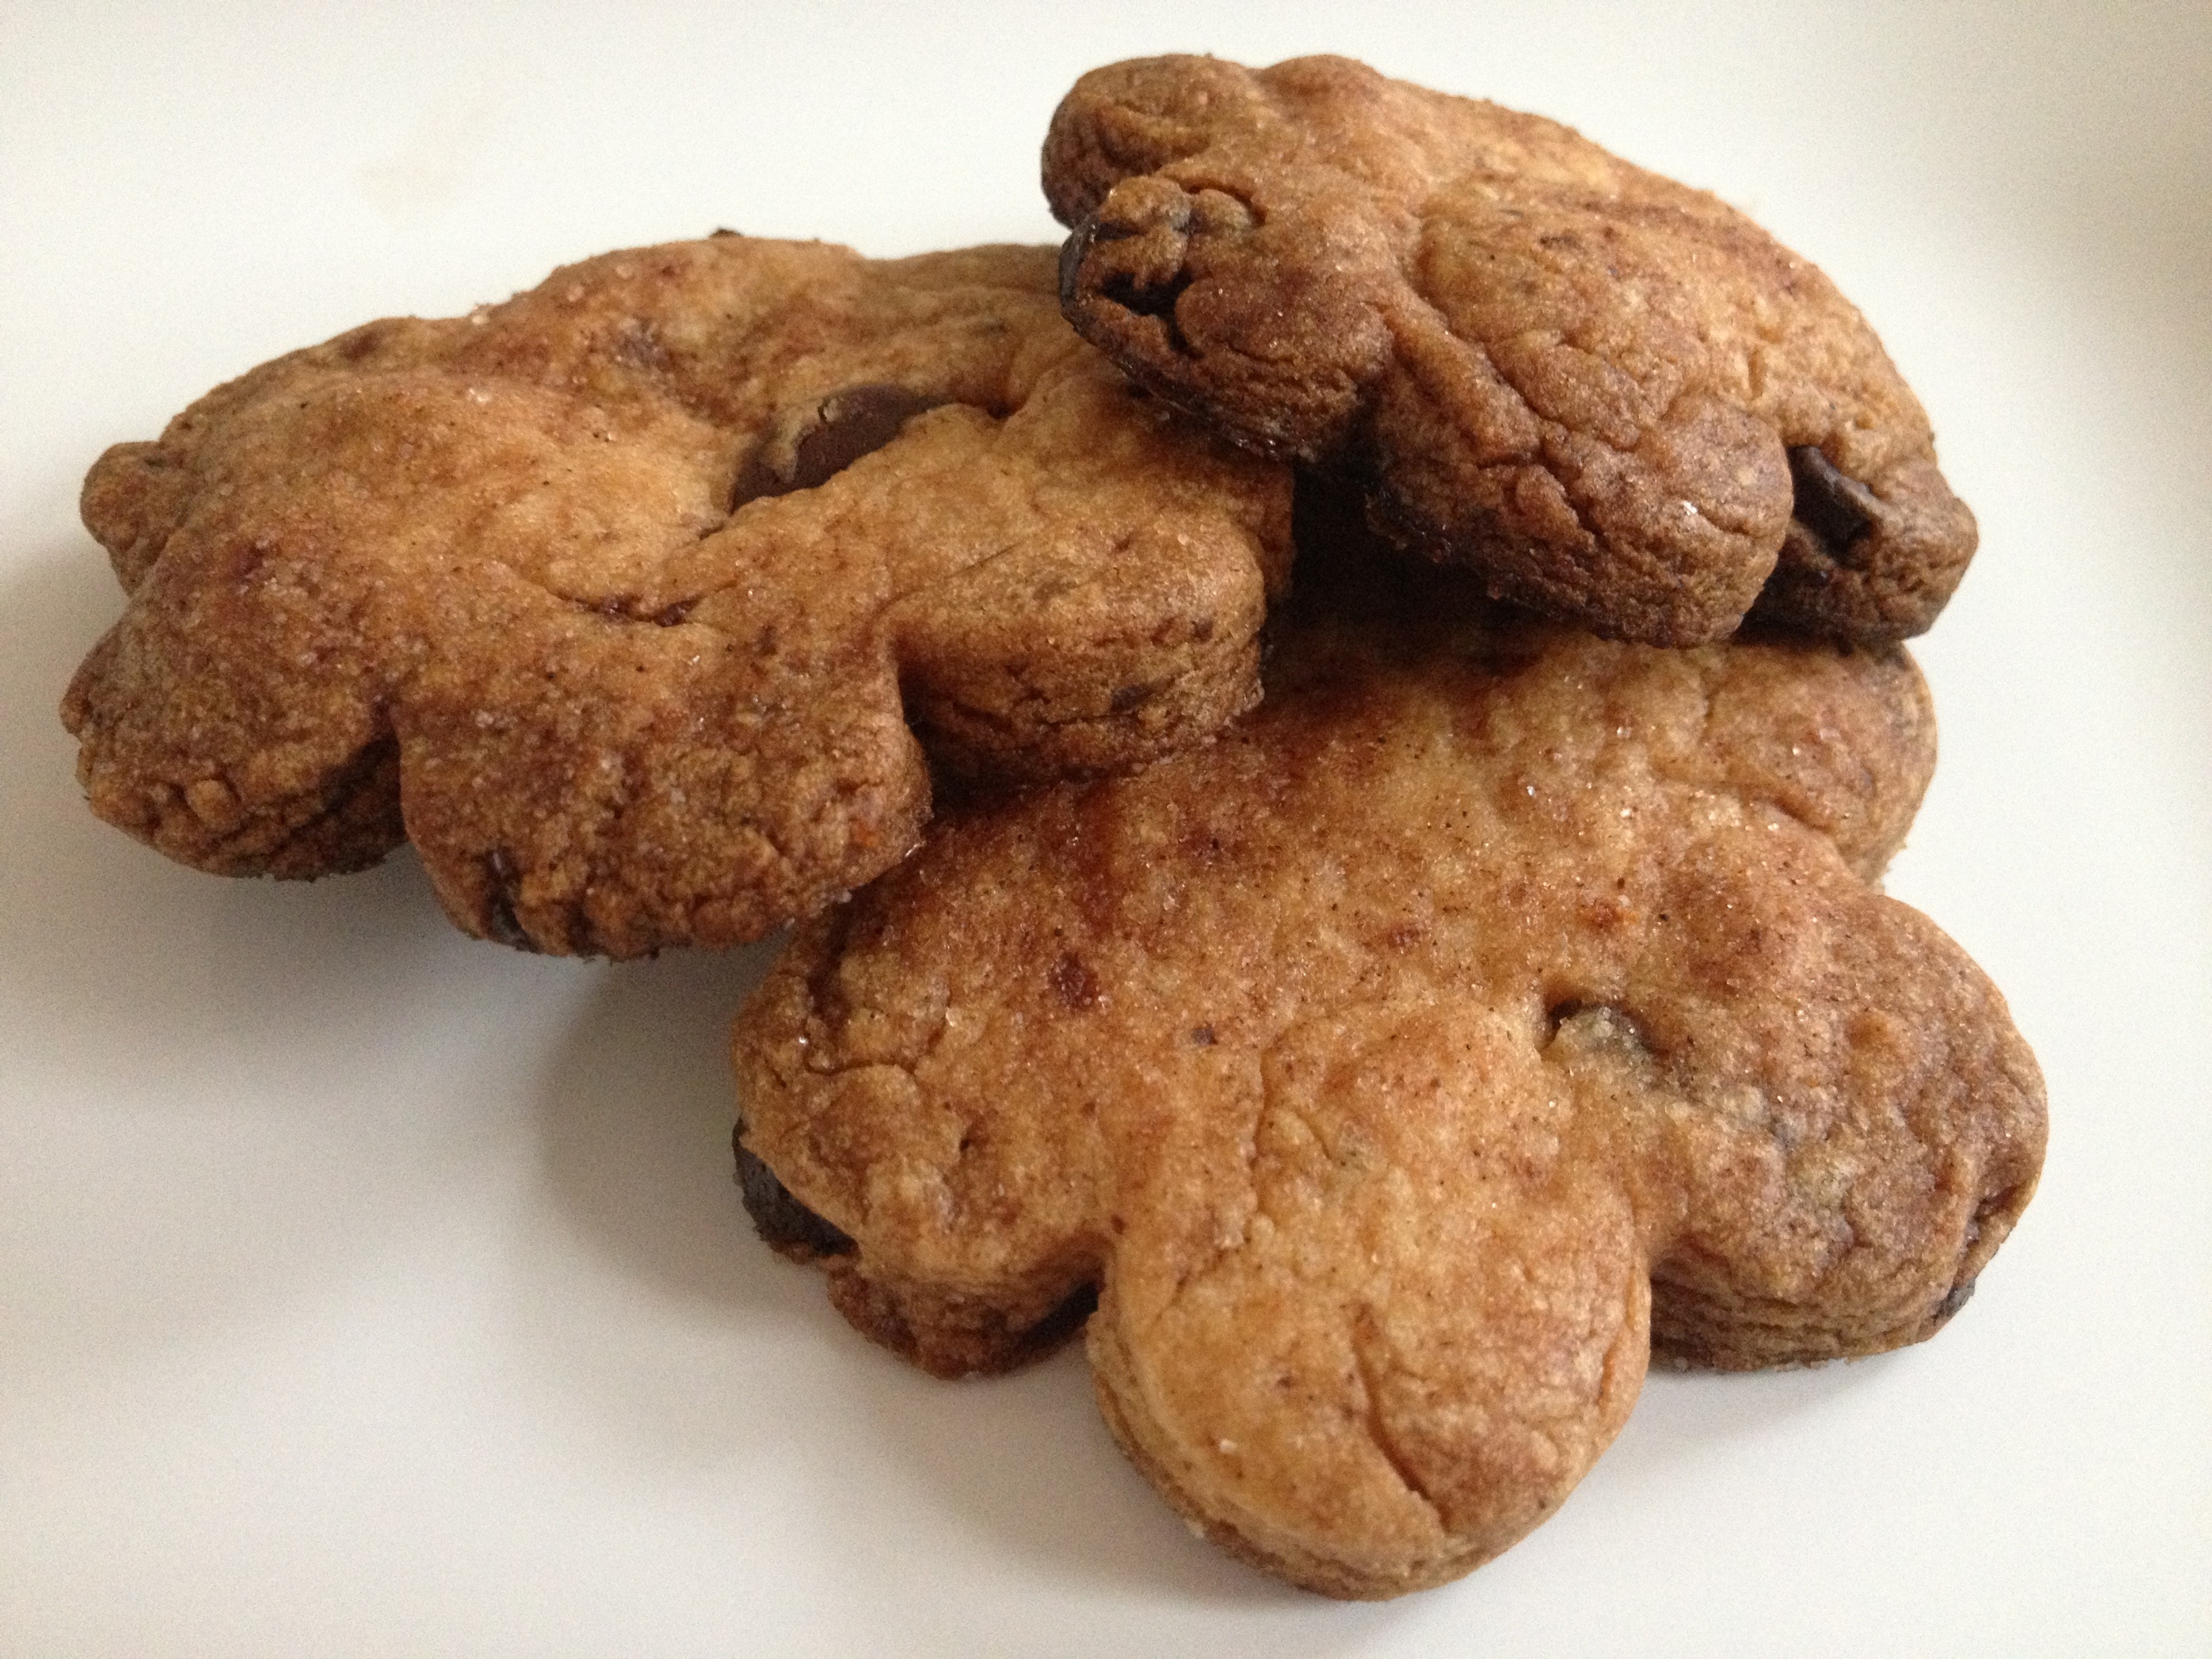
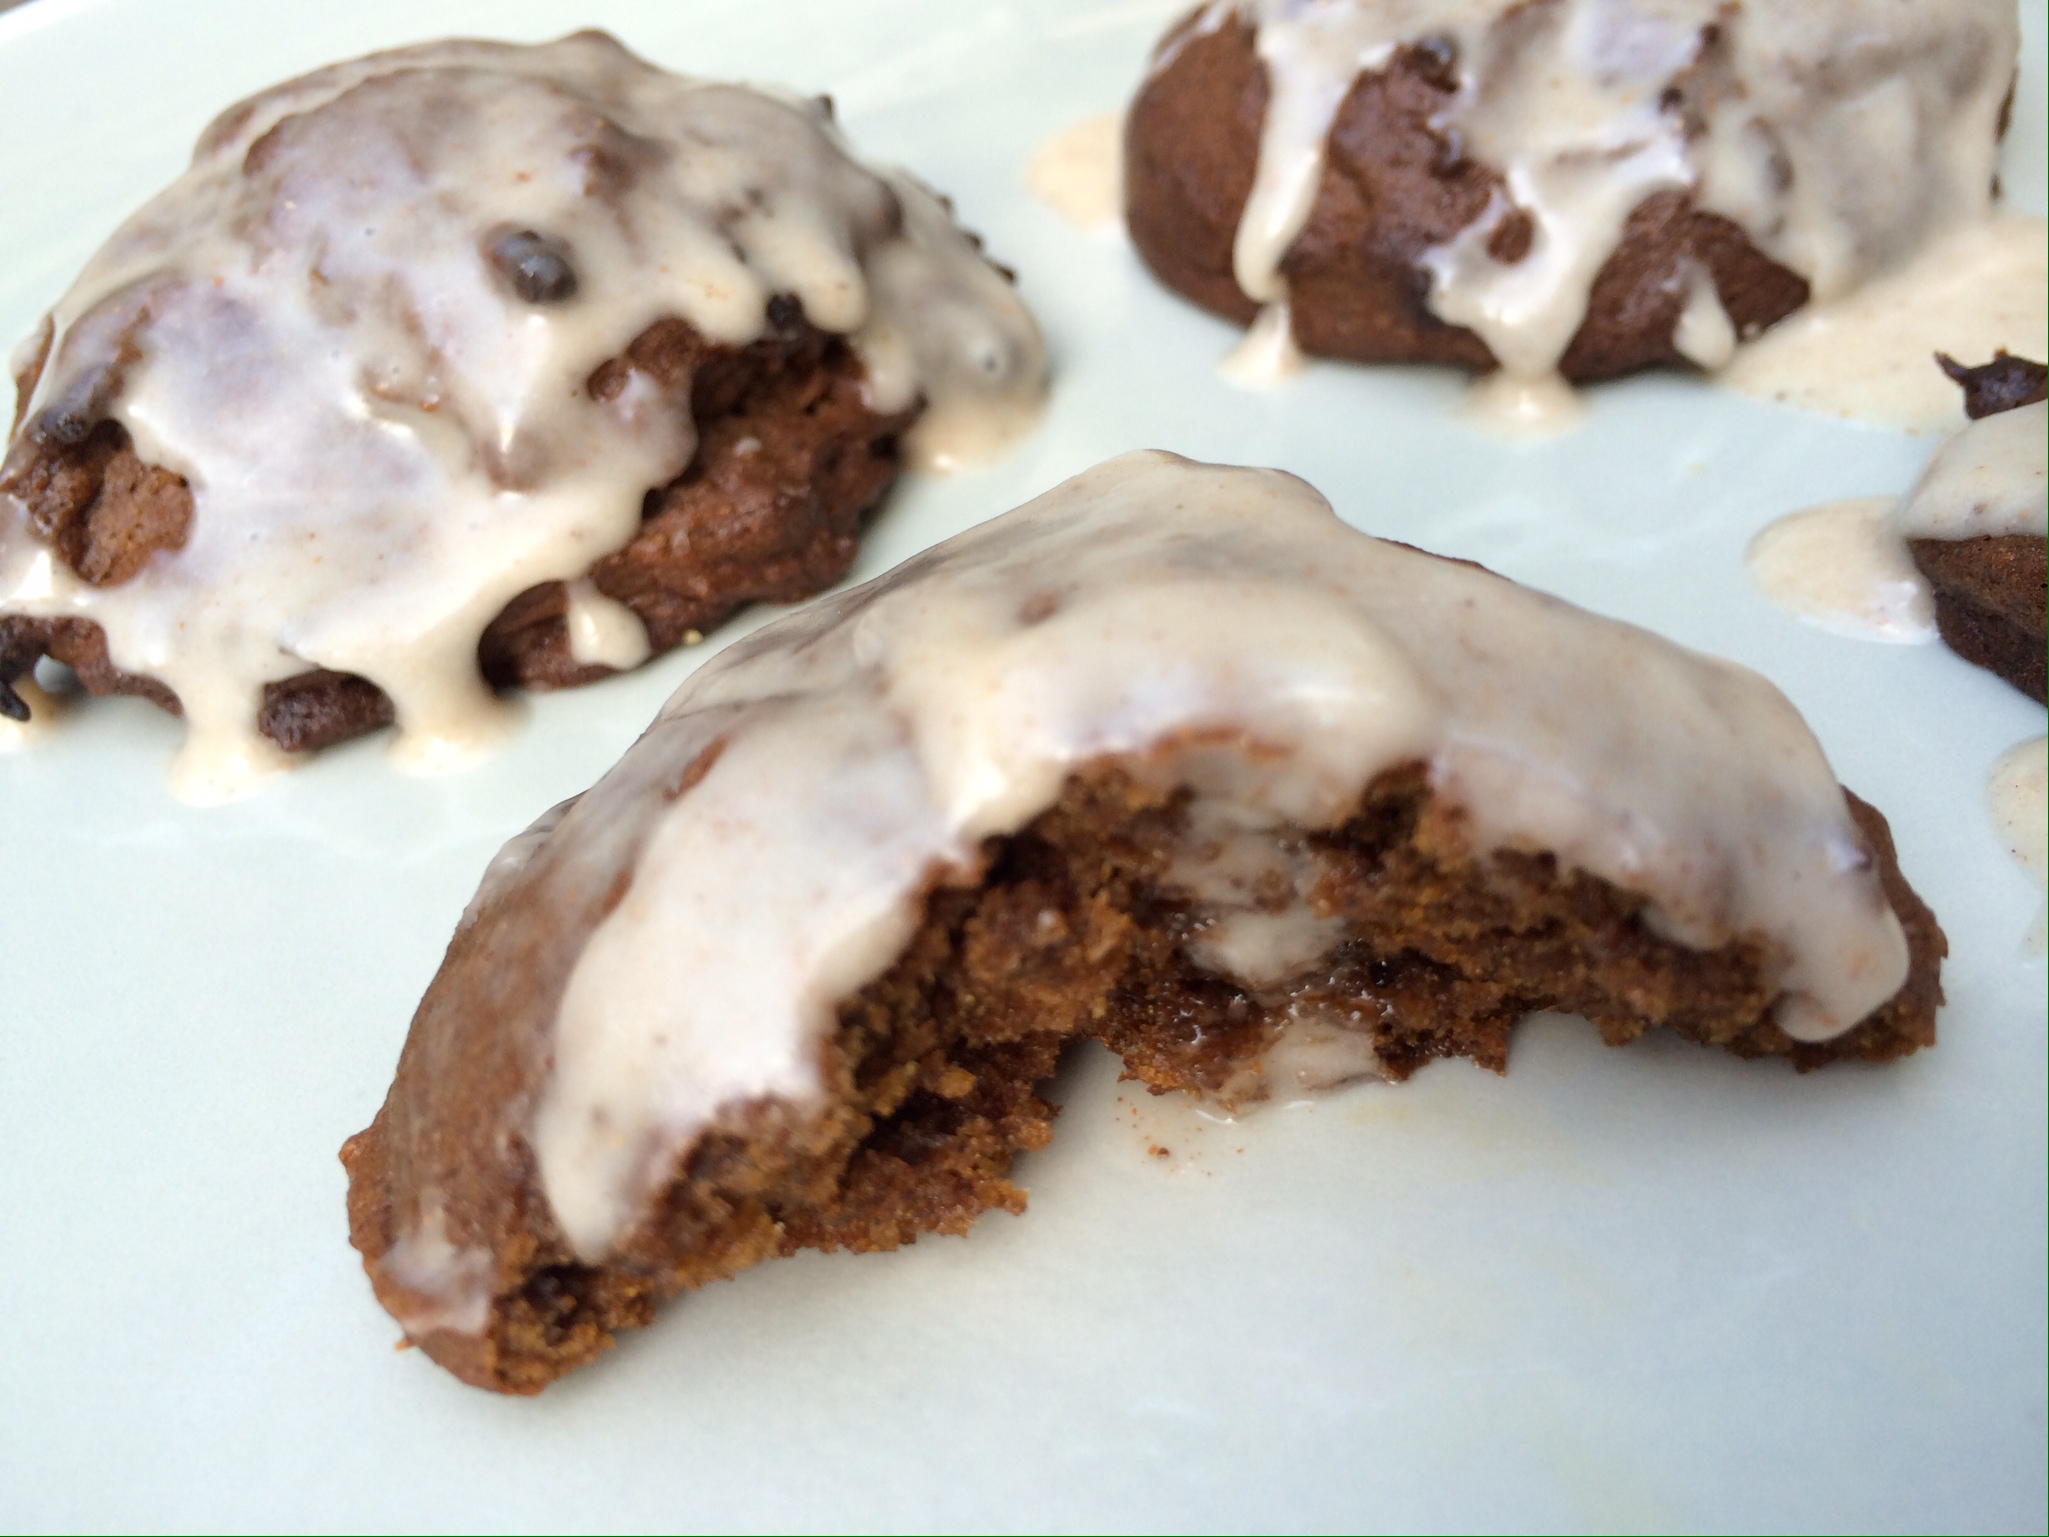
Ok, so these did not turn out in any way like I intended! However, I absolutely LOVE what I’ve created! I don’t know what to call it – is it a cake? is it a biscuit? is it a pumpkin gingerbread? who knows! All I know is that it is scrummy! It’s moist on the inside and so full of flavour and you would never know there was pumpkin in there 🙂

01cc2d99bad18909266a96645859bdf7ccc9c6c566

I set out to make a cookie-type of biscuit using pumpkin. These have come out less like a cookie and more like cake or soft gingerbread in texture – a failure? No – not in any way shape or form! They are simply divine – especially with the cinnamon glaze!

018d72e15fb9ff60eadd6436e486c70ae8fd2779f8

This will make around 24 – 30 cookie-cakes.

You will need:

2 cups Rice flour or Spelt flour (spelt is an option if you don’t need gluten-free but want to go for a low-gluten option, or you could also use a gluten free flour blend)

1/4 tsp Xanthan gum (unless you choose to use a ready-mixed gluten free flour blend which has it in – check the ingredients!)

1 tsp Bicarbonate of soda

1 1/2 tsp ground Cinnamon

1/2 tsp ground Nutmeg

1/2 cup Coconut oil

1 cup unrefined Coconut or other raw sugar

1/4 cup Molasses

1 Egg (or this can be replaced with 1/4 cup of ripe mashed banana or 1/4 cup of puréed apple if you prefer)

1 cup Pumpkin purée (recipe here)

1/3 cup Coconut, almond or soya milk

1 tsp Vanilla extract


For the glaze:

1 cup unrefined Icing sugar

1 tbsp Coconut, almond or soya milk

1 tsp Vanilla extract

1/4 tsp ground Cinnamon (or more – just add to taste)


Preheat the oven to 180 C.

Put the flour, xanthan gum, bicarbonate of soda, and spices into a large mixing bowl. Combine well (using a whisk or fork works well for this).

Put the oil and sugar in a separate bowl and mix together. Add the molasses, egg (or egg substitute), pumpkin, milk and vanilla and use a hand mixer (or whisk) to blend together.

Add the flour mix to the wet ingredients and stir well until completely combined. Place generous heaped teaspoons of the mixture on to a greased and lined baking tray and place in the oven for 10 – 13 minutes (until they are slightly crispy on the outside and are starting to turn colour – it’s hard to see as they’re dark but you will see a change).

Place the icing sugar and other glaze ingredients in a bowl and mix together well.

01e4064aa487bafe398b0ceb641c239e95bbc709de

Once the cookie-cakes are done, remove from the oven and let them cool for a couple of minutes. Then spoon the glaze over them whilst they are still warm.

Then enjoy with a cup of tea! 🙂


Spiced Toffee Apples!


Before I start with my glut of hallowe’en inspired pumpkin bakes I thought I’d quickly get this one in! Nothing says autumn, Hallowe’en and fireworks night like toffee apples! I’m always so disappointed with the ones you buy in the shops so I thought I’d make my own this year!

018e7de4931c9abcef4ce7ba4a70db28c17c2b9eae

These are easy to make but you just have to have a little faith and let that sugar boil! They’re great fun to make for the kids, though I certainly wouldn’t let the kids make them themselves – children and boiling sugar aren’t a great combo!

If you have a sugar thermometer for the toffee then that’s brill! I don’t, but luckily my mum does, so I borrowed hers! If you don’t have a handy mum to borrow one from then never fear, you can still make this by using a bowl of cold water to test when the toffee is ready (see below).

You will need:

300g Golden granulated sugar

100g Unrefined brown sugar

1 Star anise

1 large Cinnamon stick

2 Tbsp Maple syrup

100ml Water

75g Pecans crushed/chopped finely

6 Apples (Braeburns work well, as do Granny Smiths – you want an apple with a bit of tartness to combat the sweet toffee)

6 wooden sticks or lolly sticks

Put the granulated and brown sugar in to a large pan. Add the water and stir over a low heat until the sugar had dissolved. Add the vinegar and maple syrup and then bring to the boil.

0107477ca44f8fc0020ee4ee52924bda8a11f39604

Once boiling allow it to boil rapidly without stirring until the toffee reaches 150 C on a sugar thermometer (or the “hard crack” level). If you don’t have a thermometer you can test when the toffee is ready by spooning a little in to a bowl of cold water. It should harden immediately and be easy to snap. Now it will take a while to get to this stage so don’t be afraid to leave that sugar bubbling away!

018df063c2ae61fcb24c974af7522a4fd1548d3f03

Once it reaches “hard crack” remove from the heat and stir in the pecans.

Place a stick (I used lolly sticks) in to the core of each apple. Dip the apples in the toffee while it is nice and hot and then place on a baking sheet to cool. You need to work quite quickly. If the toffee gets too hard you can gently re-warm it (but be very careful not to overheat it).

0189e8744c50c93097d8939ea8ea957d8fe15f7a01 01ede5e8033820c3b6ddc521d1452eea3afd857537

Once the toffee has cooled and set then you can tuck in! They’re definitely best eaten the day they’re made but can be kept somewhere dry and cool and enjoyed over the next few days too.

01db2aaab2d10422d4dc8ff88e9c698c9267d1a339


Plum and Apple Chutney


Believe it or not after making my plum and almond cake and egg-less plum cake, I still had some plums left! I also had the very good fortune to be given a massive bag of apples from my friend Zena’s garden (how lucky am I! 🙂 ), so I decided I’d have a go at my first ever batch of chutney! I am a massive fan of chutney but have never tried making it myself – mainly because my mum, and my very good friend Colette from Colette’s fitness kitchen, make THE best chutney and have kept me in good supply! But with this glut of autumn fruit I thought it was about time I repaid the favour!

photo 4 (3)

You will need:

1 kg Apples (bramleys will work best but I used the apples I was given which were some sort of eating apple, and then I added a few extra bramleys in)

1 kg Plums

2 large Onions

1 whole Garlic bulb

1 inch of Root ginger (or a piece approximately the size of your thumb!)

500ml Cider vinegar

450g Golden unrefined caster sugar

1 Cinnamon stick

1 tsp Cumin seeds

3 star Anise (you can substitute with 1 1/2 tsp of chinese five spice)

1 tbsp Himalayan rock salt

Prepare all the ingredients to start with. Peel the garlic and cut in to fine slices. Peel and grate the ginger, and thinly slice the onions. Peel, core and chop the apples.

Pop the onions, garlic and ginger into a large pan or stock pot. Add the apples and all the spices and vinegar. Bring the pan to the boil gently, stir well and then turn the heat down and allow to simmer for 30 mins with a lid on until the apples are soft.

While the apples are cooking slice the plums in to quarters (or eighths if they’re large) and add them once the apples are soft. Add the sugar and stir well. Leave it simmering with the lid uncovered for at least 40 minutes or until the plums are cooked and the chutney has thickened. You will know when it’s ready as if you drag a wooden spoon through it to reveal the base of the pan and takes it time returning then you know it’s done. Trust me this could take a while – it will depend how much juice comes out of the apples and plums. Just stick with it and keep stirring while it simmers down.

photo 1

Pop some jars in to the oven to sterilise (20 mins at about 180 C will do it), remove the star anise and cinnamon stick and ladle the chutney in to the jars. Seal and label the jars. It’s best to let the chutney mature for a month if possible before you eat it. It will keep for up to a year, but once opened it’s best to keep it in the fridge and eat within a month.

Makes a great gift or, just enjoy it yourself with some cashew cheese!

photo6

For we all like Figgy Jam……. Fig and Ginger Jam!


This is so easy and so delicious! I’ve been trying to add a bit more ginger in to my diet lately as it’s so good for your stomach and helps with the digestion of other nutrients. It’s also a fab anti-inflammatory so is brilliant for muscle and joint aches. Apparently it has aphrodisiac properties as well!!!

Figs are also brilliant for you – they’re full of fibre and are a great source of potassium and calcium and they taste yummy! 🙂 So this jam is perfect! It’s really easy to make and tastes divine.

IMG_0042

You will need (makes one small jar):

250g fresh, ripe Figs

2 tbsp Maple syrup (or your liquid sweetener of choice – agave, honey, rice syrup etc)

1.5 tbsp Lemon juice

zest of 1/2 Lemon

3/4 tsp ground Ginger

1/4 tsp ground Cinnamon

Cut the figs in to quarters (or smaller if they are very large) and pop in a saucepan. Add the other ingredients and then bring to a simmer over a medium heat, stirring all the time.

IMG_0031

Don’t let the mixture boil but keep it simmering for about 30 – 40 minutes or until the fig has started to break down and it takes on a jammy consistency! Taste (carefully – it will be hot!) and adjust the sweetner if required.

IMG_0034

Take a clean glass jar and rinse with warm soapy water (or pop through the dishwasher). Dry it well and then place it in to the oven at about 180 C for approx 20 minutes. Remove carefully and then add the jam to the jars while they are both still hot. Pop a lid on and once cool place in the fridge. This should keep for a few weeks at least.

Enjoy your jam spread on some yummy rye toast with a nice cup of tea 🙂

An array of Easter Biscuits!


I couldn’t let the day pass without whipping up some tasty treats! These are fun spicy Easter and spring biccies that are great fun to make, and eat! Perfect holiday activity for the kids too!

20130331-160723.jpg

The icing is flavoured with either lemon, fresh raspberry or fresh blueberries.

For the biscuits you need:

2 cups gluten free or spelt flour

1 cup raw Icing sugar

6 oz Dairy free spread

2 tsp Cinnamon

1/2 tsp Nutmeg

1/2 tsp Cloves

For decoration:

Raw coconut palm sugar

Cinnamon and chilli sugar (see here)

Currants

Raw Icing sugar

Lemon juice, raspberries and blueberries

Sugar balls etc

Preheat the oven to 175 C. Mix all the biscuit ingredients together in a bowl – ensuring the spread is well combined with the flour an sugar. Once it forms a dough pop it in the fridge for 30 mins if you have time. Remove and roll out. Use whatever shaped cutters you like to it your biscuit shapes and transfer to a baking tray.

If you are using currants for bunny eyes and noses then add those now. Sprinkle with raw coconut sugar and cinnamon and chilli sugar. Place in the oven and cook for 8 – 12 mins or until golden. Remove and allow to cool on a wire rack.

Once cool you can ice the biscuits. Mix up your icing powder with lemon juice or fresh raspberries or blueberries and then spread on the biscuits. Add sugar decorations if you like. Allow to set and then eat!

20130331-161202.jpg

20130331-161251.jpg

20130331-161326.jpg

Dark chocolate cherry cookies (dairy and gluten free! :) )


You’d think I’d be bored of biscuits by now …but no, I just keep thinking of new scrummy flavour combos! Today it’s dark choc and cherry – a winning combination. The tartness of the cherries works so well with the rich, dark chocolate 🙂

20130315-184707.jpg

These use the same basic ingredients as my choc and ginger biccies but just replace the ginger with a handful of dried cherries! Simple! 🙂

20130315-184759.jpg

Yummy mummy! Dark choc and ginger cookies (low gluten and dairy free!)


You may have noticed a certain penchant for cookies and biscuits lately? what can i say? I just love this simple recipe and how easy it is to customise it with whatever flavours you like 🙂

20130310-094729.jpg

20130310-094807.jpg

So this weekend Mother’s Day and the return of my lovely friend from holiday inspired me to bake some more biscuits for both of them 🙂 Both are fans of the combo of ginger and dark chocolate and they work brilliantly with these cookies. I also had some fun with a cool set of letter cutters (I’m such a child!).

20130310-095335.jpg

20130310-095345.jpg

You will need:

2 cups Spelt flour or gluten-free flour mix

1 cup Unrefined Icing sugar

6 oz Dairy-free margarine (get the best quality you can)

A handful of crystallised ginger

A handful of dairy free chocolate (I used Willie’s chef’s drops)

20130310-093326.jpg

Pre-heat the oven to 180 C. Put the margarine in a large mixing bowl, sieve the flour and icing sugar in and cream it together. Try not to over mix but make sure the margarine is properly mixed with the dry ingredients. Chop the ginger and chocolate into small pieces and add to the mix. Once it’s formed a dough wrap in cling film and chill for 30 mins (optional). If you find the dough is too sticky then add some more flour.

Roll the dough out and use cutters to cut your biscuit shapes and transfer to a greased baking tray. I found that this dough worked best as a thick biscuit (about half a cm). If you don’t want to roll it then take small balls and flatten on to the baking tray. Bake in the oven for 10 – 12 mins or until as brown as you like them (I like my biscuits bordering on burnt so I kept them in a little longer! 🙂 ).

If you have some letter cutters (or you’re handy with a knife and can freehand them) then you can have fun spelling stuff in biscuit form! 😉

20130310-095722.jpg

Give the gift of yumminess this valentine’s day – quick gift idea!


These valentine’s biccies would make a fab present for the one you love 🙂 Whip up a batch of normal or coconut biccies, with or without icing and pop a load in a cellophane bag. Tie with a pretty ribbon and voila! One lovely home made gift of love! IF you can bear to give them away! 🙂

20130212-135211.jpg

20130212-135345.jpg

A host of Valentine’s treats! Dairy-free shortbread biccies with natural pink raspberry icing


I got a little over-excited in the biscuit-cutter section of the cake shop and end up with a loast of new valentine’s cutters! So here, for you, is a feast of valentine’s biccies for the one you love (in my case, that’s me! ha ha!) 🙂

IMG_0163

All the biscuits are based on the same biscuit recipe which I’ve posted before – here but here it is again for ease. This makes LOADS of biscuits so you may want to halve the amount to start with.

4 cups Spelt flour or gluten-free flour mix

2 cups Unrefined Icing sugar

12 oz Dairy-free margarine (get the best quality you can)

Pre-heat the oven to 180 C. Put the margarine in a large mixing bowl, sieve the flour and icing sugar in and cream it together. Try not to over mix but make sure the margarine is properly mixed with the dry ingredients. Once it’s formed a dough wrap in cling film and chill for 30 mins. If you find the dough is too sticky then add some more flour.  Once chilled, roll out and use a biscuit cutter to cut whatever shape you have. Sprinkle with a little raw sugar if you like and place on a greased baking tray and bake for 8 – 10 mins, or until golden. Remove from the oven and allow to cool on the tray.

Cutting and Decorating!

You can use any cutters you like but I had the pleasure of trying out all my new valentine’s ones! It was such fun! For most of the biccies I just sprinkled with raw sugar. I had a wonderful set of hearts that decrease in size so I had a lot of fun with those.

IMG_0179 _MG_8051

Then I also had some with lovely little messages stamped in them.

IMG_0191

Those were all plain, but for other’s however I made some pink icing using raw icing sugar and raspberries. Simply pop a handful of raspberries into a fine mesh sieve and using the back of a spoon crush them through the sieve. You will end up with a lovely raspberry puree. Don’t throw away the seeds and pulp left in the sieve, you can whack this in to your next smoothie! 🙂 Use this, instead of water, to make your icing. I simply used raw icing sugar (you can use normal icing sugar if you prefer) and the raspberry puree. I added a little at a time until I had the consistency I wanted. If you want it runnier, add a little water, if you want it less pink then add more icing sugar and water down the puree a little and just experiment!

For these adorable ‘his and hers’ jigsaw hearts I used a piping bag to pipe a thin line of slightly darker icing around the edges and then filled the middle! You could use white icing to pipe names on each half. Allow to set and then share with the one you love 🙂

IMG_0192 IMG_0248

I then had a go at just smothering the little hearts in icing – yum!

IMG_0567 IMG_0560

And finally (for the icing fun) I had a go at filling in the messages on the shortbreads. This was super fiddly but I think it looks fab! I used a cake skewer dipped in the icing to fill the letters!

IMG_0250 IMG_0263 IMG_0206

Valentine’s day wouldn’t be valentine’s day without a bit of chocolate! So I had a go with that too! I just melted some high quality, dairy free chocolate and filled the letters with it in the same way as the icing. This was messy and didn’t work out quite so well but I think with a bit of practice it will! 🙂

IMG_0259

Finally I made some little double hearts. Once again I piped an icing border around them and then I filled the centre with chocolate.

IMG_0568

Oh So Simple Apple Compote Recipe


I confess, I have a problem. I am utterly addicted to apple compote. I have it with my homemade granola for brekkie, I have it with co yo for a lovely comforting dessert and I have it cold out the fridge for a mid-arvo snack!  I have posted this before when I posted my mincemeat and apple festive compote but I thought it was worth a post in it’s own right!

Never, ever, buy a store bought compote unless you can help it. They’re so simple to make and unless you’re careful about what you buy you are basically just buying pure unrefined sugar!

The apple compote is super simple! Just peel and core some bramley apples (as many as you want to eat!), chop small and put in a saucepan with a tablespoon of water. Gently bring to the boil, add a lid and simmer on a low heat until the apple is all mushy! I like it just like this, but if you want it sweeter then add some raw sugar while you cook them. Stir occasionally to stop the apple sticking and make sure it doesn’t boil dry (just add a little more water if it does). Once cooled transfer to a jar and store in the fridge for up to a week (mine never lasts that long!). You can also freeze it in batches too :)

_MG_7417